Why should you invest time in learning how to increase blog traffic?
Well, imagine this: you toiled away for months to start your blog. You agonized over the name, carefully picked a theme, wrote your best copy, and launched it with all the giddiness of a high schooler asking their crush to prom. And then—crickets.
Your blog is a ghost town. Tumbleweeds would roll down your homepage if they could. Not a single soul seems interested in your content.
In a panic, you try your best to fix the situation. You ask your friends and family to search for your blog’s name and click it to let Google know it exists. You even consider printing business cards with its URL and handing them out on the street. Maybe a different theme would help?
Doubts creep in. Perhaps blogging simply isn’t for you after all. Perhaps you were kidding yourself, and maybe what you have to share isn’t that interesting after all. And you start to consider giving up.
This is the last situation we want you to find yourself in. That’s why, in this blog post, we have put together a list of proven tactics and tips you can use to generate traffic to your blog. You can start implementing them right now, and doing even just a few of them can make a big difference.
Ready to give it a go? Then let’s not wait any longer.
How to get more blog traffic from SEO
Search engine optimization, or SEO, is the basis of traffic generation for most blogs. That’s because it’s mostly free to implement and pretty much “set it and forget it.” Once you have a good foundation, it works with relatively little maintenance. But how do you get it right in the first place?
1. Conduct keyword research
If you’re reading this article, you want to generate more traffic with your blog. Blogs that receive a lot of visitors are ones that are full of helpful content about topics that people search for and want to read.
A blog post can be the best-formatted, wittiest, and most thoroughly-researched piece of writing ever, but if the topic isn’t something that others are interested in, it likely won’t deliver the traffic returns on it.
Keyword research helps you avoid that by ensuring you pick subjects your audience is actually interested in. That way, you don’t end up figuratively yelling into a vacuum. It also helps you discover new blog post ideas.
Evergreen content consists of blog posts that remain perpetually relevant and can drive traffic year-round. They contain information that doesn’t change or changes very slowly.
For example, “weight loss” is an evergreen topic. People are always looking for ways to slim down, and the principles (diet and exercise) stay mostly the same.
On the other hand, the results of the 2024 Olympic games are probably not a popular search topic beyond a certain point in time.
There’s also seasonal content. It can be evergreen for the same period every year, but it likely won’t bring in lots of traffic outside of a particular timeframe.
The perfect example for a seasonal search term.
In conclusion, make sure that at least part of your content strategy includes evergreen content. MailChimp has a guide on this topic with additional details.
3. Follow Google’s E-E-A-T guidelines
The acronym E-E-A-T stands for Experience, Expertise, Authoritativeness, and Trustworthiness. It’s not a direct ranking factor (i.e. something that formally impacts your content’s ability to rank) but a concept Google introduced to gauge the quality of web pages that appear in its search results. Therefore, if you want to increase traffic, you’d do best to demonstrate these aspects on your blog.
Here’s how you can do so:
Experience: Show that you have firsthand experience in your subject. For instance, if you’re talking about a product, actually use it. If you’re recommending a hotel or location, visit it.
Expertise: Create high-quality, in-depth content and link to reputable studies, data, or industry leaders to back up your claims. Highlight relevant credentials or qualifications on your About page or author bio.
Authoritativeness: Consistently publish top-notch articles to build authority in your industry, attract backlinks and mentions, and grow your reputation.
Trustworthiness: Ensure your website is trustworthy through security, transparency, and being ethical. For example, disclose affiliations or sponsorships clearly and provide easy ways to get in contact.
This isn’t a hard-and-fast rule though. In the end, your blogging frequency depends on your goals, the length and type of your content, and the time you can invest.
To get on the right schedule for yourself:
Ask your audience.
Experiment with different posting frequencies.
Find a cadence you can sustain.
Focus on quality over quantity.
6. Avoid duplicate content
Duplicate content means two pages that contain exactly the same or almost identical material. This can confuse search engines about which of your pages to rank for a particular keyword.
Here’s how to avoid it:
If you reuse the same content somewhere else, include a canonical tag to the original so that search engines know which is the most representative of the topic.
Add descriptions to your category pages. It will distinguish them from other archive pages that might contain the same blog posts.
Switch off irrelevant archives, like tags, to decrease the likelihood of several archive pages displaying the same content.
Don’t paginate your blog comments. Pagination creates additional versions of your blog posts with the same content except for the comment section.
Use tools like Siteliner and Copyscape to find duplicate content so you can fix it.
Internal links (or links to your other content from your own content) serve numerous purposes:
They allow visitors to discover more relevant pages and keep them engaged.
They establish relationships between your pages, helping search engines understand their context and how they fit together.
They distribute SEO value from incoming links across your site.
Therefore, when you create content, it’s recommended that you always link to related, relevant pages and posts on your blog. In addition, make sure to use clear anchor text, meaning the text that appears as the link on the page. Visitors should easily be able to understand what page they’ll land on when they click.
For detailed guidance on internal linking, check out this post on Yoast.
8. Use an SEO plugin
SEO plugins are helpful because they support you in optimizing your blog to increase organic search traffic. They give you lots of control over how your content appears in search results and often implement improvements automatically.
Take advantage of this possibility for every post and page to make sure your titles and descriptions grab reader attention in search results and aren’t too long.
In addition, SEO plugins often come with content analysis options. Input your page’s main keyword, and they will tell you if you’re using it often enough, in the right places, and other ways to optimize the page.
Links to your blog from other sources, called backlinks, are one of the main signals search engines use to determine where to rank your content. However, it’s not about the raw numbers; the quality of backlinks, meaning if they come from relevant and trustworthy websites, makes a huge impact (so don’t start buying backlinks).
The truth is, intentionally building backlinks isn’t easy. Here are a few practical ideas you can try:
Create linkable assets: Make your content so good that people naturally feel inclined to link to it.
Do outreach: Contact influencers and blogs in your niche or industry, and let them know about content they might find useful.
Up-to-date information is a sign of quality content. That’s why blog posts tend to drop off in search rankings over time. The antidote? Refresh your content regularly.
Here’s how to improve older content on your blog:
Tailor posts more strongly to search intent, meaning make sure you’re answering the purpose of a reader’s search fully.
Website speed is a major factor in user experience, so much so that Google has adopted it as a ranking factor. Therefore, if you want to do well in search results, make sure your blog loads fast.
If you host your blog on WordPress.com, you already have a leg up on this. Optimized and scalable servers, built-in caching, fast themes, and a content delivery network are included with every plan. These features ensure your website is blazing fast.
However, there are also speed factors you need to take care of on your end, such as:
Optimizing images.
Keeping the number of plugins on your site to a minimum.
Structured data is what you see in search results when content displays images, ratings, prep time, and other additional information, known as rich snippets.
While using structured data won’t automatically make your content rank higher, it can help because search engines can better understand your site content with it. It’s also an effective way to increase click-through rates, which are a positive signal for search engines as well. It shows that your content is relevant to their users’ search intent.
Structured data exists for different types of content, from recipes to reviews, and can add different features to your content. One example are the handy, styled recipe cards you often see in food blog posts.
You can hard-code structured data, but the easiest way to incorporate it into your content is to use one of the many plugin solutions for structured data.
Most SEO plugins also include options to assign structured data to your content. Once you have set up the markup on your site, use Google’s Rich Results Test to make sure it works correctly.
It makes sense, as most people guard their personal email address fiercely. Therefore, if they like your content enough to hand over their address for your newsletter, you’ve found someone who is likely to return.
In addition, your email list belongs to you. It can’t be taken away, and nobody can limit your reach the way a social media algorithm upgrade can.
For that reason, building an email list you can use to increase blog traffic should be an absolute priority.
13. Add email subscription options to your blog
The first step in building a newsletter audience is to equip your website with a way for people to sign up. On WordPress.com, you have that ability out of the box.
All you need to do is go to Settings > Newsletter (or Jetpack >Settings > Newsletter on plugin-eligible plans) and enable ways for people to sign up.
You can also manually add sign-up options with the Subscribe block. Once you have subscribers, you have the possibility to automatically send new content to them.
The Newsletter menu lets you customize the look of your emails, set up a paid newsletter, and compose a welcome message. You can have unlimited email subscribers, import them from other platforms, monitor open and click rates, and much more.
14. Encourage email subscribers to share your posts
Your email subscribers are already engaged with your content, making them ideal advocates for your blog. You can leverage that to increase blog traffic by encouraging them to share your posts, like so:
Make it easy to spread the word: Add links that allow subscribers to share your posts on social platforms.
Encourage subscribers to forward your emails: Use friendly language like, “Know someone who’d love this? Forward it to them!”
Offer incentives: Provide free resources, discounts, or entries into a giveaway for each share.
Feature your most engaging or useful posts: Highlight these in your newsletter and ask readers to share their favorites.
Every little bit helps. When you notice someone sharing, be sure to express your gratitude.
15. Reach out to other bloggers
Collaborating with other bloggers who have an established audience can help boost your blog traffic. It exposes your content to more people already interested in your niche.
Here’s how to pull it off:
Identify relevant bloggers in your niche or complementary niches with active email newsletters.
Build rapport by commenting on their blog posts, sharing their articles on social media, or mentioning them on your own blog.
Craft a personalized pitch, mentioning specifically how your content can add value to their audience.
Highlight mutual benefits, such as featuring their work on your blog, promoting their newsletter, or providing content their readers would appreciate.
Share your most polished and valuable posts for consideration that resonates with their audience and aligns with their standards.
Alternatively, ask them to write a blog post on your blog (with a backlink) or interview them and then ask to share the interview with their audience.
Get blog traffic from social media
Social media is an established and important marketing channel. Here are ways to use it to increase the traffic to your blog.
16. Regularly share your posts on social networks
You probably don’t need an introduction to how sharing on social media platforms works. Any blog promotion plan should include regularly publishing your content there.
An important question is which platform(s) you should choose. This depends on a number of factors. For example, if your content includes stunning visuals, like a travel blog, a platform like Pinterest or Instagram might be a good option.
For written content that you can break down into bite-sized facts, LinkedIn and similar platforms come to mind.
One that deserves special mention is Bluesky. It’s particularly friendly to bloggers since it doesn’t suppress links, and you can customize your Bluesky handle with a custom domain from WordPress.com. Other popular networks like Facebook and X try to keep users on their own site, making it more difficult to use them for traffic generation.
Take the time to learn each platform’s rules and conventions, and focus on a maximum of two or three at first. You can always branch out later.
By the way, in WordPress.com, you can auto-post your content via Jetpack Social. Just go to Tools > Marketing > Connections and connect your blog to your accounts.
After that, you can choose to automatically share posts when you publish them.
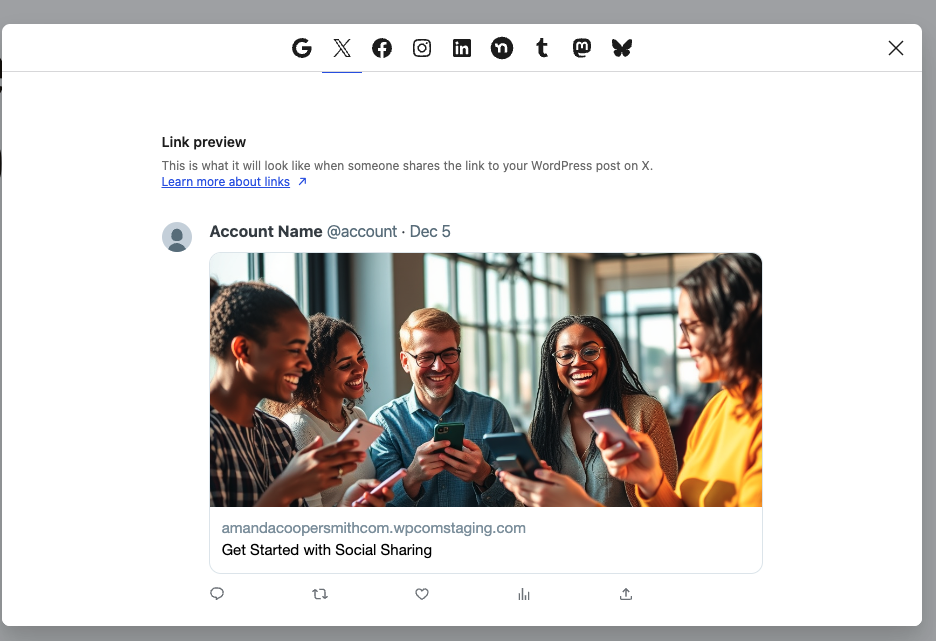
17. Add social sharing buttons/blocks to your blog
Including social sharing options in your content allows visitors to easily post it on social media. They are also easy to set up and configure on your WordPress.com blog.
If you’re using a legacy theme, go to Tools > Marketing > Sharing Buttons. Determine where buttons should appear and what the buttons should look like.
If you’re using a block theme, you can take advantage of the Sharing Buttons block instead. It allows you to display buttons wherever you want with many ways to customize them to your needs.
18. Create a link-in-bio page
A link-in-bio page is where you consolidate links to all of your web presences and most important pages.
It’s a great place to include your blog in order to direct social visitors there. In addition, it’s easy to create, thanks to w.link, which fully integrates with WordPress.com and is customizable.
Finally, here are a few more tips on increasing blog traffic that didn’t fit in the other categories:
19. Use analytics to inform your content strategy
Analytics tools help you understand what resonates with your audience. By identifying content that performs well, you can create more of what attracts your readers.
Identify which topics receive the most views, likes, and comments to create more content on similar themes or expand on related subtopics.
Check the search terms people use to find your blog to reveal what information your audience is actively seeking.
See which sources refer traffic to you to focus on platforms that drive the most visitors.
Look at which formats (e.g., listicles, how-to guides, case studies) generate the most engagement and create similar content.
20. Minimize clutter on your blog design
A clean and streamlined blog design helps readers focus on your content. Cluttered designs can be distracting and hurt user experience, making you lose visitors.
While all WordPress.com blog themes feature clean and well-optimized designs, here are additional tips:
Choose a simple theme.
Ensure your blog has enough spacing between elements.
Simplify navigation by grouping similar pages or posts under clear headings.
Use pop-ups sparingly and strategically.
21. Leverage the WordPress.com Reader
The Reader allows WordPress.com users to find content based on their interests from all the sites they follow, including yours.
To make the most of it:
Use relevant tags and categories to increase the visibility of your posts.
Interact with other bloggers by liking, commenting on, and following their posts.
Publish regularly to stay visible to potential readers.
Feature your best-performing posts to attract new readers who explore your blog through the Reader.
For more information on using the Reader, check out the documentation.
Get your blog the traffic it deserves
More blog traffic means a wider reach, a bigger impact, more possibilities, and an increase in the ability to earn money from your blog. If your traffic could be better, don’t panic—there are many things you can do to improve the situation. Pick strategies from above that resonate most with your goals and abilities and build from there.
It looks like you’re here because you want to learn how to create a website, and maybe you find the task ahead a bit scary, overwhelming, and unsettling.
That’s understandable. Making a website can seem like a big undertaking, especially if you’ve been told that you need special skills for it, like knowing how to write code.
We are here to tell you that that’s not true. You can have your own, professional-looking website without any programming skills. In fact, all you need is to know how to use your computer mouse and write on your keyboard.
Sound hard to believe?
Seeing is believing, so in this article, we go over the process of creating your own website using WordPress. We’ll break it down into small, easy steps, so you can follow along even as a beginner.
If you are unsure what the purpose of your site is, doing some competitor analysis is often helpful. You can learn a lot from analyzing other websites in your industry, market, or niche, such as:
If you discover anything interesting or noteworthy, document it so you can borrow inspiration later on.
Choose the type of website you will build
Very different types of websites.
There are many different types of websites and they all come with their own goals, requirements, and differences. Some common kinds of websites include:
Business websites: These sites provide information about a company and its services or products. Sites of this kind usually have an objective such as selling goods or services, lead generation, or newsletter signups.
Personal websites: A personal website lets you establish a profile for potential employers, build your personal brand, consolidate your web presence, or find clients. It comes in many different varieties, from static brochure sites over portfolios to one-page websites.
Blogs: Starting a blog is an excellent way to attract more users to your website (hey, you are here, aren’t you?), show off your expertise, and help your audience. You can also start one to simply practice writing or pursue a hobby. Plus, it can be standalone or part of another type of website (like wordpress.com/blog is the blog for WordPress.com, our WordPress hosting company).
Online stores: The goal of an online store is selling products, goods, or services. This, too, can take many different forms. For example, a shop selling digital products is usually very different from one that deals in real-life merchandise. That’s because you normally don’t need as many product images for digital wares, they typically don’t come in many variations, and they don’t require shipping—all factors that simplify the experience of digital-only online stores.
Newsletter websites: The purpose of a newsletter site is mainly to collect subscribers for an email newsletter. You can grow your email list through popups or subscription forms.
Podcast sites: Another example of a type of site you can build is a podcast website. It can serve as home to your podcast episodes as well as provide additional information around them and you. You can even collect payments for exclusive content and earn money.
Naturally, it’s also possible to combine several website types. For example, you can sell products on your personal blog and send your latest posts via a newsletter. In fact, most websites use a hybrid approach like that. The important thing is to clarify this for yourself so that you work towards the right direction.
Pick your hosting provider and website builder platform
A hosting provider rents out server space where you can place your website files so that others can see your site. A website builder is the software that powers your site. Both influence its management and the end result.
What types of hosting providers exist?
There are different kinds of hosting, but the most common forms are:
Shared hosting: With shared hosting, your website is on the same server as many others, and they all have to share the same resources (hence the name).
VPS hosting: This acronym stands for “Virtual Private Server.” VPS hosting still places your website on the same machine as other sites but everyone gets their own dedicated resources they can’t exceed.
Dedicated server: You may choose to rent and manage your own server solely for your website.
Managed hosting: Like the name suggests, managed hosting providers take many of the day-to-day tasks of keeping a website running off your hands. WordPress.com is a managed hosting provider.
While shared hosting is probably the most common type, the divided server resources can become a speed bottleneck if one or more websites on the shared server start hogging all the processing power. Therefore, it is usually only sufficient for simple sites with little traffic.
VPS and dedicated hosting don’t have this problem; however, they come with additional responsibility. That’s because you only rent the server space; everything else related to site management is up to you. In particular, that means security, speed optimization, backups, infrastructure decisions, and other, similar tasks.
Managed hosting offers the most hands-off approach. For example, when you create a website hosted on WordPress.com, besides making sure your site is fast, secure, and backed up, we also keep it updated, offer top-notch support, and provide an optimized environment.
This arrangement eliminates a lot of busywork for website owners like you. As a result, it allows you to fully focus on the parts of running a website that have the biggest impact on its success and reaching your goals. Examples include content creation, marketing, outreach, and product development.
As mentioned, in this tutorial we’ll show you how to set up your website using WordPress. It’s an open source content management system (CMS) and website builder, which means you can use it to create and manage websites and web content.
In the past, you would have to hand-code HTML and CSS files and upload them to servers to build your site. With WordPress, you can set up a website, change settings, create content, and do everything else from an easy-to-use interface instead.
That’s why it is our website builder of choice here at WordPress.com. Whatever hosting plan you choose (including our free plan), WordPress is automatically included in your account and set up for you. You always land directly on the platform’s user interface—no need to install anything by hand.
WordPress is both powerful and beginner-friendly (as you will see), which is why we, along with more than 43% of all websites on the internet, prefer it. Plus, WordPress is open source, meaning software built and maintained by volunteers and paid contributors who support it for the good of all.
A domain name is the address you type into your browser to access a website. Google.com is a domain name as are wordpress.com and wikipedia.org.
At WordPress.com, we offer many domain extensions for purchase, including .com, .blog, and .org. In addition, with our free hosting plan, you can have a website running on a free subdomain like example.wordpress.com.
While sufficient for getting your feet wet in the website-building game, subdomains like this are not suitable for any professional purposes. It’s like using a Gmail address for your business email; it isn’t as professional or polished as a custom email address is. Thus, if your website is meant to be more than a hobby, you need your own domain name, especially for a business.
Your domain name should be relevant to your site or brand. For example, if you’re building a company site, you may simply want a domain using the company name. It’s where people will naturally assume they can find you.
However, a domain name can also be topical, like gluten-free-gutenberg.com for a food blog with gluten free recipes.
What’s most important is that your address is easy to remember and distinct. While you are at it, it’s also worth checking if the respective social media handles are available to ensure brand consistency.
As for domain endings, due to how common and memorable they are, you can usually go with the .com extension unless you have a good reason not to. One example would be if you operate in a specific area or country. Then, a local domain ending like .de for Germany or .co.uk for the United Kingdom may make the most sense for your intended audience. Specific extensions for certain industries and types of business, like .org, .app, or .ai, also exist.
A second important step is to make sure your desired domain is even available. For that, input it into a domain search tool. It will tell you if you are able to purchase the domain, how much it costs, and alternative ideas if your initial idea is already taken.
Affordable pricing: Standard domain endings are just $12 to $14 per year with hundreds of other options and frequent deals on chosen domains. Most importantly, if you decide to host your website with WordPress.com, you actually get a free domain included for the first year.
Reliability: We’ve been in the domain business for over ten years. Our domains come with free privacy protection, SSL certificates, and a fast and secure DNS infrastructure.
Great customer support: You can reach our domain experts via email and live chat for advice on everything from transferring domains to managing multiple at once.
Finally, having your website and domain hosted with the same provider offers you simplicity. You can manage your domain and site from one dashboard and don’t have to deal with connecting your domain to your hosting account manually.
Pick your WordPress.com theme
WordPress uses “themes” to control the design of your website. They include colors, fonts, layouts, and more—all of the elements that shape the look and feel of a website. You can change themes at will and, as a result, modify your website’s look in literal seconds.
Another benefit is that WordPress themes allow you to affect the appearance of your website without code. You can customize almost any aspect of your theme through an interface without needing to use HTML or CSS.
Same website, same content, but different themes.
What kinds of themes exist?
The good thing about using WordPress as your website builder is that it has themes for pretty much any purpose. No matter what kind of website you want to create, there is likely a suitable theme already out there, complete with specific design elements for the type of site they are created for.
For example, here at WordPress.com, you can find themes for the following website categories:
Blog: These are perfect if you are planning to start blogging. They contain page templates that allow you to easily display and showcase your content. We also have themes for topical categories like travel & lifestyle.
Portfolio: Are you an artist, photographer, or painter? Then, portfolio themes are the perfect tools to show off your work. They are focused on drawing attention to photos, illustrations, and other creative works.
Business: Our business themes aim to help you set up your business site in the easiest way possible. You can also choose from different industries like restaurant websites, real estate, health & wellness, and more.
Store: If you are going the e-commerce route, these themes will give you a leg up in creating your store, offering your products, and attracting customers.
It’s important to note that there are free and premium WordPress themes and that you can find them in a variety of places, including directories on WordPress.org and here on WordPress.com. Note that you need to have a WordPress.com site with a Business plan or above to install third-party themes.
How to install and apply themes
Changing your theme and website design is very easy. You will find the option under Appearance > Themes in the WordPress user interface.
You can filter the list of themes by category at the top or search for specific keywords or theme names. If you see something you like, click on it for additional information.
Try out the style variations and read the theme description. Click Preview & Customize to try out your site in the new design with the option to customize and activate it.
Alternatively, activate your theme from its own page via the Activate this design button. Some themes will automatically change your homepage content, so you have to confirm that you understand that. When you do and look at your site afterward, you can see it in its new look.
Determine the branding and colors you’ll use on your site
Next, it’s time to set guidelines for the content that will populate your pages.
Give your website a voice
Your website content should sound like an extension of yourself or your company. To achieve that, it helps to establish a basic voice for it.
You can do this quickly by following a simple “We are [BLANK], but not [BLANK]” exercise. Here are some examples:
We are lighthearted, but not goofy.
We are funny, but not offensive.
We are helpful, but not bossy.
Of course, if you run your website alone, you can also do this exercise with “I” and “am.” This exercise will help your website sound the way you want it to.
Establish a basic color scheme
If your company already has a visual identity, the website you create should match it. It should be immediately identifiable as your business or brand.
Did you recognize the Google color scheme right away?
Without an established color scheme, you have to create one from scratch.
Don’t have a graphic design background?
No worries, there are only a few things you need to understand here:
Select colors that look good together and convey the emotional sentiment you want visitors to feel. A good starting point is the guide to color psychology from CoSchedule.
Document the hex color codes for your chosen color palette. Color-hex.com makes it easy to find codes that you can copy and paste into website and image design tools (such as WordPress.com). Another option is Coolors, which both helps you create color schemes and gives you the accompanying color codes.
Once you’ve grasped the basics, you can use what you’ve learned about color psychology and hex codes to establish color schemes for other parts of your business.
Put together the visual elements for your site
Common examples of visual elements websites use:
Hero spots and banner images: These will go at the top of your website pages.
Photography: This includes product images, photos of your business, and staff headshots.
Designed images: Think charts, graphs, and infographics.
It’s a good idea to figure out any graphics your site may require before you start building. Some assets you might already have on hand, and others you may need to create.
If your website will need photos (such as images of your business, a portrait of yourself, or maybe a quick snap of your dog), then gather them together now. You can also find more generic images on stock photo sites like Unsplash, Pixabay, Pexels, or Openverse. Just be sure that the image you want to use is copyright-free if you’re getting it from another source.
Should you need designed images (logos, charts, graphs, and so forth), basic design services like Canva, Stencil, or Snappa can help. They make image design easy, especially for featured images, graphs and charts, infographics, etc. Other options include Infogram, Piktochart, and Venngage.
Home Page: The page that visitors land on when they enter your domain into a browser. It can have all types of content, including a blog feed or links to other important pages on your site. Anyone who lands on the homepage should immediately get a good understanding of what your site is about.
About Page: Visitors are usually keen to learn more about the company or people behind sites they like. Consequently, the About page is often one of the most frequented pages on a website, so make sure it’s impactful and clearly communicates who you are.
Contact page: This page is often the next step for visitors after the about page. Your contact page should clearly list all the ways visitors can get in touch or even come with a contact form.
Product and services page: Naturally, if you offer any services or products to purchase on your site, you need pages where visitors can take advantage of that.
Blog: Unless your homepage itself is a blog, you are going to need a separate page to show off your writing. The blog page usually lists articles in chronologically-descending order and also has extra information such as the most popular content and categories. When building a site on WordPress, your blog (like wordpress.com/blog) will be a Page but the individual articles that make up your blog are called Posts.
Legal pages: These days, pretty much all websites need at least a privacy policy. You might also need a Terms & Conditions page and meet other legal requirements.
Consider this list to be a simple starting point. As before, the details depend on the type of website you want to make.
Great ways to determine which pages you’ll need are building a simple sitemap and planning your site structure. A simple spreadsheet or diagram is often enough for that.
Create your website content
When it comes to creating content, the two main questions are the “how” and “what.” You can either write your page content in a separate document and copy it over to your site or create the content right inside WordPress.
Learn how to create pages in WordPress
To make a new page in WordPress, go to Pages > Add New Page in the dashboard.
WordPress.com will automatically propose pre-defined layouts for different kinds of pages that you can choose from.
However, it’s also possible to start with a blank canvas by clicking the Blank page button.
Either way, once you make your selection, you end up in the WordPress block editor.
To start creating your page, enter a title at the top and add your content (like text and photos) below. Page content is created in the form of Blocks, which can be anything from paragraphs and headings to layout elements like columns and even forms and widgets.
Paragraphs are the most simple; they appear as you write and insert line breaks. You can see every other available block when you click the big plus button in the upper left corner or in the editor itself.
Click on any of the block names to add them to the page. Then format and configure them through the settings bar and options in the sidebar.
You can also add more blocks by typing a slash forward (“/”) and searching for the name of a block.
When you publish (by clicking the Publish button in the top-right) or preview (by clicking the computer icon in the top-right) a page, the blocks you added appear as they would for readers of your website.
Before you start writing, determine what information you want to include on your pages. You can do this by drafting simple outlines right inside the WordPress editor.
Each outline should have:
A header or page title.
Subheadings for each page (you can create these using the heading block).
A description of the information each section should include.
Keep it clear and simple. You’ll have time to refine and polish your website copy later on.
Add written material
Unless you have a photography website or similar, your main content is likely going to be words. There are three areas to particularly pay attention to:
Titles
Body copy
Calls to action
Your title matters because it not only appears on your own website but also in search engines.
It’s one of the main elements people use to decide whether or not to click on a link or check out a page. It has to be both informative and alluring, which can be a difficult balance to strike if you haven’t taken the time to plan out your content.
As you might have guessed, body copy appears in the body of the page and contains the main information of each page. This can be a list of your services, your about page, or a blog post.
Here are a few basic writing guidelines that aid in readability:
Keep sentences under 25 words.
Use no more than three sentences per paragraph.
Remember your unique voice.
Write enough copy to cover the needs of each page.
Finally, some pages on your website will have a call to action, which gives your readers an obvious next step. A product page tries to sell, a blog post might encourage readers to comment or join an email list, and a contact page invites visitors to write you a message.
Clearly tell visitors what you would like them to do. You can do it in the form of a heading, button, or simple text. Your pages can also have more than one CTA, the important thing is that they are present and clear.
If you’re struggling to come up with your written content, you can get assistance from the Jetpack AI Assistant on WordPress.com sites. It can craft content for you, propose headlines, check spelling and grammar, adjust the tone, translate content, and more. Check it out! (See, that was a call to action.)
Include images and other visuals
Visual elements help clarify or emphasize points you are making in your writing. They also break up the monotony of large text blocks and generally make online content more pleasant to consume. If you’ve been following along, you should already have your visuals ready.
The most common way to add them to content in WordPress is the WordPress image block. However, you have other options depending on the look you’re after, such as gallery, slideshow, or cover.
You can also include images from the aforementioned Pexels and Openverse right inside the WordPress.com editor. While you create your website pages, click on the block inserter again and then go to the Media tab. Search images by keyword and click them to add them to the editor, complete with the correct attribution.
Consider using videos
Videos are undeniably one of the most popular forms of online content. With WordPress, you can easily embed in your website content. For example, when you copy and paste a YouTube video URL into the editor, WordPress automatically embeds the video where you put the link using the YouTube block.
Automatic embeds like this exist for many other services, including for social media posts.
The WordPress editor also has a number of blocks that allow the use of video, such as a moving background in certain blocks. Finally, you have the option to post animated GIFs (or short videos in image form) as either uploaded images or embedded from somewhere else.
Set up your homepage
To make one of your newly created pages your homepage, go to Settings > Reading in the WordPress.com admin dashboard. At the top, you’ll see two drop-down menus that allow you to define which page serves as your homepage and which one displays your blog posts.
Select your desired (published) page under Your homepage displays and save the settings. That’s it, your homepage is now live!
Add your pages to a menu
Besides your homepage, you want visitors to be able to access the rest of your most important pages. The most common way to do so is with a navigation menu. You can create and modify one under Appearance > Editor in the Site Editor.
The screen you land on looks similar to the block editor used for pages; however, instead of a single page, you can make changes to the entire site layout.
The block that is responsible for navigation menus is itself called Navigation, and you usually already find it in the top section of your theme. Use the Document Overview (it’s a black button with three horizontal lines in the top toolbar) to find it.
Here, you can easily add or subtract menu items, change their order, or modify the entire look of the navigation across all of the pages on your site. All of that happens with the help of the settings bar and menu in the sidebar.
Customize your header and footer
While here, you might as well make changes to your header and footer (if necessary). They are the top and bottom elements of your website, respectively.
You’ve probably already encountered the header element while working on your navigation menu. Besides the menu, it usually contains things like the logo or a search field. Its main functionality is branding and helping people get around your site.
The footer is meant to invite people to stick around longer and explore more options when they reach the end of a page. For that, it commonly includes elements like the copyright notice, extra menus, or your business address.
Your WordPress theme likely already has a header and footer. However, you can try out different options by simply clicking on either element. When you do, additional design options show up in the sidebar.
Click on any of them to insert the block into the editor.
You can also customize them like any other page element. Add layout elements like columns and rows, fill them with menus, social icons, or text. You can also change background and font colors, sizes, and more in the sidebar menu.
WordPress plugins are programs that you can install on your website to add specific features and functionality. They are part of what makes WordPress so customizable; instead of filling the platform with loads of functionality not everyone needs, you can add site features according to your individual requirements.
You can think of them like apps on your phone. Not everyone needs the same banking app that you do, but you can download it to your phone to add that necessary functionality for you.
Plugins can add small tweaks, like the ability to change usernames, or big features, like online store capabilities or entire page builders.
Additionally, there are literally tens of thousands of plugins available. Created by individual developers as well as companies, you can find many of them in the plugin repositories on WordPress.com and WordPress.org, but also third-party stores and on websites of individual developers. Like themes, there are free and paid plugins.
On WordPress.com, you need a site on a Business plan or higher to be able to install plugins. However, all websites on WordPress.com come with two important plugins by default:
Jetpack: Jetpack has features for many important parts of website management like speed, security, and growth.
Akismet: Our anti-spam plugin. It uses artificial intelligence and machine learning to sort the spam comments your site receives from the real deal.
Go to the Plugins menu. Use the search bar to look for what you need by name or keyword, or go through the categories.
When you see something you are interested in, click on it to learn more and then on Install and activate (or Purchase and activate if it’s a paid plugin) to add it to your site.
The plugin will automatically download and become active on your site so you can start using it. You can manage all the plugins on your site as well as deactivate and delete them under Plugins > Installed Plugins.
Popular plugin options
If you don’t know which plugins you should install while you create your website, here are a few popular examples:
Yoast: The most popular WordPress SEO plugin. It allows you to add important information for search engines, such as SEO titles and descriptions. It also has an analysis module where it tells you what you need to do to optimize your pages and much more.
Crowdsignal Forms: This is a plugin that comes pre-installed on WordPress.com sites to help you create contact forms where visitors can get in touch with you. Alternatively, consider using the Form block.
ShortPixel Adaptive Images: Images can be an obstacle to website speed because of their size and longer download time. This plugin helps by converting your visuals to file types with a smaller footprint, compressing them, adding lazy loading, and much more.
MonsterInsights: Easily connect Google Analytics to your website (more on that below) and display website data in your WordPress dashboard. Alternatively, you can enable Google Analytics tracking on WordPress.com without installing a plugin on eligible plans.
In order to attract visitors from search engines, you need to make sure your site is configured in a way that search providers will be able to understand its topic correctly.
With your site running on WordPress, it is automatically search engine-friendly. The CMS is configured in a way by default that makes you content readable and well-structured. Yet, there are still a few things that you can and should do to give your site the last bit of SEO polish.
Write title tags for each page
It’s possible to customize your page titles just for search engines so they are short enough to not be cut off in search results but descriptive enough to entice new visitors to your site.
On WordPress.com, you have the ability to do so via the Jetpack plugin. Go to Jetpack > Settings > Traffic and find the Search engine optimization panel. Here, you can define default title structures for different types of content as well as preview and customize your front page’s appearance in search results and social media.
You can also enable an option to do the same for individual posts and pages.
SEO plugins, like the aforementioned Yoast SEO, also add this and other abilities to your website. For example, both Jetpack and Yoast will automatically create a sitemap for you.
Add meta descriptions
A meta description is another piece of information that appears in search results. It’s the text that you see below the links and URL.
You can configure this with the aforementioned tools, and in general, meta descriptions should be no longer than 160 characters. If no meta description is set, Google will either use the beginning of the post/page or a random passage that it deems relevant.
In fact, it will often do the latter, even if you have included a meta description. However, writing a custom description allows you to control its content for those cases when it does show up.
Use a search-friendly URL structure
The URL is another element that search engines look at when figuring out the topic and ranking of your website. You can configure different link structures for your site in WordPress under Settings > Permalinks.
The most important part is that you show the post name at the end of the URL (also known as the slug). That way, you can include your topic and keywords there. Luckily, WordPress is automatically configured to do so.
You also have the option to display categories in the URL structure. This makes sense if you’re creating a website with an online shop, where grouping products is imperative.
However, it can also be a good idea for content-based sites. It helps further clarify broad topics.
Finally, you have the possibility to include a date in the URL so that people can see when a particular post was first published. This makes the most sense for websites where the date is important to the article context, like news websites.
It’s important to note that unless you have a completely new site, you shouldn’t change your URL structure randomly! It can make you lose search traffic by breaking the links already indexed by Google. This kind of thing needs careful consideration and planning to not ruin your hard work.
Include relevant keywords
Keywords are terms your target audience might use when searching for content like yours. For example, a reader may look up “gluten free pasta salad” to find a new recipe. If you want your pasta salad recipe to rank for that search term, you’ll need to make sure that term (otherwise known as a keyword) appears within your content.
It’s important to put keywords in the title, URL, and meta description. Besides that, you should also include them in your written text, the file names of your images, and their alt text. You can configure the last part in the editor sidebar when you click on any image block.
The information here is used by search spiders and screen readers of people who are visually impaired to figure out the content of an image without being able to see it. Therefore, it is very important for accessibility, not just SEO. It should be a description of what the image is about.
If you are unsure about your use of keywords, many SEO plugins let you enter the keyword you are targeting into the analysis module and give you a checklist if you have used it enough and in the right places.
Generally, you don’t want to overdo keyword usage in your posts or pages, as that can be rather unpleasant to read as a site visitor. Instead, be mindful of the term you’re trying to rank for and use it and variations of it throughout your content in a natural way.
Set up analytics
Web analytics allow you to track website metrics so that you know if you are achieving your goals. They also help you figure out what’s working on your site, if there are technical problems, and which content is popular. Three common tools for this are Google Search Console, Google Analytics, and Jetpack Stats.
Google Search Console
Search Console is what Google calls its webmaster tools. It’s free to use, and you can connect your site to it to find out how your content is performing in search results. It tells you what search queries your content is ranking for, the number of impressions, clicks, and your click-through rate.
This information helps you determine your best-performing pages, find related keywords, and see the countries your content is most popular in. You can also find out what queries individual pages rank for and take action if the performance starts to decrease.
Besides that, Search Console tells you if there are technical problems on your website, and you can find out your indexing status, page experience, Core Web Vitals, and more. This helps you make sure your search performance is not hurt by a technical glitch. You can also submit a sitemap to help Google discover your content.
Google Analytics
Google Analytics is another free Google tool that you can connect to your site. Instead of ranking in search, it reports on traffic from all sources and helps you better understand how visitors interact with your site once they’re there.
The tool shows how many people are on your site, where they come from (both the medium and locality), what content they look at, how they move through your site, where they drop off, how long they stick around, and a lot more. It also lets you track conversions for custom events and shopping activity.
This tool helps website owners understand what pages and content are most popular and how you can improve the experience on your site in order to move visitors towards desired calls to action and pages.
Jetpack Stats
Jetpack Stats is present by default on any website you create on WordPress.com, and you find it in the Stats menu.
The analytics tells you the number of visitors, page views, likes, and comments. You can filter it by different timeframes, see your most popular posts and pages, who refers visitors to you, where they come from in the world, search terms, most clicked links, and a lot more.
Depending on your WordPress.com plan, you may also see the Insights tab that gives you a yearly overview of how much you posted, your visitors per day, the most popular posts, and more.
Finally, there is also information about your WordPress.com subscribers.
Test, publish, and promote your website
Once you have finished all of the above, the final step is to publish your site. But there’s one that comes before it: testing.
Go through every part of your website and make sure it’s the way you want it to be. Test all functionality, proofread content, check your pages on different devices, and run them through a speed tool like the WordPress.com Speed Test.
Once satisfied, publishing your site usually means switching it from private to public in Settings > General. Make sure to disable the setting that discourages search engines from indexing your site.
After that, it’s publicly available and ready to welcome visitors. However, you have to take an active role in bringing them to your site. Here’s how:
SEO: We have already covered how to optimize content to rank well in search. To let search engines know that your site exists, make sure to submit your sitemap to webmaster tools like Google Search Console. That way, they can index your pages and show them in search results.
Social: Use social media to promote your website and potential blog posts. Write updates, use appropriate hashtags, and interact with others in your industry.
Email: Starting an email newsletter is an effective way to build a loyal following. You can email them about new content and other news.
Jetpack, which comes with every WordPress.com website, has a number of useful features for this. For example, under Tools > Marketing you can connect to your social accounts and have the plugin automatically post new site content to them.
Likewise, under Settings > Newsletter (or Jetpack > Settings > Newsletter on eligible plans), you can add email newsletter functionality to your site and configure where sign-up boxes appear.
Plus, you can use the Subscribe block to add more options manually. Once set up, you have the ability to automatically send new posts to anyone who signs up to your newsletter.
Maintain your website
Running a website means playing the long game, and it takes consistent effort to make it successful. Two of the most important matters to keep in mind are backups and content updates.
Without a backup solution in place for your website, you could lose everything you worked so hard to create. In addition, if you let your content go stale, it can lead to loss of search rankings and a bad user experience.
If your site is hosted at WordPress.com, the first part is taken care of for you. All sites on Business plans and above are automatically backed up at least once a day and give you the ability to restore them to any previous point in time.
That’s the beautiful part about managed hosting; it leaves you time and space for non-admin work. Time that you should invest in keeping your content updated. At least once a month, make sure to look over your most important pages to see if the information is still current, especially crucial information like your business hours or address.
Besides that, if you are running a blog, you should also regularly update your articles. Google Search Console and other SEO tools can tell you if your rankings start worsening. If you see rankings start to go down, that’s definitely a cue that your content might need an update.
Frequently Asked Quetions
Finally, let’s go over some FAQs about creating a website.
Do I need to learn how to code?
No, absolutely not. WordPress is set up as a beginner-friendly, no-code solution. Thanks to its powerful block editor, you can make almost any change you want through its visual interface.
If you do know how to code, you do have the ability to use it on your site. However, it is never a requirement.
How long should it take to build my website?
There is no cut-and-dry answer to this. It will depend on the type of website you’d like to build, your level of expertise, how much time you are able to commit to it, and more.
Generally speaking, you can start a basic website with WordPress.com in a weekend. As you have seen above, it’s enough to simply slap on a design, create pages and content, and put it out there. If you need something more elaborate, it will, of course, take longer.
How much should I pay for a website?
Just like time invested, website costs are variable and depend on your needs. Two of the most basic costs are your domain and your hosting plan. These are easy to figure out.
However, there are other costs involved with building and running a website, such as from buying premium themes, plugins, or tools. Yet, as mentioned, a lot of that is optional, and you can forgo some of the bells and whistles to make the process more affordable.
It’s important to note that with a WordPress.com plan, you get a lot of value for your money. They include many features you often would have to pay a separate service or plugin for, especially when it comes to website speed and security.
Why is WordPress.com the best choice for my hosting/website builder?
Customer support: Access to 24/7 expert support, ensuring you get help whenever you need it.
Security: Automatic updates, daily backups, and built-in security measures protect your site from malware and hacking attempts.
Built-in Jetpack features: Essential tools like site stats, social sharing, downtime monitoring, and basic SEO are built-in, improving your site’s performance and reach.
Speed: WordPress.com’s global Content Delivery Network (CDN) and optimized infrastructure ensure fast load times for visitors worldwide.
No limits on traffic: We handle any amount of traffic without you needing to worry about bandwidth limits, extra costs, or a decrease in site performance.
Open source-driven: Because WordPress.com is hosting made for the open source WordPress software, you have the flexibility and freedom to customize your site (unlike other proprietary solutions).
Themes and plugins (on the Business plan and above): Unlock thousands of premium themes and plugins for advanced customization and added functionality to match your unique needs.
Create your website with WordPress today
Lack of development and technical skills shouldn’t keep you from setting up your own website. Even as a beginner, you can follow the steps above to create your presence on the internet.
While it might be a bit outside of your comfort zone, it’s absolutely doable. All it takes is a willingness to try, learn, and persevere. With that, you too can create a website for yourself. Know what you want to achieve, then set out to do it one step at a time.
We’d be honored to be along for the ride. Sign up to WordPress.com today and take advantage of the convenience of WordPress-optimized managed hosting, powerful tools, and expert support. Whether you’re starting a personal blog, launching a business site, or opening an online store, everything you need is within reach.
So, you want to start a blog, huh? First of all, that’s a pretty dope idea. In my opinion, it’s one of the most fun and rewarding things you can do.
Blogging allows you to dive deeply into topics that really interest you, improve as a writer, and learn a ton along the way. In addition, starting your own blog has never been easier. The required pieces are readily available. You just have to know how to use them, which is what this post will show you.
We’ll cover the step-by-step process on how you can start a blog basically today. From if and why you should do it, over preparation, getting a website address, setting up and designing your blog, to writing your first blog post and making it ready for publishing.
But wait, isn’t blogging dead?
If blogging had really died as often as people said it did, it would have signed a DNR by now.
But, the truth is, blogging has never really gone away. It has changed over time, for sure, but is still a valid way to attract an audience, drive traffic to your website, and even build a business around.
77% of participants say they see results from blogging, 20% even say strong results
65% use it as a tool to drive SEO traffic to their websites
Yes, they also say it takes more effort to craft blog posts. Participants see the best results when they spend 4-6+ hours per in-depth blog post. But blogging is alive and well.
Okay, so why should you start a blog?
Starting a blog lets you write about and explore anything you want. Whatever your interest or passion, it’s an outlet to curate your knowledge and ideas.
In addition, it’s great writing practice and great thinking practice too. It forces you to properly structure your ideas. Plus, it really helps with learning because, in order to explain something to others, you first need to understand it yourself.
In addition, being creative is simply fun and meaningful. Sharing what you know with others in the hopes of helping, inspiring, and educating them is rewarding.
What’s more, it can actually be a vehicle to build an audience, establish authority in your industry, and position yourself as an expert. And who knows, over time, your blog might turn into a side or even main business. You wouldn’t be the first blogger to start earning money from sharing your knowledge.
Most importantly, a blog is your own presence on the web where you can decide what happens and how. And, especially if you create it with a system like WordPress, you fully own it.
That’s different from, say, a presence on social media, where you can:
Get banned for violating the terms and conditions, even accidentally
Lose your reach due to an algorithm change
Be forced to migrate because you don’t support the new ownership
When you don’t own your outlet, you are at the mercy of those who do.
How to start a blog with WordPress.com in 12 steps
Feel motivated yet? Good, then let’s put that energy to good use.
1. Choose a niche and determine what you’ll write about
When considering your blog topic and niche, there are three fundamental factors to think about:
Your interest – It’s hard to start a successful blog and stay motivated to write about something day in and day out that you aren’t really into, even if it’s a popular topic. So, choose something you actually care about, it will also show in your writing.
Monetization – Some niches are more suitable for building a business around than others. If that’s your goal, it helps to do some research beforehand. For example, you may check if there are affiliate programs you could sign up for. A simple Google search like “[your topic] affiliate program” is often enough. Other ways to monetize a blog are Patreon and Ko-fi. On WordPress.com you can also accept donations and run ads on your blog.
It’s also important to niche down. Start with broader topics like personal finance, cooking, or travel. From there, dig further, for example:
Investing for millennials
High-protein meal prep ideas
Solo travel for women
You can always broaden your topic later but for the beginning, going small helps you focus.
2. Brainstorm a name for your blog and secure your domain
In naming your blog, you can go different routes. For example, you could use your own name like author James Clear.
This emphasizes who is behind the writing even if it doesn’t give away the blog’s topic yet. You can also use a business name instead of your personal name.
Another choice is to give the blog a title that conveys its topic, similar to Nerd Fitness.
A third option is to do a mix. For example, Chris Guillebeau uses his own name for the domain but his blog is called “The Art of Non-Conformity”
Generally, your blog name should be clear, easy to remember, and unique. This also matters for your choice of domain name. You want to use one that’s the same as the blog name or at least intimately tied to it.
Hosting allows you to make your blog available for people surfing the Internet. With WordPress, you are free to choose where to host your blog.
Using a managed hosting provider like WordPress.com allows you to outsource many of the more technical tasks of starting a blog, like:
Installation – You can skip uploading the files to a server, creating a database, or running the installation yourself.
Speed optimization – WordPress.com’s servers are optimized for WordPress and offer other speed features.
Security – You get daily security scans, automatic backups, brute-force protection, downtime monitoring, encryption, firewalls, DDoS protection, automatic software updates, and more with every plan. Don’t worry if you don’t know what half of this means. The bottom line is simply that your blog is super secure from being hacked.
All of the above allows you to fully concentrate on content creation and growing your blog. Simply choose a WordPress.com plan to get started.
Each plan comes with unlimited visitors, posts, and pages. You can even start with the Free plan and upgrade later, such as when you want to extend your blog’s functionality with plugins on the Business plan. Plus, if you go for the yearly option, every plan also includes a free domain for one year.
4. Select a WordPress blog theme
Themes control the design of a WordPress blog. Switching from one theme to another can make a huge difference in the look and feel of your blog. There are plenty of blog themes with design and layout elements specifically for blogging, making it easy to start. They even exist for different subjects like food, travel, etc.
To install one, log in to your WordPress blog, go to Appearance > Themes, and click the Blog category at the top.
Click on any theme you like for additional information and also to try out any style variations it comes with.
You can apply it to your blog right then and there by clicking Activate this design. Alternatively, click Preview & Customize to view your current website in the new skin and make adjustments before activating it.
5. Add pages
At this point, you might want to jump straight into customizing your theme design and we’ll get to that. But, in order to do so, it helps to first get familiar with the basic workflow of how to edit content in WordPress.
A good way to ease yourself into it is to create pages. It uses a lot of the same principles but is less complex and, therefore, a good starting point.
You create a new page by going to Pages > Add New Page in your WordPress admin interface. The first thing you’ll see is a prompt with block patterns for different types of pages. They can work as a starting point and you can insert them with a click.
Alternatively, you can also start with a blank page.
Insert page elements
In WordPress, basic design elements are called “blocks”. For example, the editor automatically creates a paragraph block when you write something and press the enter key.
You find a list of all available blocks when you click the big “+” button in the top left corner.
They range from text elements and buttons to layout elements like columns and beyond. A click on any of them inserts it into the editor.
You also have access to more pre-designed collections of blocks in the Patterns tab. Inserting them works the same way.
You can also add blocks by clicking the small “+” button that appears when you place your cursor within the editor. Alternatively, type a forward slash (“/”) in any empty line followed by the block name.
Every element in the editor is customizable. Click it and you’ll find an options bar at the top and additional customization options in the Settings sidebar.
Use the editor to create must-have pages for your blog, such as:
About page
Contact page
Legal pages like a privacy policy
6. Add a menu
Including your new pages in a navigation menu allows your visitors to reach them easily. Sitewide changes like this happen in the Site Editor. Enter it via Appearance > Editor.
You’ll quickly notice that it works the same way as the Page Editor, only that there are more site elements you can work on. For example, your theme likely already has a navigation menu. In this example, it appears as part of the header.
There are different ways to customize it. One is via the Navigation menu. Another is through Patterns and Header. Thirdly, you can also click the header element in the main editing window and then choose Edit.
In all cases, the element you want to edit is the Navigation block. Opening the Document Overview menu helps you find it more easily. Once active, it lets you add and subtract menu items and other elements, rename them, and more.
While already in the Site Editor, you can also start to change the appearance of other parts of your blog.
Change global styles
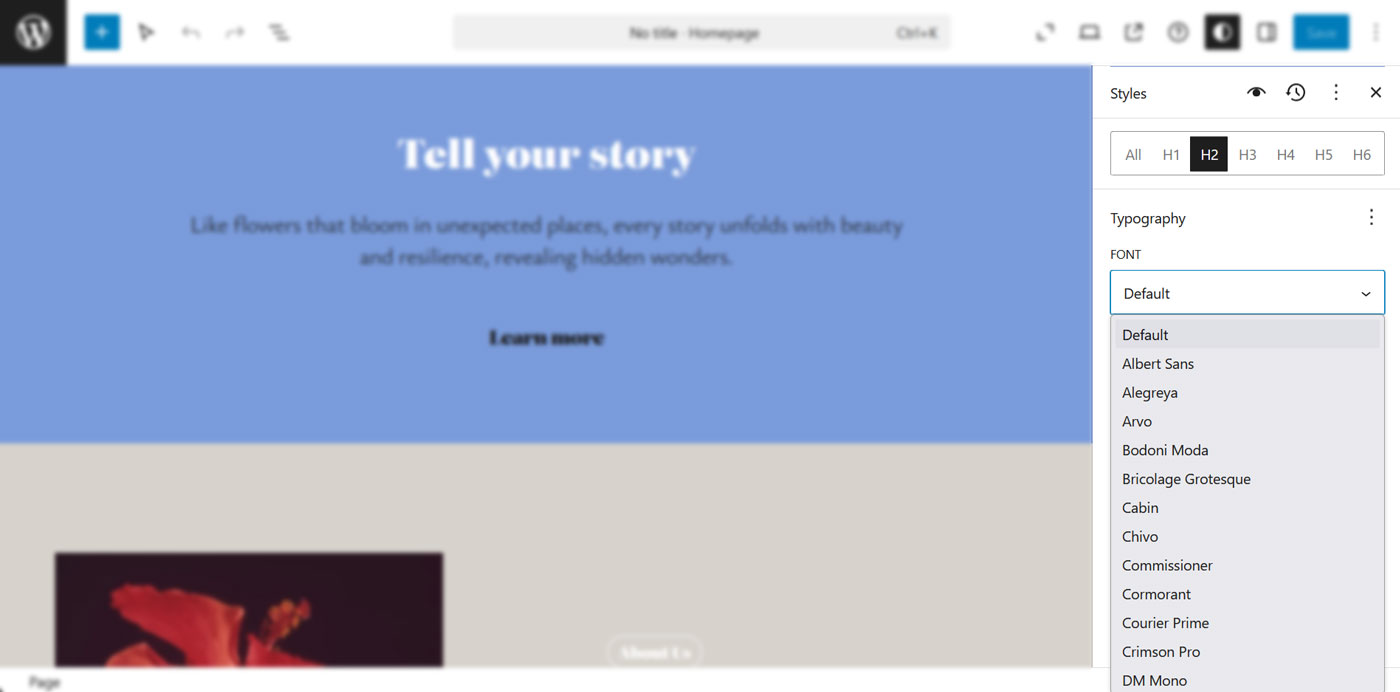
Changing global design options like fonts, colors, etc. happens in the Styles menu on the right side of the screen.
Among other things, it lets you change:
Style presets – Switch between style variations your theme ships with.
Typography – Make changes to the font family, size, appearance and more for all text on your blog, from body copy to links and headings.
Colors – Define custom colors, try out existing palettes, and change the color of text, backgrounds, links, and beyond.
Layout – Define content width, global padding, and spacing.
For example, if you go to Colors > Background, you can change the background color of your blog with a few clicks.
Customize page templates
Page templates work like blueprints for certain content types. If you modify a template, the changes apply to all pieces of content of that kind.
You can access them via the Templates menu when you click on the WordPress logo in the Site Editor.
One of the most decisive customizations you can make here is to determine how your posts appear on your blog page. Your theme most likely has a template called Blog Home for that.
Click to start editing it. Find the Query Loop block (again, use the Document Overview) and choose Replace.
This will show you available patterns for displaying the main blog.
Click whichever you like to see it on the page.
Customize it as needed. If you save now, your blog will adopt the new design.
8. Add blog categories
You should now have enough knowledge to customize the look of your blog. From here, it’s time to talk about how to create content, starting with categories.
Categories bring order to your blog posts and also clarify the topics of your blog to search engines. You manage them in Posts > Categories. Click the blue button to add a new category.
Provide a name and, optionally, a description that can show up in category archive pages. You’re also able to create sub-categories this way.
Think of categories as broad topics that your blog is about. For example, a food blog would have categories like Recipes, Cooking Tips, and Product Reviews and from there subcategories like Breakfast, Meal Prep, and Cookbooks.
Start with 3-5 categories. If you have more than that, your blog topic might lack focus.
Later, you assign categories in the Post Editor sidebar.
9. Develop a basic content strategy
In writing blog content, it helps to be strategic and develop a plan that will keep you on track.
The first step is to decide how often you want to publish a new post. This depends a lot on how much time you have available to invest. In the beginning, it’s more important to be consistent than to post often. Once a week or every other week is an okay goal to start with.
As for what to write about, you probably already have a few ideas for blog topics. Spend 10 minutes jotting down as many as you can.
After that, take another 10 minutes to score those ideas with numbers 1-3, the highest number being the best. Take your 3s and input them into tools like Google Keyword Planner, Semrush, or Ubersuggest. This will help you validate demand and also refine your exact key phrases.
Then add all those left over to your calendar.
10. Write your first blog post
If you’ve made it this far, it’s finally time–you are going to start creating your first blog post. This can be a bit overwhelming at first, so let’s break it down into manageable steps.
Create an outline
A blog post outline gives you an overview of the general content and structure of your blog post. Here’s an example:
It helps you determine the topic, angle, and main points. You can actually create it right in your WordPress blog. Go to the WordPress Post Editor (Posts > Add New Post) and open the Outline feature in the document overview.
This shows the heading structure of your future post. Use h2 headings to determine main sections, then h3 headings to further divide them, and so forth. You can also create a list of points you want to make in each section if you already know them.
Start researching
The research phase is where you collect all the raw information you will mention in your blog post and bring it into the right order.
This usually involves a lot of googling and reading the material that’s already out there. But you can also use books, your own expertise, or other sources.
You don’t need to write complete sentences here. Incomplete sentences and key phrases are enough.
Write a first draft
The main objective of your first draft is to turn your research notes into a cohesive text. This won’t be the final version and nobody else is going to see it, so shoot for volume rather than conciseness and speed over precision.
Seriously, you just want to vomit enough text onto the page that you have something to work with, so avoid sweating over specific sentences or editing while writing.
Edit and format
The editing phase is the most important part of the process. This is where you polish your draft, clarify your points, make sure the post progresses logically, and refine your writing. Besides research, this is where most of your effort should go and it often helps to do several rounds of editing.
Part of editing is formatting to ensure readability. Here are a few suggestions and best practices for that:
Include no more than 25 words per sentence
Use around three sentences per paragraph
Try to express one idea per paragraph
Keep sections short (under 300 words)
Use numbered and unnumbered lists
A great help is to input your content into the Hemingway App. On the Business plan and above, you can also install plugins like Yoast SEO and Rank Math that have a readability analysis.
Add visuals
Visual content breaks up text, makes it more interesting, and clarifies and emphasizes your points. It can take many different forms, such as:
Note that you can directly embed images from Openverse and Pexels via the Block Inserter’s Media tab.
Just search for a keyword and click when you find an image that you like to insert it.
Refine your headline
More people read your headline than will read the rest of your post, it can really make or break your article. To make sure it is the best it can be and get some practice, challenge yourself to write 25 of them.
If you are drawing a blank, feel free to plug it into your favorite AI tool for some input.
For example, Jetpack AI can also help you create a headline for your post.
In addition, you can use a free headline tool like Easy Peasy AI to further refine your ideas.
11. Optimize your post for SEO
The aforementioned SEO plugins also help you optimize your blog post for search engines. For one, they allow you to set custom page titles and meta descriptions.
These show up prominently in search results.
Customizing them makes sure they are engaging, inspire clicks, and don’t get cut off. You can also use Jetpack for this purpose.
SEO plugins additionally often come with content analysis models. When you input your main keyword, they tell you how well-optimized your post is.
An Important part that they will alert you to is using your keyword in your post slug, meaning the end of its URL.
It’s best if you make it concise, no more than 3-5 words. Ideally, it should just be the main key phrase.
You can also further customize the entire URL structure of your blog under Settings > Permalinks.
Including categories can help further clarify your blog topics to search engines but it’s not a must. Just be sure not to change the permalink structure of an established blog because it will neutralize established links in search engines and lead to 404 errors.
Finally, make sure to include internal links in your blog post to related blog articles and other relevant pages. It will help visitors discover more information and also helps spread SEO value throughout your entire site.
Besides SEO, additional promotion channels like social media and building an email list help you get your blog writing in front of more people.
All WordPress.com plans come with Jetpack, which you can find under Tools > Marketing > Connections. It allows you to automatically publish new blog content to selected social accounts.
You can also easily add social sharing buttons to your content using the Sharing Buttons block to make it easy for your readers to further spread the word.
In addition, WordPress.com has native functionality to build a newsletter. It allows you to collect subscribers, automatically send out new posts via email, schedule them ahead of time, and even monetize your newsletter.
You find options for that under Settings > Newsletter. It lets you offer different subscription options throughout your site and content. You can also set them up manually with the Subscribe block.
In addition, you customize the content and features of your emails as well as set up a welcome message to new subscribers. Detailed instructions in the documentation.
Make This the Year When You Start Your Blog!
Creating a blog, whether as a hobby, to build a personal brand, or to grow a business, is a rewarding experience. It allows you to share your passions with the world and claim your own spot on the web.
The process may seem overwhelming at first, but if you take it step by step, it’s both accessible and achievable for anyone willing to put in the effort. So, why wait? Bring your ideas to life, and start building something meaningful today. Launch your blog in just a few clicks on WordPress.com.
New Year, new themes! We’ve been hard at work developing new themes to help you kickstart 2025. Whether you are building your very first website or looking to refresh an existing site, these new options can help you achieve the design you want.
Also great for: Blogs, Digital Zines and Magazines, News, Advocacy
Dadaism pushed the boundaries of what was considered art with absurdism and flair – with Dadaist, you too can reject the boring linearity and blank spaces of common web design. Dadaist hearkens back to a different era of handmade collages, irregular lines, and bold color pairings, giving you a one-of-a-kind website that embraces the best of both digital and print design.
With posts organized into an assemblage-inspired feed, this theme is a great choice for sharing research collections or blog posts. You can add additional pages, like an About or Contact page, in the main header while the subheader is a perfect place to separate your content into multiple collections using tags. A boldly designed subscription block dominates the footer, making it easy for your followers to sign up to receive new content directly in their inbox.
Designed for: Non-Profits and Community-Driven Projects
Also great for: Political Campaigns, Advocacy Organizations
Put your mission front and center with Koinoia, a theme built to support NPOs through advocacy, community engagement, and donations. Koinonia is clean and modern, ensuring that your organization’s digital home feels both reputable and professional for visitors old and new. Use your homepage to share your value proposition, mission statement, and additional content to help visitors quickly understand who you serve and what you offer the community.
With high readability and easy navigation, supporters can find everything they need, whether they want to join your network of volunteers through a built-in form, browse your community’s service offerings, or make a well-deserved online donation (tip: many digital payment processors offer discounted rates for non-profits).
Also great for: Summer Camps, Sports and Hobby Leagues
At a busy institution, you need to handle questions and resources for a variety of stakeholders, from current staff and students to potential families. With Kentwood, you can ensure you are building a professional and reputable digital brand that meets a family’s needs, from their first visit through graduation.
With two layers of navigation, students and staff can quickly link out to academic resources without compromising space for in-depth information for current and prospective families. Your homepage highlights your brand with custom photography and blog updates while additional pages give you ample space for well-organized long-form content. No matter where they land, families will be impressed with your institution’s plethora of resources.
Professio allows private teachers and tutors to create a digital hub for current and potential students. With a simple but visually impactful two-tone theme available in three color waves, it’s you can quickly build a design-forward website for your teaching business. With Professio’s pre-built homepage blocks, you can quickly introduce your services, answer FAQs, and build credibility with downloadable materials, blog posts, and testimonials. Once prospective students are ready to book a course, they can sign up digitally via a form or email.
Whatever you need to grow your teaching business, Professio can scale beautifully so that you can focus on what matters most: your students.
Designed for: Gamers, Streamers, and Esports Personalities
Also great for: Bloggers, Podcasters
With black and neon color palettes and futuristic fonts, Streamer brings gamer vibes right out of the box. With Streamer, you control your content in one central location: share exclusive team updates, rep your sponsors, create custom content, or upload a complete library of your Videos On Demand directly on WordPress. Cross-platform fans can become subscribers to get your fully-branded content directly in their inbox.
Got merch? With WooCommerce for Spotify, you can sell personalized products directly on your Streamer website.
Also great for: Bakeries, Microbreweries, Product-Forward Brick & Mortars
When you’re a visual creator, you want your images to take center stage. With Veuo’s full-width image gallery, your homepage will feel like a bespoke, archival experience. A neutral color palette and unobtrusive text ensure that your artistic style, not the template, defines your website’s ultimate look and feel. When viewers click on an image, they can see it in higher resolution alongside any additional information you’d like to provide. Have multiple oeuvres or themes within your portfolio? Automatically create clickable subcollection pages with tags.
Add your bio or artist statement alongside social media links in your footer, making it easy for fans and potential collectors to follow along on your creative journey. Whatever your style, you can be sure that Vueo will let your work shine.
Ready to try out a new look for your website in 2025? You can explore these themes further by clicking on the Preview link and then clicking “Demo site” at the top of the page. There, you’ll be able to explore a clickable sample site to get a better sense of the theme’s appearance and feel.
Once you’ve found a theme you love, you can click the “Activate this Design” button to customize it. Any new blocks or features you add from WordPress’s suite of tools will be automatically adjusted to match your new theme’s style.
Premium themes from Automattic are available at no extra charge for customers on the Personal plan or above.
You can explore our extensive selection of free and third-party themes by navigating to the “Themes” page under “Appearance” in the left-side menu of your WordPress.com dashboard. Third-party themes can be purchased for $99/year each on the Business plan and above.
Want to make your blogging life easier with just one tool? Start using an editorial calendar. Let us show you how to create one.
It takes discipline to run a successful blog. Without something to organize your publishing schedule, it’s easy to waste time wondering what you should write about, and hard to hold yourself accountable for meeting deadlines. With a well-designed content calendar, you can burn less mental energy thinking about your blog, and focus more clearly on your writing.
The end result? You produce better content with less effort. It’s win-win.
Editorial calendars are easy to set up too, so there’s no excuse not to use one. In this post, we’ll cover the following (and more):
How to build one in under five minutes using a simple spreadsheet (with a free template you can copy).
How to establish a sustainable posting schedule for your blog.
How to generate tons of blog post ideas to keep your calendar full.
Plus, we’ll even get into some advanced tools and tactics you can use to level up your calendar and content planning game. A better blogging future awaits you.
An editorial calendar is a visual schedule of the content you will publish on your blog (or other channels). They document the topics you will cover, when you’ll publish each piece, and other important information. Typically, they are created using spreadsheets or dedicated software.
Bloggers and marketers have borrowed the concept of an editorial calendar from the journalism world, where writers and editors have been using calendars to keep organized for decades. No matter what type of content creator you are, you can benefit from using such a calendar too.
Why should you really use an editorial calendar?
The obvious reason to use a calendar is to get organized. But why does getting organized matter and how does that translate into being a more successful blogger? Here are a few ways that getting more organized is directly connected to better blogging results.
Destress your blogging life
Developing a consistent writing practice is challenging. Knowing what you will work on, before you sit down to write, can help you spend less time wondering what to write so you can focus on the words. If writing is less stressful and more satisfying, you’ll be more likely to stick with it.
Produce writing that you’re proud to publish
You’re more likely to produce writing you’re happy with if you aren’t mentally overwhelmed. Anything you can do to get control over your blog (whether by planning ahead, writing clear outlines, or anything else that helps you get organized) will help make you more successful.
Get better results from your blogging efforts
It’s easy to think that becoming a successful blogger is all about creativity. While creativity is important, the real foundation for success might actually be having strong processes in place. An editorial calendar can form the foundation for your blogging workflow, helping you plan what you will publish in advance, so you can flex your creativity without worrying about distractions.
How to create an editorial calendar in five minutes
There are many different tools you can use to create your calendar. Let’s start by building one with Google Sheets (though you can use any spreadsheet or similar tool you’d like, such as Airtable, Clickup, or Excel).
Create a new spreadsheet and add your top row
First, create a new spreadsheet, and add a top row with the following labels:
Date
Topic
Category (these should match your blog categories)
Status
Author (if your blog will have more than one author)
Published Link
It should look something like this:
Add rows for months under column A
Next, add some placeholder dates and columns for future months. This will help keep your calendar organized as the year progresses:
Add a dropdown selector under the Status column
If you’re using Google Sheets, click Insert, then click Dropdown. This is how we’ll add status selector options that will make it easy to see the progress you’re making on each post:
Add basic labels that outline your writing process. At a minimum, include Not Started, In Progress, and Published. You could also consider adding steps for Editing, Graphic Design (if you’ll be creating visual assets for your posts), or any other steps that may be specific to your workflow. Use the color selectors to color-code each status too:
Then, click the blue circle on the lower right corner of the cell, and drag it down to add the dropdown to each cell. Copy and paste works as well:
Start adding some ideas
Now you’re ready to start adding topics to your calendar. Here’s how things might look once you have a handful of post ideas lined up:
Or you can download this template
You can also use the button below to find a finished version of this editorial calendar template. Click the button, then click File > Make a Copy to create your own version:
Creating your calendar with a spreadsheet is the easiest way to get started. They are simple to set up and can be customized to suit your needs.
However, there are many more options for editorial calendar tools you can choose from. Let’s look at some options you can consider when you’re ready to upgrade from your spreadsheet.
Trello
Trello is a simple Kanban board-style project management tool. They offer a free plan and a couple different editorial calendar templates that can help you get set up in a few clicks. It’s used by publications like Wired and offers a lot of task management capabilities that you aren’t going to get with a spreadsheet.
Similar to Trello, Asana is another projectment management tool that can be used to create an editorial calendar. It’s a bit more robust than Trello but with a slightly higher learning curve. Their free plan offers all the capabilities that bloggers should need to manage your calendar and tasks.
Edit Flow is a long-running WordPress plugin for managing your editorial calendar and workflow directly within WordPress. It’s free, full-featured, and easy to use. As a WordPress.com user, you’ll need to choose a plugin-enabled plan to install it (Business and above):
Here is another WordPress plugin option, appropriately titled Editorial Calendar. This plugin is actively maintained and free to use. If you’re on a plugin-enabled WordPress.com plan, you can install it now here:
CoSchedule
CoSchedule’s Content Calendar offers a beautiful editorial calendar option that’s packed with powerful automation features so you can schedule all your blog publishing and social promotion in one tool. They also have a WordPress plugin available. Their free and lower-tier plans are suitable for bloggers, while their more advanced packages are built for marketing teams.
Establishing your publishing cadence
There is no right answer to how often you should post on your blog. With that said, sticking to a schedule will help you publish regularly, build discipline, and be a more successful blogger.
Determine how often you’ll publish
If there is a recommendation we can offer for determining how often to post, it’s this: you should publish as often as you have something worth sharing on your blog.
That’s not a very specific recommendation though. If you’re looking for some structure to follow, set a goal to publish one article in your first month. Continue adding another post each week, until you’re publishing something at least once a week.
There’s no science behind this. When you’re trying something new, starting small and working your way up can be a good way to build endurance, without immediately burning out.
Example of a basic blog publishing schedule
Month 1
Publish one post by the end of the month.
Month 2
Publish one post every two weeks.
Month 3
Publish one post every week and a half.
Month 4
Publish one post every week.
Determine what days you’ll publish on
From a technical standpoint, there are no specific days that are best for publishing blog posts.
With that said, publishing on specific days can help you develop discipline and hold yourself accountable. It can also help set expectations for readers, who may wonder when they should expect new content from you, especially if they subscribe to your blog via email.
Here are some general guidelines to help you choose which days to publish:
Web traffic is generally highest early in the week. It starts to decline on Fridays, and is lower on weekends. This is supported by Wise Owl Marketing; the author of this post has been blogging weekly since 2007.
If you have email subscribers to your blog, consider publishing in the morning, so you can start the day at the top of your reader’s inbox.
Consider your own schedule and when it’s easiest for you to regularly write and publish.
How to keep your editorial calendar full, all year long
No matter which tool you use to build your calendar, you’ll need content ideas to keep it full. Let’s look at some reliable methods and processes you can follow to make sure you never run out of things to write about.
Write what you’re most passionate about
If you’re starting a blog, it’s likely you have something to say. Are there any burning issues you can’t wait to write about? Ideas that you’re desperate to share with the world? Stories that can’t wait to be told? Add them to your calendar and turn them into reality.
Brainstorm a month of blog post ideas in 30 minutes
Whenever I’m asked about blog post ideation, I always recommend this process. It’s one I picked up from a previous employer, and it’s time-tested because it works. Follow these steps:
Spend 10 minutes writing down as many ideas as you can. Don’t think about them too hard. Just get them written down, either in a doc, or on Post It notes.
Spend 10 minutes scoring each idea a 3, 2, or 1. 3’s are your best ideas, 2’s are ideas that need some work, and 1’s are duds. You will have ideas in all three buckets.
Spend 10 minutes sorting through your 3’s and add them to your calendar. These are your very best ideas, that you feel most strongly about.
Now, in just half an hour, you should have enough ideas to write about for at least a month.
See what people are talking about on Reddit
Find relevant sub-Reddits to the topics you write about and gather ideas. This guide from Better Web Movement has some tips on how to find subreddits that are relevant to your niche. Even better, be an active participant in Reddit communities that are relevant to the things you write about (though you’re probably doing this anyway if you’re passionate about what you cover).
Use an RSS reader to follow other blogs and publications
It’s safe to assume you follow publications and other blogs that are relevant to you on social media. If you’re not using an RSS feed to keep up with your industry or community too though, you might miss out on important stories or articles that could spark your own inspiration. RSS is great because it’s less noisy than social media; you just see the latest articles, without distractions.
Here are some options for RSS and news reader apps you can try:
Feedly: A popular option for a basic RSS feed reader.
Inoreader: Another great option for a basic RSS feed reader.
WordPress Reader: Built into your WordPress.com website. It follows all WordPress.com blogs and self-hosted WordPress sites that use Jetpack.
Use SparkToro to learn about your audience’s interests
SparkToro is an advanced tool used by marketers to conduct audience research. Even if you’re not a marketer, and can only afford their free account, it’s still useful for gathering insight about where your audience spends time online and what they might want to read about.
Conduct keyword research to uncover popular search topics
Google processes over eight billion searches per day. At least a few of those clicks should go to your site, right? If you blog about evergreen topics (meaning topics that are always relevant and not time-sensitive), then paying attention to SEO and keyword research is essential.
Here are a few basic keyword research tools you can use that will help you find the terms people search when they’re looking for information about the topics you cover:
Google Keyword Planner
Google’s free keyword research tool shows how often keywords trigger ads to appear in search results. It can be useful for SEO too, helping you understand how often potential readers search for specific information:
Ahrefs Free Keyword Generator
Ahrefs is a professional SEO tool that’s built primarily for marketers. Their free Keyword Generator tool is useful for bloggers to gather a quick list of basic ideas:
Answer the Public
Answer The Public makes it easy to enter a keyword or two, and then generate a large list of questions people ask related to that topic. It’s a quick way to turn one idea into dozens or hundreds of ideas:
Some common questions people ask about editorial calendars
Before we go, let’s go over a few final questions you might still have (or didn’t know to ask).
Is there a difference between an editorial calendar and a content calendar?
The short answer is no. The longer answer is that people sometimes use these terms in very slightly different contexts. When people say “editorial calendar” they’re often referring to blogging or news publishing, while the term “content calendar” is sometimes meant to include social media, video, and other content formats. Functionally though? They’re the same thing.
Is an editorial calendar the same thing as a content strategy?
An editorial calendar documents what content you will publish. A content strategy is much more complex and encompasses an overarching plan for the who, what, why, and where of all things content on a given website. An editorial calendar might visualize the execution of your strategy, but it’s not a strategy by itself.
How far in advance should you plan your calendar?
This is another area where there are no rules. Having at least three months worth of ideas will ensure you’re never wondering what you should write about. If you can reach a point where you have two to six weeks worth of content written and scheduled in advance, you’re in great shape.
If you can’t reach that level though, that doesn’t mean you’re doing it wrong. In fact, if your blog is focused on covering news or events as they happen (such as a sports blog or local news site), then planning too far ahead might not be possible or even desirable. This is a good reminder that not all blogging advice applies to everyone equally (not even the advice in this post). So, if something sounds like it’s not applicable to you, don’t worry about it.
Your blog + an editorial calendar = success
You now have the knowledge and tools to plan and organize your blog content like an expert editor. Your stress-free future of blogging success awaits!
Studio Sync makes it simple to publish your local WordPress site with powerful WordPress.com hosting. Here are a few of our favorite use cases:
Push and Pull with Ease: You can keep your local Studio sites connected to your WordPress.com site, so pushing or pulling will be as easy as clicking a button.
Flexible Syncing: Having complete freedom, you can connect a WordPress.com site to multiple Studio sites.
Team Collaboration: Multiple developers can connect a local Studio site to a shared WordPress.com site, making it easy to push and pull changes as a team.
Sync To and From Staging: If using staging sites are part of your development workflow, you can now easily push from your local Studio site to your WordPress.com staging site.
One-Click Bliss: No need to worry yourself with database dumps, manually syncing files over SFTP, or performing other monotonous manual steps. Synchronize your local and hosted sites at any time with just one click.
Connect your site
You can connect any of your WordPress.com sites on a Business plan or higher. Use built-in search to locate your site and quickly see if the site has a staging environment available.
Push and pull
Pull to synchronize your WordPress.com site changes with your local Studio site, or push to deploy your local Studio site changes to your WordPress.com site.
Launch your Studio site on WordPress.com
Ready to publish your local Studio site for all the world to see?
Simply click Connect site on the Sync tab, and then you’ll see an option to purchase a new hosting plan for your Studio site at WordPress.com.
Ready to get started with Studio Sync?
You can start taking advantage of this new Studio Sync feature in just a few steps:
So, you are considering creating a personal website. Congratulations! In my opinion, that’s one of the smartest decisions you can make.
Building a website for yourself allows you to claim your own little part of the Internet. A space you fully control and that nobody can take away from you. Where you make the rules, determine the look and feel, and express yourself in any way you want.
If that sounds worth pursuing, this post covers everything you need to know. It will talk about the nature and benefits of a personal website, then give you step-by-step instructions on how to build one using WordPress. From picking a website address and basic design to creating pages, adjusting design elements like fonts and colors, and adding extra functionality—it’s all here.
A personal website is pretty much what it sounds like. It’s a website that belongs to you and allows you to represent who you are and what you do in whatever way you want.
You can control the design, content, functionality, and everything else about it.
Why would you want to build something like that for yourself?
Let’s talk about that for a minute.
Benefits of building your own website
Yes, there are other ways you can build a brand or profile online. For example, many people use social media as their main outlet. But, putting all your eggs into that particular basket is also risky.
There’s always a chance you can get banned or hit with an algorithm change that cuts your reach. Anybody who is old enough to remember when you could build an audience for your Facebook page without spending money on ads can tell you that much.
Or, just imagine, your favorite outlet gets bought by a person or company you don’t like and don’t want to support, so you feel compelled to start over on another platform. Sounds far-fetched, I know, but it could mean all your hard work is gone from one day to the next.
This can happen because you don’t actually own your social media account. The platform you are on does, including all the content you publish. And what’s not yours can be taken away from you.
In contrast to that, creating your own personal website, especially if you do it with a system like WordPress, means building something permanent. You fully own it and can take it with you wherever you want.
Plus, it allows you to do things that you can’t always do on social media, like:
Change the design
Publish detailed, long-form content
Sell goods and services
Tell people more about yourself
Get inbound traffic from search engines
Show off your portfolio
Build a central hub to consolidate all your online outlets
And much more…
Types of personal websites
So far, the definition of a personal website has been relatively broad. The reason for that is that it can take many forms depending on your purpose:
About Me website – Simply introduce yourself and who you are. It can work as an online resume, business card, or just a fun project.
Blog – If you are going the blogging route, you can dive deeply into a topic that interests you, grow a following, build expertise, and maybe even create a business.
Newsletter – You can also use a personal website to build a newsletter. This works well when combined with a blog. You can use content to attract an audience and then get them on the newsletter to stay in contact easily.
Portfolio – If you are an artist or any type of creative professional, a personal website is where you can show off your portfolio (also works for developers). It gives people an impression of what you can do and also allows them to get in touch with you directly, e.g. via a contact form.
Thankfully, as you will see below, the process of creating a personal website is also very flexible, so it can accommodate whatever you have in mind.
How to make a personal website
I’ve been building websites for more than ten years. If I were in your position and wanted to create a website for myself for the first time, here’s how I would do it.
1. Choose your hosting plan
Hosting basically means renting space on a computer that’s connected to the Internet. That’s where you save your website files so that others can access them with their browser.
With WordPress, you are free to choose your hosting provider since it runs on almost any server setup. WordPress.com is a great option because it’s managed hosting.
That means it takes care of a lot of the more technical parts of running a personal website, namely:
Installation – The website is automatically created for you. There’s no need to upload files to a server, create a database, or run an installation.
Ease of Use – Everything that has to do with managing the website happens in the same, beginner-friendly interface. You don’t need to switch back and forth between the hosting provider panel and the website; it’s all in the same place.
Speed – Performance is a very important topic for user experience. WordPress.com’s servers get the most out of the CMS and store copies of your website across 28+ data centers for super fast delivery.
Security – Jetpack is included on every WordPress.com site and provides daily security scans, automatic backups, brute-force protection, downtime monitoring, and more. Plus, you get encryption, firewalls, activity monitoring, DDoS protection, and automatic software updates with every plan.
While you can also implement the above manually, by choosing managed hosting, you can fully focus on the important parts of creating a personal website instead: its design, content, and growth.
If that sounds like the right choice for you, all you need to do is pick a WordPress.com plan.
The Personal and Premium plans are most suitable for simpler websites with fewer pages and for writing a blog. If you want to add extra functionality via plugins or even sell things on your personal site, Business or Commerce might be more your speed.
Each plan comes with unlimited visitors, posts, and pages. If you go for a yearly plan, you also get a free domain for one year. That brings us to the next point.
2. Pick a domain name
The domain name is what your visitors will type into their browser bar to reach your personal website.
An important aspect to pay attention to here is the domain ending or top-level domain (TLD). You know, the .com, .org, or .net part.
For example, if your site is for a particular country and language, it can make sense to use a country-specific domain ending like .de (for Germany) or .co.uk for the United Kingdom. Another example is that as a writer or artist, you could also use a .blog or .portfolio.
The main part of your domain, the name, is also important to think about. It should be easy to remember and convey trust. You can find more tips in this post and the video below.
Simply search for your desired name and hit enter. The tool will tell you if it’s available, the cost, and alternatives.
Select your choice and go through the purchasing process. As mentioned, if you host your website at WordPress.com, you get a free domain with an annual plan that can be automatically assigned to your site.
But don’t worry if you can’t make up your mind right now. You can skip this step in the beginning and settle on your domain name at a later time. Your website will live at a temporary address until then.
3. Select a theme
In WordPress, themes are what control the basic design. They are website blueprints that contain colors, fonts, layouts, and other design elements. As a consequence, you can alter your WordPress website’s look and feel—quite dramatically—by simply activating another theme.
Same website, different themes.
Another benefit is that there are themes specialized in building particular types of websites like restaurant sites, travel blogs, photography sites, and more. They come with features, layouts, and design elements specifically for these use cases, making getting started much easier.
In addition, themes are just starting points, not destinations. You can also still customize them completely later on as you’ll soon see.
Applying a theme to your personal website is super easy. You can check what’s available by going to the theme directory or Appearance > Themes in your WordPress.com admin interface.
Use the controls on top to search for a particular theme or filter by topics and plan. Click on any of them to learn more about it.
You’ll find a description and list of features as well as a preview on the right. Many themes come with style variations that apply different color schemes and fonts. You can try them out directly on this page.
In addition, you can see what your current website would look like with the new theme by clicking the Preview & Customize button. The editor that appears allows you to customize it further, e.g., try out style variations on your site.
You can save your changes and activate the theme immediately with a click on the button in the lower-left corner. Alternatively, do it from inside the theme menu.
4. Add a homepage and customize it
With the basic website in place, it’s time to learn how to create and customize pages, starting with your homepage.
Set up a new page
Navigate to Pages > Add New Page in your WordPress.com admin interface.
This will open the WordPress Page Editor. When creating a fresh page, you’ll be prompted with a collection of pre-defined layouts you can use to quickly populate it.
These layouts include categories such as About, Services, Contact, Blog, and more. If you find something you like, simply click it to insert the layout into the editor. Alternatively, you can start with a blank page and completely customize it yourself.
Add page elements
The WordPress Page Editor works with blocks, which are singular content elements of different types. For example, a paragraph block is automatically created when you write and press the Enter key. Other examples for blocks are:
Headings
Lists
Buttons
Images
Tables
Columns
Grids
You find a full list of available blocks when you click the big blue “+” button in the top left corner.
They are ordered by category, and you can also search for specific blocks. Clicking on any of them inserts it into the editor at the current position of your cursor.
In addition to individual blocks, the Patterns tab offers pre-designed collections of blocks, such as contact forms, galleries, team member sections, newsletter sign-ups, and more. These patterns can help you quickly create layouts without having to build everything from scratch. You insert them the same way.
Another method to add blocks is by clicking the small “+” button that appears when you place your cursor within the editor. It lets you search for a block by name and click it to insert.
Even easier, type a forward slash (“/”) in any empty line, start typing the block name, and select it using your mouse or keyboard.
To understand and manage the structure of your page, use the Document Overview tool in the top left corner.
Customize blocks
Clicking on a block brings up an options bar at the top and additional customization settings in the sidebar.
The options vary depending on the block type. For instance:
A paragraph block lets you adjust font size, color, text alignment, and more.
A button block allows you to customize alignment, style, color, dimensions, and shadows.
It takes some trying out to know what you can change for which type of block.
Be aware that these settings apply only to the specific block on the current page. For global design changes—like applying a new font to all headings—you’ll need to use the global Styles settings, covered later.
Once you’ve designed your homepage to your liking, save your changes and publish the page.
Set it as your front page
To make your newly created page your homepage, go to Settings > Reading in the WordPress.com admin dashboard. At the top, you’ll see two drop-down menus that allow you to define which page serves as your homepage and which one displays your blog posts.
Select your new page under Your homepage displays and save the settings.
Your homepage is now live! For more information about pages in general, check the documentation.
5. Add more pages and a menu
You can use the same workflow as above to create additional must-have pages for your personal website, such as:
About page
Contact page
Services
After that, you’ll likely want to include them in a navigation menu so that your visitors can reach them easily.
Sitewide changes like this happen in the Site Editor. You can access it via Appearance > Editor. The Site Editor works similarly to the Page Editor but allows you to edit additional parts of your website.
In many cases, your theme already includes a navigation menu. In our example, it appears as part of the header. One way to edit it is to click Patterns and Header, though you might need to know the name of your header pattern to pick the right one.
Alternatively, click the header element in the main editing window and then choose Edit.
Either gets you to the editor below.
Here, select the Navigation block (again, Document Overview is your friend).
You can then add and subtract menu items and other elements, rename them, and also change some design options in the sidebar.
Make adjustments as needed, then save to make them appear on your website.
Note: In some themes you control menus in the Site Customizer instead. You can find more information here.
6. Customize fonts and colors
The Site Editor is also where you can make global design changes for your website. You’ll find these options in the Styles menu in the top right corner of the editor.
Here’s what you can change:
Browse styles – Switch between style variations, color palettes, and font combinations your theme ships with.
Typography – Make changes to the font family, size, appearance, line height, letter spacing, and more for body text, links, headings, buttons, and other text elements on your site. You can also change font size presets here.
Colors – Add colors and gradients to use in the editor, try out existing color palettes, and customize colors for text, backgrounds, links, buttons, headings, and more.
Background – Give your website a background image.
Shadows – Set up presets for drop shadows to use them in the editor.
Layout – Define basic layout settings such as content width, global padding, and block spacing.
Blocks – Make design changes to particular block types that apply sitewide.
A cool feature to preview changes in real-time, is the Style Book option in the Styles menu. It provides an overview of how your site’s design elements will look.
Let’s go over some use cases to help you understand all of this information
Change heading fonts
You change the font of your headings under Typography and then Headings. To make things easier, open the Text tab in the Style book to see all headings at once.
Pick which heading type to customize, then apply your changes. For example, if you want to prevent your H1 headings from turning into all caps, choose the “H1” option, then set Letter Case to None.
To change the background color of your website, go to Colors and then click Background.
Pick from the theme palette (you can choose a different one at top) or define a custom hue. That’s it.
Modify button shadow
To make changes to a single block, click Blocks.
Either scroll to the button block in the list or use the search functionality to find it. Click it.
Find the Border & Shadow option at the bottom. A click on Drop shadow allows you to apply different kinds of shadow effects to all of your buttons.
7. Edit page templates
Templates define the design and layout for certain content types across your website. To access them while in the Site Editor, click on the WordPress logo and then Templates.
You’ll see a list of all existing templates on your site such as single posts, pages, and archives. For example, you might want to adjust the layout of your blog posts. For that, click the Single Posts template, to start editing it.
Let’s say your goal is to switch the position of the post meta to appear under the title.
For that, simply choose the post-meta block and move it up.
When you now save, the changes apply to all blog posts on your website.
Plugins let you change and enhance the functionality of your personal website. If you are on a Business or Commerce plan, you can install them in the Plugins menu.
Plugins cover a wide range of features that they can contribute to your website, such as:
Improve search engine optimization (SEO)
Add an Instagram feed
Limit login attempts
Accept payments with different providers
Connect your website to Google Analytics
You can find plugins by using the search functionality at the top or browsing through categories. To learn more about a plugin, click on it. If you like what you see, click the big Install and Activate button.
Once the installation is finished, you can start using the plugin’s functionality right away.
Your personal website is your own piece of online real estate. It’s yours to do with as you please and, unlike other online profiles, can’t be taken from you.
Designing and developing websites is complex. User expectations rise alongside advancements in what is technically possible. As a consequence, the process has many moving parts you must keep in mind if you want to design and build web presences that provide a great user experience, rank well in search engines, and achieve client goals.
Even as an experienced freelance or agency developer, you might struggle to remember every item on the to-do list. The good news is, you don’t have to. By establishing a formalized web design process, you can create a roadmap to follow each time you build a new website.
Doing all the thinking beforehand ensures that you don’t forget anything crucial. It also frees up headspace for doing the actual work, avoids overwhelm, improves efficiency, and allows you to build better websites on repeat.
In this post, we’ll help you reap those benefits by establishing your own web design process. We’ll go through all the necessary steps and give you actionable advice on how to implement each and every one of them. This will give you a foundation to develop your own workflow and make life easier in the future.
How to use this information to develop your own process
We’ll go over the following steps (you can click on the links to jump directly to the part that most interests you):
Goal-setting
Scoping
Resourcing
Project management
Sitemap / wireframes
Copy / content creation
Staging site setup
Visual design
Testing
Launch
Site maintenance
Our goal is to cover each point as completely as possible to provide you with a blueprint for developing your own process. Take what’s useful and relevant to you and add any additional information you might need for your particular use cases, working style, industry, or else.
Be aware that a formalized web design process is a living document that you’ll likely change over time as you repeatedly go through it and as web design requirements change. That way, it always reflects your latest way of working and current level of technology.
To make getting started extra easy, we also created a customizable checklist template. To use it, just create a copy and adapt it to your needs as you go through the information below.
1. Determine website goals
The first thing you need is background information on the website you are about to build. The main objective is to understand its purpose, as this lays the groundwork for many decisions down the line.
For that, your first task is to understand who your client is. Their type of organization, industry, and audience make a big difference in the end product. Good questions to ask are:
What exactly does your business do?
What are the company’s vision, mission, and/or values?
How do you differ from the competition?
Which problems do you solve for your customers?
Which challenges, opportunities, and trends are shaping your industry?
What regulations or compliance requirements does your industry have?
Is there an existing brand identity?
Once you have a better picture of the client, the second step is to find out how the website fits into their business. This is a set of questions that will help you do so:
What’s the goal you hope to achieve with the site?
Who is the intended audience? What’s the first impression they should have when entering the website and what actions should they take on it?
What type of content are you planning to publish?
What are must-have features and functionality?
How should the site be different or the same as that of competitors?
What’s the budget and timeline?
Questions like this are important for several reasons. First of all, lots of industries have distinct conventions when it comes to website design. For example, you would use a very different color scheme for a children’s toy store compared to a corporate financial services website. The client might also already have existing branding that you have to take into account to preserve an established look and hit the right tone.
In addition, the type of site you will build also has a big influence on the web design process. A brochure website, blog, and online shop all have very different purposes and require unique approaches. There can even be legal requirements that you have to meet. For example, on real-estate websites, visitors might have to virtually sign a contract before they can view portfolio items.
Without being crystal clear about what you are making and for what purpose, you are almost certain to get off on the wrong foot, which can be costly and time-consuming to correct. Therefore, spend enough time on the discovery phase until you have a firm grasp of the client’s needs. Extensive contact with stakeholders, market research, audience personas, a design brief, and competitor analysis are all useful tools for this stage.
2. Scope the project
Once you know what you are tasked with designing, the next step in the web design process is to put together the project scope. This is where you determine the exact functionality and technical requirements for the site. It also helps you estimate how long the process will take, allowing you to agree on the exact work to be done (to prevent scope creep) as well as deadlines and milestones with your client.
Ask your client for these basic pieces of information:
How many pages does the site need?
What will they contain? Do you have to account for things like forms or e-commerce functionality?
What other features will be on the site?
What about content? Will the client provide it, or is that part of your duties?
Once you have collected key information, you can estimate how long the total project will take. Be sure to build in some buffer for when, not if, something unexpected happens.
A very useful tool for visualizing the timeline is a Gantt chart.
It shows the project timeline, key deliverables, and their expected completion times. You can easily create Gantt charts using existing Excel or Google Sheets templates.
3. Identify and allocate resources
After this, it’s time to deal with your resources, including money, workforce, and tools. Let’s go over them one by one.
An established scope makes it easier to calculate project costs. For example, it helps you see how many hours it will take and calculate the cost of labor. However, don’t just think about the time—also consider external costs, such as:
Be sure to calculate these beforehand for yourself and to provide an accurate estimate to your client. We have a checklist for website costs if you need a refresher. For hosting options, consider:
If you need a free tool for local development, check out Studio.
Another part of resourcing is determining who will do the work. If you’re a freelance full-stack developer, you might handle everything yourself. If you’re part of an agency, the work will likely be divided between the design and development teams. Either way, ensure there’s a clear plan and everyone knows what’s expected of them.
4. Prepare your project management platform
By now, you should have a good overview of the work that awaits you. It’s time to put it into order and make it more manageable.
The first step is to list all the phases and tasks the project will go through and add them to a project management tool. This also allows you to bring them into the correct order. Recommended tools include:
As mentioned earlier, you can also use the free checklist template included in this article.
Feel free to break the phases down into smaller chunks if that’s how you prefer to work. In addition, include all the resources you already have and attach them to their respective tasks. While you are at it, don’t forget to input the timings and milestones you determined earlier for each item. This will help you stay organized.
By the way, your planning should also include regular check-ins with clients for approvals and updates. This fosters collaboration and ensures everyone stays on the same page.
5. Create a sitemap and wireframes
From here, it’s time to start conceptualizing the end product and create a plan to follow along.
You’ve already determined the must-have pages for the website in the project scope. These often include the usual suspects (homepage, about page, contact page, legal pages, etc.), but you might also have less common ones depending on the project. The next step is to put them into relation to each other and plan the site structure. You can do so with a basic sitemap.
The way pages are arranged greatly influences a website’s navigation and user experience. For example, it determines how easy it is to find content and how often visitors have to click to reach it. A good structure also makes the site more crawlable, giving it an SEO boost.
Part of the site structure are also navigation and menus. They point out important pages and are often an initial entry point for visitors, so it’s important to consider them as well as other navigation elements like breadcrumbs.
Once you have the overall structure, the next task is to visualize individual pages. This is where you create layouts for each page and determine how elements will be arranged—a process also known as wireframing.
Wireframes let you map out the page structure before dealing with design considerations. They help you focus purely on usability and are a great tool to collect feedback from clients. Be sure to also map out your mobile layouts!
You can create wireframes using a variety of tools:
Graph paper – Go old school with pen and paper.
Google Docs – While not the best option, it still works. Tables are your friend.
Professional design tools – Options include Balsamiq or Figma. If you use Figma, consider using a wireframing kit like Johannes WP, which is specifically made for wireframing WordPress websites.
With the concept finished, you can start creating the visual parts of the website. Ideally, this doesn’t start with colors, fonts, and CSS but rather with written content.
While this might seem backward, it actually makes a lot of sense. Design should follow content, not the other way around. You don’t want to find yourself in a situation where you have a finished design but it can’t accommodate the intended text.
Writing copy doesn’t just mean crafting text for the main sections of the page wireframes you created earlier but also for navigational elements, buttons, forms, and other page elements.
There are several ways to handle this step:
Receive the content from the client
Draft the copy yourself (if that’s part of your agreement)
It’s important to be a bit flexible here. Content might still change and not everything has to be fully ready. It’s fine to use placeholders for some parts, like product descriptions.
However, you want at least a rough idea of what you need to accommodate in your page designs before you start creating them. This saves you from having to make time-consuming changes later.
7. Set up a staging site
Now that you’re ready to work on the actual website, it’s crucial to set up a development version. As a professional web developer, you know better than to do the design process on a live domain.
Once that’s ready, you can immediately start creating the raw structure of the site. This includes setting up all the pages you scoped earlier and creating navigation items pointing to them.
While you’re at it, you can also install any plugins included in your scope, implement features like forms, and insert written content into the appropriate places to create a rough version of the site.
8. Create the visual design
The next step is visual design. This is where you implement the structure from your wireframes and make it look good with fonts, colors, and other elements that create the website’s aesthetic.
This part of the process often happens in two phases: first creating a design mockup and then implementing it. In a WordPress website, the central element for that is the theme, which controls the website’s design.
Here, you can either go with an existing theme or create your own. If you have a WordPress.com Business plan, either is an option since you can upload any third-party theme you want.
Obviously, making a theme from scratch is more work though it gives you the possibility to create a bespoke solution. Going with an existing theme takes less effort, yet it might not have all the features you want or need.
The most time-friendly solution is often to take a hybrid approach. That means finding a theme that is very close to what you are looking for in terms of design and functionality, and then customize it according to your needs.
Thanks to block themes and the WordPress Site Editor, this has become simpler than ever. For example, you can adapt visual elements like colors easily using Styles and/or the WordPress Customizer.
In addition, the Site Editor gives you control over all typography available on your website. You can assign a multitude of fonts to any text elements on your website.
Finally, your website will likely also include visual page content, such as photos, icons, graphics, or videos. Depending on your contract, these might either come from the client or be something you create. Be aware that you have the possibility to source free images directly inside the WordPress.com editor.
First, there is the Jetpack AI image creator. Simply insert an Image block and choose Generate with AI.
Then, input your prompt in the panel that shows up.
You can also insert images from Openverse and Pexels.com by clicking the Block inserter button and choosing the Media tab.
Search for any image and click on a result you like to automatically add it to the editor, complete with the correct attribution.
9. Test the website thoroughly
Already done with the design? Alright hot shot, let’s move on then. Now it’s time to get to testing, which is one of the most crucial stages of the web design process. You don’t want to launch a website only to find parts or even the entire site not functioning correctly.
Testing should ideally happen on a staging site, especially one that uses the same environment as the eventual live website. This allows you to spot potential conflicts or problems that didn’t surface during development.
Here are the most important things to examine each page for:
Double check the content – Content is the main attraction of any website. Go through all pages to ensure there are no typos, missing images, or other errors that detract from the user experience.
Ensure all features work – Test all central functionality, such as web forms, shopping carts, and interactive elements. For example, see that form submissions reach the intended destination.
Verify all links – A well-planned site structure is only effective if users can actually use it. Make sure that links go to the correct destinations and are not broken. A tool like Screaming Frog lets you scan for broken links in bulk.
Check SEO – Make sure all pages have correct meta information, such as title tags and meta descriptions. Screaming Frog also allows you to scan for that.
Measure speed – Page speed is a major usability and ranking factor. Run all pages through tools like PageSpeed Insights to identify performance bottlenecks and fix them. You can also use WordPress.com’s free Site Profiler tool.
Test on different devices and browsers – Since most users access websites on mobile devices, ensure the site looks good on all screen sizes. Test the site on multiple browsers as well.
Validate accessibility – Modern web design must meet accessibility standards, such as WCAG guidelines. Check for sufficient color contrast, keyboard navigation, and compatibility with assistive technologies using tools like Lighthouse (which is also part of PageSpeed Insights) or WAVE.
Invite your clients or other stakeholders to get involved in testing as well. Fresh eyes can catch issues you might have missed. Plus, you’ll need client sign-off on the website before launching. User testing is also a possibility at this stage.
10. Launch
With testing complete and any problems resolved, it’s time to publish the website. Here, too, having a detailed launch checklist can be extremely helpful to ensure you don’t overlook anything.
After all, there are important things to do, such as connecting Google Analytics and Search Console, setting up security measures, creating user accounts, and configuring backups.
When you set a launch date, be sure that any promotional efforts, such as social media updates and email campaigns, are prepared in advance. This coordination ensures that your website makes a big splash as soon as it goes live.
11. Do regular site maintenance
While the website design process is mostly done after launch, it doesn’t mean your work is over. Websites are ongoing projects that require regular maintenance to stay functional, secure, and effective.
Here are some common maintenance tasks:
Addressing smaller bugs
Publishing and updating content
Creating new pages
Building traffic
Performing software updates
Conducting security audits
Running backups
Measuring KPIs through analytics
Smart developers have a plan for maintenance to continue creating value for clients—and revenue for themselves.
Of course, it’s best to automate as much of this work as possible. For example, WordPress.com automatically handles backups and updates, so you don’t have to do them manually or set up a separate solution.
You can find a full list of recommended maintenance tasks in this article.
Stay on top of things with your own web design process
Creating a website that meets today’s high standards for design, usability, and performance is no small feat. With countless moving parts to manage, having a structured web design process is essential to stay on track.
By following a plan beforehand, you can save time, reduce errors, and ensure that nothing important gets overlooked. It allows you to focus on delivering results that align with your client’s goals while making your workflow repeatable for future projects. The steps outlined in this article serve as a flexible foundation to help you put together a process that works for you.
Now it’s your turn: What strategies or tools have helped you master the web design process? Share your thoughts in the comments below!
No matter what type of website you want to build, WordPress.com has all the tools you need to build your online home.
Many of those features are powered by Jetpack, a versatile plugin that provides WordPress websites with a suite of essential tools for site security, performance, and more. It’s included with every WordPress.com website (even sites on our Free plan). For self-hosted sites, Jetpack tools are also available on a subscription basis, with bundled and ala carte options.
Jetpack provides WordPress.com with tons of value. It makes sure your site performs well so you can build and create with confidence. But what exactly does Jetpack do and why should you care? Let’s look at just some of the ways Jetpack gives your WordPress.com site superpowers.
What’s inside the Jetpack toolbox?
Jetpack offers tools in four categories to meet your website’s needs: security, performance, growth, and management. Many of these tools are included with free WordPress.com websites, with additional tools unlocked on higher plan tiers.
Jetpack Stats: Understand what’s resonating with your readers
Free; more features unlocked on Personal and above
Use Jetpack Stats to see your website performance at a glance, including how many visitors are on your site and what content is performing best. Quickly see where your traffic is coming from to better optimize your marketing and partnership strategies. Jetpack is fully GDPR compliant so you can track your visitor metrics with confidence.
To access your free stats, navigate to the “Stats” tab in the WP Admin. For even more information on your website’s trends and insights to improve your website’s performance, upgrade to Premium.
Gone are the days of logging into every social platform to share your newest blog post with your followers. Jetpack Social lets you preview and share your content across major platforms – Facebook, Twitter, Instagram, Linkedin, Mastodon, and Threads – with just one click from within the WordPress Editor.
Jetpack Social also enables you to automatically put quick share buttons on your posts, enabling your visitors to share their favorite content with their communities, expanding your content’s reach.
Free; additional features unlocked on Premium and above
With the Activity Log, you always have a high-level view of changes and actions taken across your site, from comments to new posts to downloads. Whether you have a large team of content creators or you’re trying to find the source of a pesky bug, the activity log offers transparency and accountability for every website change.
Free users have access to the 20 most recent website updates. Upgrade to a paid plan to view your complete site activity across your plan’s data retention period.
Free and above (limit 20 requests on Free plan, unlimited on paid plans)
With a suite of AI-assisted tools, creating engaging content for your website has never been easier. Jetpack’s AI Assistant can help you quickly generate text, lists, tables, and AI-generated images. AI can also help you edit existing content, highlight readability challenges, identify tonal shifts, and suggest word and image updates to optimize user engagement on every page.
Jetpack Blocks: Add tons of functionality to your site
Free and above
Blocks make it simple to build pages and add functionality to your site’s content. Jetpack provides WordPress.com websites with several blocks that allow you to embed content, add monetization options, customize forms, and much more. Here’s a glimpse at all the things you can do with Jetpack-powered blocks:
Spam can attack your site faster than you can say “where’s the firewall?” but Akismet Anti-spam offers professional-grade defenses. Using advanced machine learning, Akismet can filter out 99.99% of spam in user-submitted text, including spam comments, bot form responses, and fake leads, keeping your site and CRM looking pristine and professional.
Akismet Anti-spam can be found in the Jetpack section of the WP Admin. From there, you can monitor how much spam has been blocked across your site and choose whether you want to review or automatically delete potential spam messages.
You no longer need a separate platform to get your content into people’s inboxes: Jetpack Newsletter allows you to convert your blogs into emails right from your post-publish page. Jetpack offers tools to support your newsletter from start to finish, from collecting subscribers on your website to sending and tracking your newsletter’s performance – all from within WordPress.com. Already have a dedicated following? Simply import your existing subscriber list to get started.
Accidentally broke your site with a new plugin? Never fear: VaultPress Backup has you covered. With daily backups and additional backups created every time you make an edit, it ensures that your website is crisis-proof.
To enable backups, simply navigate to the Jetpack tab in your WordPress Admin and select “Backup.”
Once VaultPress Backup has been enabled, it will automatically create daily backups of your site and backups after every change, with multiple secure copies stored across the cloud. If you ever want to return to a previous version of your site, click the date arrows to navigate to the date you want to roll back to. Click the “Restore to this point” button to revert your site with just one click.
Do you have a large website with a lot of content? Help your visitors find what they’re looking for quickly by enabling Jetpack Search. You can turn on Jetpack Search and filtering with just one click in the Jetpack tab of WP Admin. Jetpack will automatically index all of your site content and offers flexible design options that match your brand.
For eCommerce sites, this is particularly valuable: research shows that people are 2x more likely to purchase something when they search versus standard browsing.
Help new users find your site with Search Engine Optimization, which helps your website climb up the ranks on popular search engines like Google. With the Jetpack SEO tools on WordPress.com Business plans and above, you can control your title tags and meta descriptions to ensure your site is optimized for search.
You don’t have to be an expert to use Jetpack SEO: Jetpack will notify you if your text exceeds the recommended character count limitations to ensure your metadata looks great in search engine results.
Business plan users and above can install additional plugins to their websites. Let’s look at two top-tier plugins the Jetpack team offers to further extend your site’s capabilities.
Jetpack Boost: Make the jump to lightspeed
Paid plugin
Speed matters: just a one-second delay in website loading times can cause a 20% drop in website conversions, with slow sites causing users to experience stress equivalent to watching a horror movie or taking a math test. With Jetpack Boost, you can get suggestions to optimize your website and give your website a relative speed score. Boost will also optimize your code for ultra-fast response times, no developer required.
For a fully integrated, simple CRM, try out Jetpack CRM (formerly known as Zero BS CRM). Jetpack CRM allows you to manage your customers and website visitors with ease, ensuring you never lose a contact or a sale. With integrations for WooCommerce, Paypal, Stripe, Gravity Forms, and more, you can ensure all your data and sales operations are at your fingertips. Unlike complex CRM platforms, Jetpack CRM keeps things simple so that you can run your business effortlessly.
With Jetpack built into every WordPress.com website, you get best-in-class tools to help build and grow your site, no matter which plan you choose. It’s that special ingredient that helps make WordPress.com the best place to host your website (in our biased opinion). Sign up to create your first website today or upgrade your existing plan to access everything Jetpack has to offer.
The internet is a treasure trove of visuals, overflowing with inspiration and information. Images are what draw us in, keep us engaged, and help us learn, and create. But imagine the internet without those visual cues—navigating it would be a real challenge.
Luckily, for people with visual impairments, those dealing with slower internet connections, and even the robots powering search engines, there’s a simple yet powerful solution: alt text (short for alternative text). This unsung hero of the digital world ensures that everyone can access and benefit from the images we often take for granted.
What is alt text?
Alt text is exactly what it sounds like—a description of an image that appears on the page. Simple, right? But there’s more to it than that. To write truly effective alt text, it’s important to understand why it matters, when an image needs an alt attribute (spoiler alert: not every image does!), and the best tools to help you make sure your images are covered. Let’s dive in and make your alt text work smarter, not harder!
Why alt text is important
Alt text isn’t just a box to check—it’s a powerful attribute that serves two important purposes: making your content inclusive and helping search engines understand your images.
Accessibility
Alt text provides a written description of an image for those who rely on screen readers or encounter issues loading images. It’s there to ensure that no matter the barrier—be it visual impairments or low-bandwidth connections—your content remains accessible and meaningful to all users.
Without proper alt text, you risk not only making your site inaccessible to visitors but also potentially violating accessibility laws like the Americans with Disabilities Act (ADA), which could result in fines or other legal consequences. Similar laws are found throughout the European Union, Canada, the Republic of Korea, and Australia—just to name a few. If you’re trying to make the case for an equitable online experience for your team, this is a great place to start.
Want to learn more about building an inclusive online community? Here are a few resources to get you started:
Search engine crawlers pull several key details from an image, including its file name, captions, title, and alt text. Among these, alt text is the most important for helping search engines understand the image’s subject within the page’s overall content. This information works alongside the other content on the page to enhance search engine algorithms, boost your rankings, and drive more traffic to your site.
When writing alt text, aim for clear, meaningful descriptions that fit naturally with the page’s content. Incorporate keywords thoughtfully, and most definitely resist the urge to overdo it—keyword stuffing not only disrupts the user experience but can also result in search engines penalizing your site as spam.
Not familiar with keyword stuffing? Keyword stuffing is all about cramming in as many keywords as possible in an attempt to boost rankings on search engine results pages. This doesn’t work and often backfires. Here’s an example:
alt=”Cute kitten playing with a ball of yarn, adorable kitten, fluffy kitten, playful kitten, cute kitten image, kitten for sale, kitten pictures.”
Well-written alt text can both enhances accessibility and support your SEO strategy. Use your commonsense and keep your (human) site visitors top of mind.
How to know which images need alt text and how to write it
After all that, you may be surprised to learn that not all images require alt text. In fact, it becomes an exhausting experience for some users with screenreaders to endure fluffy alt text applied to images that don’t provide any value. Luckily for us, the W3 has categorized web images and offered some tips about how to treat images within each category.
Here’s how to write the right kind of alt text depending on what your image is for:
Informative images: These are the most common images found on sites and include pictures, photos, or illustrations that represent concepts or information. Your alt text should give a short description that conveys the essential meaning of the image.
For example, this image illustrates all of the integrations available with Automattic’s P2, but those integrations are not named in the accompanying content. It’s important here that the alt text provides that information for visitors that may not be able to see or load the image. It should look something like this:
alt="Logos for available P2 integrations: Crowdsignal, Figma, Twitter, GitHub, YouTube, Vimeo, Google Calendar, and Loom"
Decorative images: If an image is just there to look nice and doesn’t add any important info, use a null alt attribute (alt=””). This tells assistive technologies to skip it.
Functional images: If an image works as a button or link, the alt text should explain what it does—not what it looks like.
For example, the alt text for a video icon might say “Watch this video about hibernating bees on Vimeo.”
Images of text: If the image contains readable text (like a graphic with a quote or a logo), the alt text should include the same words.
Complex images: Charts, graphs, or diagrams need more detailed alt text to describe the data or information they present. You might even link to a longer description.
Groups of images: If multiple images work together to convey one idea, the alt text for one of the images should cover the whole message. A good example of this would be process shots for a recipe or other how-to tutorial that includes steps.
Image maps: For images with clickable areas, provide alt text that explains the overall purpose of the image, and include alt text for each clickable section describing where it leads.
Not sure how to categorize an image? Check out the W3 Images Tutorial for help.
While there are no official length guidelines, it’s generally recommended to keep alt text under 140 characters. Longer descriptions can become tedious when read by screen readers. Be descriptive, but stay concise—this is not the place for creative flourishes.
The Alt Text Tools from the NerdPress team is a free, light-weight plugin that generates a CSV file of the images used in your content, along with their alt attributes.
Once the scan is complete (it’s very fast!), you can open the CSV file in the spreadsheet application of your choice. There you can quickly identify images that have missing alt attributes and scan for any that may need some improvement. The file also includes links to edit the posts where the images appear, making it quick and easy to update their alt attributes.
This freemium WordPress plugin from Equalize Digital goes beyond alt text to ensure your site is accessible to a wide range of visitors. If you and your team are committed to making your content accessible, this is a great resource.
Equalize Digital also runs a Facebook Group and hosts a monthly virtual meet up for WordPress developers, designers, and users interested in learning more about creating accessible websites that can be used by people of all abilities.
Alt text may seem like a small detail, but it plays a big role in making the internet more inclusive and user-friendly. By writing thoughtful, descriptive alt text, you’re not just improving accessibility—you’re also optimizing your content for search engines and enhancing the overall user experience. With the right approach and tools, adding alt text can be an easy step toward a more accessible and SEO-friendly site.
Choose the plan that works best for your business, and let us manage the rest. With any WordPress.com plan, you get all the benefits of fast, secure managed WordPress hosting.
One of the areas where WordPress shines is content management. This is also corroborated by the fact that it is the world’s leading Content Management System, or CMS, by numbers.
The most popular way of displaying the content hosted by WordPress is through a frontend, like through blog posts and pages. That is wonderful for human visitors but there are other ways of consuming that content –– for example, web APIs.
In this article, we’ll explore how we can leverage WordPress in order to power a central API for projects like phone apps, browser extensions, or the frontends of other WordPress sites!
Following along
All the steps described in this article were made in WordPress Playground. If you want to see the end result and maybe sometimes skip ahead as we go, download this ZIP file, and perform these steps:
API stands for Application Programming Interface and it’s a way for software applications to communicate with each other in a standardized fashion. A web API is simply one that is accessed through “the internet” –– for example, by entering a certain URL in your web browser.
There are multiple types of web APIs, and one common way to group them is the protocol they use. In this article, we’ll be implementing two APIs, one based on the REST protocol, and another based on the GraphQL protocol. Other protocols you might have heard of include SOAP, RPC, or gRPC.
By the end of this article, we’ll have built a WordPress site that allows users to login in order to add/update/delete data entries which will be queryable both via REST routes and a GraphQL endpoint.
The data entries will collectively represent a company’s organizational chart –– things like employees, teams, and offices. While a little bland, the concepts can be applied to absolutely anything else.
Optional: Trimming down the frontend
While an optional step, it makes a lot of sense to do this if your site won’t be serving any content via pages but exclusively through APIs.
Once you have a hosted WordPress website, you can start by installing a minimalist WordPress theme like Blank Canvas and deleting every single demo post and page on your site. Continue by using the site editor to include information on the homepage for visitors who find it unintentionally.
For example, add your business’ name and logo, and tell them that they probably landed there in error. You can also include a button linking to the admin area for maintainers of the content. Something along the lines of:
One way to prevent your site from being found in search engine results is by checking the Discourage search engines from indexing this site in your site’s settings.
If you would rather fully lock down the frontend and not even have the homepage described above, you can add the following code snippet either to a plugin like Code Snippets or to your child theme’s functions.php file:
/**
 * Disables the frontend for non-logged-in users.
 */
add_action(
	'template_redirect',
	static function (): void {
		$authorization_required_code = \WP_Http::UNAUTHORIZED; // 401

		if ( ! is_user_logged_in() ) {
			\status_header( $authorization_required_code );
			die( \get_status_header_desc( $authorization_required_code ) ); // phpcs:ignore WordPress.Security.EscapeOutput.OutputNotEscaped
		}
	}
Custom post types and taxonomies
Now it’s time to focus on the website’s admin area and the data modeling part of this tutorial. The most straightforward way of compartmentalizing your data is by using WordPress’ built-in functionality of custom post types and custom taxonomies.
While there are many ways to do this, for the purposes of this tutorial, we’ll organize our data like this:
An employee custom post type
A team custom taxonomy
An office custom post type
In order to create these custom data types, you can either add custom code to your site, or use a plugin (like in this video). A very popular plugin for creating custom post types and taxonomies using the admin interface is Custom Post Type UI – and that is what we’ll be using in this tutorial.
Here is the JSON configuration for importing the data into your installation:
For custom post types
{"employee":{"name":"employee","label":"Employees","singular_label":"Employee","description":"","public":"false","publicly_queryable":"false","show_ui":"true","show_in_nav_menus":"false","delete_with_user":"false","show_in_rest":"false","rest_base":"","rest_controller_class":"","rest_namespace":"","has_archive":"false","has_archive_string":"","exclude_from_search":"true","capability_type":"post","hierarchical":"false","can_export":"true","rewrite":"false","rewrite_slug":"","rewrite_withfront":"true","query_var":"false","query_var_slug":"","menu_position":"","show_in_menu":"true","show_in_menu_string":"","menu_icon":"dashicons-id","register_meta_box_cb":null,"supports":["title","thumbnail","excerpt","revisions"],"taxonomies":[],"labels":{"menu_name":"Employees","all_items":"All Employees","add_new":"Add new","add_new_item":"Add new Employee","edit_item":"Edit Employee","new_item":"New Employee","view_item":"View Employee","view_items":"View Employees","search_items":"Search Employees","not_found":"No Employees found","not_found_in_trash":"No Employees found in trash","parent":"Parent Employee:","featured_image":"Profile image for this Employee","set_featured_image":"Set profile image for this Employee","remove_featured_image":"Remove profile image for this Employee","use_featured_image":"Use as profile image for this Employee","archives":"Employee archives","insert_into_item":"Insert into Employee","uploaded_to_this_item":"Upload to this Employee","filter_items_list":"Filter Employees list","items_list_navigation":"Employees list navigation","items_list":"Employees list","attributes":"Employees attributes","name_admin_bar":"Employee","item_published":"Employee published","item_published_privately":"Employee published privately.","item_reverted_to_draft":"Employee reverted to draft.","item_trashed":"Employee trashed.","item_scheduled":"Employee scheduled","item_updated":"Employee updated.","parent_item_colon":"Parent Employee:"},"custom_supports":"","enter_title_here":"First and Last Names","show_in_graphql":"1","graphql_single_name":"Employee","graphql_plural_name":"Employees"},"office":{"name":"office","label":"Offices","singular_label":"Office","description":"","public":"false","publicly_queryable":"false","show_ui":"true","show_in_nav_menus":"false","delete_with_user":"false","show_in_rest":"false","rest_base":"","rest_controller_class":"","rest_namespace":"","has_archive":"false","has_archive_string":"","exclude_from_search":"true","capability_type":"post","hierarchical":"false","can_export":"false","rewrite":"false","rewrite_slug":"","rewrite_withfront":"true","query_var":"true","query_var_slug":"","menu_position":"","show_in_menu":"true","show_in_menu_string":"","menu_icon":"dashicons-admin-home","register_meta_box_cb":null,"supports":["title","thumbnail","revisions"],"taxonomies":[],"labels":{"menu_name":"Offices","all_items":"All Offices","add_new":"Add new","add_new_item":"Add new Office","edit_item":"Edit Office","new_item":"New Office","view_item":"View Office","view_items":"View Offices","search_items":"Search Offices","not_found":"No Offices found","not_found_in_trash":"No Offices found in trash","parent":"Parent Office:","featured_image":"Featured image for this Office","set_featured_image":"Set featured image for this Office","remove_featured_image":"Remove featured image for this Office","use_featured_image":"Use as featured image for this Office","archives":"Office archives","insert_into_item":"Insert into Office","uploaded_to_this_item":"Upload to this Office","filter_items_list":"Filter Offices list","items_list_navigation":"Offices list navigation","items_list":"Offices list","attributes":"Offices attributes","name_admin_bar":"Office","item_published":"Office published","item_published_privately":"Office published privately.","item_reverted_to_draft":"Office reverted to draft.","item_trashed":"Office trashed.","item_scheduled":"Office scheduled","item_updated":"Office updated.","parent_item_colon":"Parent Office:"},"custom_supports":"","enter_title_here":"Add Office","show_in_graphql":"1","graphql_single_name":"Office","graphql_plural_name":"Offices"}}
For custom taxonomies
{"team":{"name":"team","label":"Teams","singular_label":"Team","description":"","public":"false","publicly_queryable":"false","hierarchical":"false","show_ui":"true","show_in_menu":"true","show_in_nav_menus":"false","query_var":"false","query_var_slug":"","rewrite":"false","rewrite_slug":"","rewrite_withfront":"0","rewrite_hierarchical":"0","show_admin_column":"true","show_in_rest":"false","show_tagcloud":"false","sort":"false","show_in_quick_edit":"","rest_base":"","rest_controller_class":"","rest_namespace":"","labels":{"menu_name":"Teams","all_items":"All Teams","edit_item":"Edit Team","view_item":"View Team","update_item":"Update Team name","add_new_item":"Add new Team","new_item_name":"New Team name","parent_item":"Parent Team","parent_item_colon":"Parent Team:","search_items":"Search Teams","popular_items":"Popular Teams","separate_items_with_commas":"Separate Teams with commas","add_or_remove_items":"Add or remove Teams","choose_from_most_used":"Choose from the most used Teams","not_found":"No Teams found","no_terms":"No Teams","items_list_navigation":"Teams list navigation","items_list":"Teams list","back_to_items":"Back to Teams","name_field_description":"The name is how it appears on your site.","parent_field_description":"Assign a parent term to create a hierarchy. The term Jazz, for example, would be the parent of Bebop and Big Band.","slug_field_description":"The slug is the URL-friendly version of the name. It is usually all lowercase and contains only letters, numbers, and hyphens.","desc_field_description":"The description is not prominent by default; however, some themes may show it."},"meta_box_cb":"","default_term":"","object_types":["employee"],"show_in_graphql":"1","graphql_single_name":"Team","graphql_plural_name":"Teams"}}
At this point, your WordPress admin interface might look something like this:
To Gutenberg or not to Gutenberg
The Gutenberg block editor is functional, adaptable, and easy to use, and you should be using it to edit your traditional WordPress posts and pages. However, when it comes to CPTs without a frontend, there might not be any content to warrant the use of a performant editor like Gutenberg.
If you are positive that all of the information you need is not HTML-based, then it might make sense to disable Gutenberg for these CPTs and default back to the classic post editor that was the standard before WordPress 5.0.
The simplest way to disable Gutenberg support for a CPT is to set the show_in_rest argument to false when registering it (as we’ve done above).
Alternatively, if you want to keep the built-in REST routes that WordPress provides for every CPT, you can add this code to your child theme:
Now that we have our basic data types in place, we need to start populating them with entries. Before we do that, we need to ensure that we can record all the necessary data on each entry, and for that we will need to build custom fields.
The easiest way to add custom fields to your custom post types is to register them with custom-fields support. When you then edit a post, it will include a metabox like this:
While this type of “key-value” interface can be enough, you might want to build a more user-friendly interface with fields like checkboxes, dropdowns, media selectors, and so on.
A popular way to add those types of custom fields is the Meta Box plugin, which, as mentioned above, is what we’ll be using in this tutorial. Using their online custom fields generator, we got the PHP code needed to register the fields we wanted and then added them to Code Snippets.
Using a fake data generator, we populated the custom post types with a bit of seed data:
Other UI customizations
While we won’t explore any further UI customization options in this tutorial, we wanted to note that it’s possible to use various WordPress filters to tweak things like:
The default Add title placeholder on new posts (e.g., to First and Last Names)
The columns hidden or visible by default on the CPT list table view
Various other labels and messages throughout the admin interface
Access control
Before we start looking into making the data available via API, it’s time to think about who should have access to it.
The custom post types and taxonomies mentioned above were registered in such a way that any logged-in user with the ability to edit regular WordPress blog posts will also have the ability to edit these. However, it’s possible to make that much more granular.
You can create custom user roles with custom capabilities in order to ensure that the UI is as clean-as-possible in order to promote focused-work for the users doing the data maintenance. This is particularly important if you anticipate a very high number of entries, especially on an ongoing basis.
While it is possible to control this entirely with custom code, a way to maintain a simpler overview of access management is provided by Access Policies implemented by the Advanced Access Manager plugin.
For example, you can create a separate access policy for each CPT you create. Then you may assign the policy either to a role or to individual users in order to maintain full control over who may add new Employee entries or even just edit existing ones. Deleting entries can be a capability reserved only for administrators.
Here is an example of how a policy named Employees CPT – Full Control and assigned only to Administrator users can look like:
Here is an example of what the admin interface can look like for a dummy operator user that has the Data Entry Operator user roles (cloned from the Subscriber role) with two AAM Access Policies attached – one for each custom CPT:
Notice how the lack of most menu items makes it easier to focus solely on the data-entry aspect. The policies can be made more granular, for example, to also restrict who may delete an entry or create new ones.
Custom REST routes
While WordPress will automatically create REST routes for every CPT as long as it is registered with the show_in_rest argument set to true, you can also create your own custom rest routes that are better suited for serving the CPT content in a way that makes more sense to your use-case.
You can choose to have your routes publicly accessible if the permission_callback argument is set to the __return_true function or you can choose to lock down calls using any permission scheme you want.
The recommended way of locking down access is behind a capability check, i.e. a call to current_user_can. You can use the AAM Access Policies mentioned above to grant or withdraw permission from individual roles or users, and you can use WordPress’ application passwords to authenticate API requests.
Hint: even if you decide that GET (read) requests should/can be publicly available, we still recommend that any POST // PUT // DELETE (create, update, delete) requests always be guarded by a current_user_can check.
Here is a REST controller that we added to Code Snippets in order to be able to list the employees on the site and fetch them by ID:
Your custom REST routes will be available under <your-domain>/wp-json/<route_namespace>/<route>. For example, the path for retrieving the list of employees could look like this:
Hint: the team query added there will be parsed by WordPress and made available in the controller; you can then choose to either ignore it or filter the results by it – anything you want!
The easiest way to test your endpoints, especially if they will require an application password to access, is to use a tool like Postman which lets you test APIs in a very user-friendly manner. Publicly available GET requests can also be tested by simply visiting the URL endpoint in your browser!
Querying via GraphQL
Now that we are able to fetch the data via REST routes, let’s explore how we might be able to fetch it using GraphQL as well.
If you’re unfamiliar with GraphQL, what you need to know is that it’s actually a querying language just like SQL but for APIs. You can read more about it on the official website over at https://graphql.org/.
The simplest way to add GraphQL support to our site is by installing the newly-canonical plugin WPGraphQL. It also has a documentation page where you can learn more about what it provides out-of-the-box, and also examples of how to handle much more complex scenarios.
If you’ve been paying attention to the JSON configuration of the custom post types shared above, you might’ve already noticed a key named show_in_graphql set to 1 (true/active). That is all we need in order to allow the custom post types we added to be queries using GraphQL.
Here is an example of a GraphQL query that can be used to list Employees which you can test in the built-in GraphQL IDE bundled with the plugin:
If this sounds like something you want to build for your own business, you can work on it on your own computer using Studio by WordPress.com. You can even share your work with colleagues (for free!) using a demo site, and when you’re ready, any WordPress.com Business plan or higher will be able to host and manage your site.
Bringing back a frosty feature (plus more improvements for WordPress.com users)
About 17 years ago we added an option called “Show falling snow on my blog” to WordPress.com. The name said it all: it added falling snow to your blog. Then, one day, it disappeared. It wasn’t because spring came and melted the snow away. We were cleaning up code, juggling lots of different priorities, and the snow was shoveled away.
When we first announced this bit of fun in 2007, we were inspired because WordPress co-founder and our CEO Matt Mullenweg was missing out on a White Christmas in his hometown of Houston. Ever since it went away, some of you have let us know you’ve also been missing out on snow — on WordPress.com. Thanks to everyone who reminded us, we’re bringing back this frosty feature today, available now for every WordPress.com user.
Want to join the fun? Log into your WordPress.com account and visit Settings in the left-hand sidebar. There, you’ll find an option to add some fresh powder to your site:
Your personal snow machine, free for all WordPress.com users.
Voilà! With one click, your visitors can enjoy a wintry surprise, no matter where they are in the world:
We like to think of it as a fun gift for a time of year when so many people around the world will be sharing gifts — whether or not it’s snowing where you’re writing on your blog.
Now, we know not everyone appreciates snow as much as we do. So, we’ve been working hard on a flurry of other gifts over the past few months too, adding tons of improvements to WordPress.com. Until now, we just haven’t told you about them on our blog! This seems like a great time to recognize all those other small features, improvements, and wishlist items that make the WordPress.com world just a little bit nicer:
We added over 65 themes to our Free, Personal, and Premium plans in the last half of the year. If you haven’t taken a look at our new themes lately, take a moment and browse around now. If you’re on the Business plan and above, you can use any theme — even custom ones — but we’re always trying to make sure you have a great, curated list of high-quality options on our less expensive plans too.
We also brought back Bulk Plugin Management, so Business and Commerce plan users can efficiently manage and update plugins across all your WordPress.com sites. If you’re managing multiple sites, this will save you a lot of time, so you can spend more time doing what you love.
The WordPress core development team created a new component for managing data called Data Views. We’re using this functionality in our Hosting Dashboard, improving the experience of managing your sites and domains.
Developers know that PHP — a programming language that’s near and dear to our hearts — is the backbone of the web (and WordPress itself). Never heard of it? Not to worry. Just think of PHP as the magic that makes your WordPress website possible. WordPress.com upgraded to PHP 8.1 this year, ensuring your sites maintain top-tier performance and compatibility with your favorite themes and plugins.
With all these new features and improvements, there’s snow time like the present to build your websites with WordPress.com. Feeling the giving spirit too? It’s easy to share WordPress.com with a gift subscription. No pressure, of course. Enjoy the snow, and look for even more enhancements and features to come in 2025!
Another month means another fresh batch of excellent themes for WordPress.com. Let’s look at some of the latest additions to the WordPress.com themes gallery, with great options for content creators, small businesses, event organizers, and personal sites. Preview each one below (and maybe try taking one for a spin).
Also great for: Consultants, thought leaders, speakers, and content creators with paid course offerings
With a clean, single-hued design, minimal photography, and approachable fonts, CoachAva is built for professional coaches looking to highlight their core offerings and showcase their expertise.
Whether you’re a seasoned executive coach, a life coach, or a subject matter expert looking to sell digital or in-person services, CoachAva can help you establish trust with potential clients by putting your thought leadership front and center. Blocks make it easy to share blog posts, podcasts, and/or customer testimonials on your homepage. The flexible design makes it easy to define, package, and showcase your different offerings, connecting clients to the perfect programs.
Also great for: Bloggers, serial content creators, news sites with limited photography
Ideal for podcasters building their first site, Castcore features bold, attention-grabbing titles and a minimalist aesthetic that keeps your listeners focused on what matters most – your content.
With a simple homepage design, this template makes it easy for listeners to scroll through your recent content to find the right episode. Castcore is a great option for podcasters who want to build their subscriber base. The Podcast Player block makes it super easy to create an embedded mini-player for your episodes: simply copy your podcast’s RSS URL to engage listeners right on your page. Choose a grey and black color combo for a classic design or go young and bold with bright yellow.
Also great for: Thought leaders, speakers, and content creators with paid course offerings
CoachBen’s dark theme with bright accents offers a bold and professional design that perfectly reflects a coach at the top of their game. Striking and to the point, this theme allows professional coaches to quickly articulate their value proposition and define their services.
With pre-designed blocks for displaying company logos of past clients, a calendar of speaking events, and a blog subscription, there are plenty of ways to show potential clients your expertise and experience. When they’re ready to dig in, they can learn more about specific offerings on your courses page or reach out to schedule a call.
Also Great for: Brick and mortars, Restaurants, Personal care providers, Digital portfolios, visual artists, photographers
Greenseed is a beautifully simple, highly adaptable theme that makes it easy for businesses to take their brick-and-mortar brands online. Designed with full-site editing in mind, Greenseed can be customized to match any brand style, but its open spaces and bold visuals make it a particularly great choice for businesses looking to establish a streamlined online presence that embraces custom photography.
This minimal, approachable layout gives your photos space to breathe while providing key business information like address, phone number, and store hours. Link to your reservations page or provide visitors with a contact form to make it easy for potential customers to make an appointment or plan a visit.
Also great for: Eco-conscious consumer brands, wedding suppliers
Like the jewelry and accessory brands it was built for, Aether embodies modern elegance. With delicate fonts and natural-toned color palettes, this product-focused template offers a tasteful design that allows artisan accessories and jewelry to truly sparkle.
With social media integrations and the ability to highlight products on your homepage, Aether creates a flexible hub for your digital brand. You can allow your customers to purchase products directly through WordPress’s e-commerce plugins or you can link your website to an existing storefront. With Aether, you can be sure your customers will understand your brand’s commitment to quality and design.
Also great for: Writer portfolios, speakers, brand consultants
With a bold split-page design and minimalist elements, Miko keeps your brand center stage. Best for individuals, creators, or service providers who want to make a lasting visual impact, this template allows visitors to navigate through all of the pages of your site on the left side without ever navigating away from the image and title anchored on the right.
Featuring a variety of hyper-modern font options and cool color combos, Miko can lean sweet and delicate or bold and artistic, effortlessly complimenting a huge range of personal and professional website identities. Regardless of the style you choose, Miko is the perfect theme for anyone who wants to present themselves as a modern, polished professional with an eye for design.
The best way to market your upcoming conference is with a sleek custom website. Conference is a flexible template that helps conference planners create a credible online presence.
The Conference template can support both marketing and event logistics: You can highlight your speakers, sponsors, and conference news to draw in new attendees via the signup form. Once attendees register, the site acts as a home base for key information, providing pages for the conference location, daily schedules, and lists of attendees to help your participants connect in advance. Whether you are hosting a multi-day affair or an intimate workshop, Conference can scale to meet the needs of your event.
Ready to give your site a makeover? You can explore these themes by clicking the “Demo” button on each theme page. Whether you’re starting a coaching business or looking to improve your professional online presence, you might just find the perfect jumping-off point for your future website.
Most premium themes are available to use at no extra charge for customers on the Personal plan or above. Partner themes are third-party products that can be purchased for $99/year each on the Business or Commerce plans, so if you haven’t found what you’re looking for today, there are plenty of alternatives available.
You can explore all of our themes by navigating to the “Themes” page, which is under “Appearance” in the left-side menu of your WordPress.com dashboard, or by clicking the button below:
Spam bots and denial-of-service attacks are a reality for many website owners. Depending on timing and scale, they can be an annoyance or a detriment to your business’s bottom line. Services like Cloudflare, Fastly, and Vercel are popular choices for mitigating these attacks with sophisticated techniques beyond the firewall rules many hosts (WordPress.com included) employ to examine and potentially block incoming traffic.
WordPress.com’s defensive mode introduces similar, sophisticated DDoS protection that further enhances your site’s security. It works by issuing proof-of-work challenges to browsers visiting the site. Legitimate users will briefly see a challenge page while their browser completes the work before accessing the site. The feature is powered by our global edge network, but it can still be enabled independently of our global edge cache feature.
What is defensive mode?
If you notice an inordinate amount of traffic to your website that is slowing it down, this setting filters spam traffic by requesting that they complete a proof-of-work challenge. When visitors come to your website for the first time, they will see the following screen:
This proof-of-work challenge page has a unique random puzzle embedded in it, along with JavaScript that can solve the puzzle. The puzzles are designed to take a typical CPU a few seconds to solve, and they deter botnets, which are not able to run the scripts to solve the puzzles.
Visit your Sites page by clicking on the WordPress logo in the upper left corner of your dashboard.
Click on your site title.
Click on the “Server Settings” tab on the site overview page.
Scroll down to the Defensive mode section.
Select a duration and click the “Enable defensive mode” button
Note that WordPress.com staff may proactively enable defensive mode on your behalf, regardless of what hosting plan you have, if your site is attacked.
Get it all on WordPress.com
Many hosts charge extra for capabilities like this, or they require integration with a third-party provider. On WordPress.com, defensive mode is included on every plan and can be managed manually on Business and Commerce plans.
This is just one more reason why WordPress.com stands out as the premier managed host for WordPress sites. With staging sites, SSH and WP-CLI access, or GitHub deployments, we’re always working on new tools to make WordPress.com an essential component of your development workflow.
What other features would you like to see on WordPress.com? How can we make WordPress.com an even more powerful place to build a website? Let us know in the comments below.
Having a well-designed, functional website helps you reach a broader audience, build credibility, and connect meaningfully with customers or followers. In today’s digital-first world, your website is often the first impression you make, and right now is the time to make it count.
Why now? Black Friday savings, of course!
Until December 2nd, save 25% on the first year of any new annual hosting plan from WordPress.com.
There are many reasons a website is important. Let’s take a look at three that impact the relationship you can build with your audience:
Trust and credibility
We live in an “informed consumer” society and having a website allows you to share important details about your business or products. Your customers look for a website to help them form opinions, understand your offerings, and ultimately make a purchase decision. If you don’t have one, it can raise questions of legitimacy and cause your customers to look elsewhere for the products or services they require.
User experience
Your WordPress.com website gives you full control over how people experience your brand. A well-organized site not only sets the right tone but also makes it easy for visitors to find what they need, continuing to build trust and showing your commitment to a positive experience.
Accessibility and convenience
The internet never closes or sleeps. With a website, your audience has 24/7 access to everything you offer—any time, from anywhere.
Putting your audience first is essential to your success.
This is why our Black Friday sale is about so much more than the 25% savings you’ll receive on the first year of any new, annual hosting plan.
Choosing WordPress.com as your website host means choosing a team committed to your success. Our self-help resources, AI Assistant, and Happiness Engineers are all focused on helping you be successful with your website.
Our managed WordPress hosting also offers unmetered visitors, unmatched speed, and unstoppable security for one low price. With WordPress.com, you always have what you need to get online (and stay online) so you can grow your audience.
And if you take advantage of our Black Friday sale before December 2nd, you get even more with your purchase:
25% off any new, annual hosting plan
A free custom domain for one year
Expert support from our Happiness Engineers
What’s possible on WordPress.com
WordPress is a powerful and flexible website building platform, and WordPress.com gives you that functionality alongside powerful, secure, and scalable managed hosting. Whether you want a simple blog, a complex eCommerce store, or anything in-between, WordPress.com is the right hosting platform for you.
ScreenshotScreenshotScreenshotClick to view example sites.
How to unlock powerful WordPress hosting
Ready to get started with WordPress.com? We thought you might be.
Click the button below to learn more about each of our plans, choose the right plan for you, and purchase your discounted hosting plan. Your 25% off discount will apply automatically at checkout.
For sure. You can transfer or connect your domain and we can guide you on the steps as needed.
Can I migrate an existing site?
Absolutely. Whether your existing site is built with WordPress or another platform, we have guides available to walk you through the process. We also offer free migrations of WordPress sites. And yes, our Black Friday offer applies to site migrations too.
Is this offer available on renewals or upgrades?
No, this discount only applies to new annual plans. Current users can, however, use this offer if they’re adding a new plan or site.
How do renewals work?
Our Black Friday offer gives you a 25% discount off the first year of your hosting plan. Our annual plans automatically renew 30-days prior to your expiry date at the regular full price.
Sign up today to take advantage of powerful managed WordPress hosting from WordPress.com and save 25% on the annual plan of your choice.
When you’re building a WordPress website, there are some essential elements you likely want to include, such as a contact form. However, limiting your use of forms to your contact page is a missed opportunity to increase leads, boost engagement, and enhance the overall user experience (UX) on your site.
There are many ways you can use forms on your WordPress site beyond providing visitors with a contact method. From collecting user feedback to generating leads and expanding your mailing list, forms offer dynamic and convenient ways to drive conversions.
In this post, we’ll start by discussing the role forms play in WordPress and how they can help you collect valuable information. Then we’ll introduce you to eight creative ways to use them on your site with some tips for making them effective.
Note: We’ve saved the most surprising ways for the end, so keep reading!
An introduction to using forms on your WordPress site
When most people think of website forms, they likely think of contact forms. These simple, embedded features let your visitors enter basic information to get in touch with you:
However, the use of online forms extends far beyond contact points. These documents allow you to easily and conveniently collect a wide variety of information from users and visitors directly from your website. You can also use them across other channels such as email and social media.
Website forms are beneficial because they provide straightforward ways of collecting lead-generating data that you can store and use in the future. Therefore, forms are essential tools to help you with marketing, sales, and promotions.
Another benefit of using forms on your WordPress site is that creating and embedding them is quick and easy. There are several plugins you can use to build forms if you require different functionality.
Six creative examples of forms you can create right now
Now that we understand more about the role forms play in websites, let’s look at their different use cases. Below are six creative ways to use forms on your WordPress site, aside from your contact page.
1. Run fun contests and giveaways
Running contests and giveaways on your website is an excellent way to boost engagement. Giving away freebies can help promote your brand and spread awareness about specific products and offerings.
To make it as simple as possible for your customers to enter the contest, you can use an embedded or pop-up form to collect their information, such as names and email addresses:
This form provides you with customer contact information that you can use for future campaigns. People will be more likely to hand over their details when they know they have a chance to win something in return.
2. Register users for memberships and events
If you run a membership site or host events, you can use website forms to make user registration a breeze:
You can also utilize them for event registration, such as an upcoming webinar. Like a giveaway, this can be an effective lead-generation technique because you’re giving users something in exchange for their contact details.
3. Conduct user and reader surveys
Curious to know what your readers or customers think about a topic? Use a questionnaire and find out! You can easily create a poll or survey using Crowdsignal, our service for creating surveys and polls. Get started with a free account and learn how to set it up:
You can also effortlessly capture insights from your audience by creating a simple poll using the Poll block:
4. Let users sign up for your mailing list
Email marketing is a powerful way to grow your audience, expand brand awareness, and increase engagement. However, figuring out how to grow your subscriber list can be challenging.
One way to expand your subscriber list is by embedding a newsletter signup form on your website. It lets you easily capture the email addresses of your visitors:
One of the benefits of signup forms is that there are so many different areas you can place them. For example, you can insert them in the header or footer of your website. This placement ensures the forms are easily accessible no matter which pages your users are on.
You can also use forms as exit-intent pop-ups. For example, as visitors are about to leave your website, you can have the signup form appear with a convenient Call To Action (CTA).
5. Enable applicants to apply for jobs
Recruiting and hiring new talent is a staple in any successful business. However, the application process you use can influence the number of applicants and the quality.
Today, many job seekers want a quick and convenient way to apply to jobs they’re interested in. To make the process as convenient as possible for your prospects, you can add a form on your website that enables potential employees to apply to open positions:
You can embed these forms directly below the job descriptions. Plus, you can enable applicants to attach documents, such as resumes and cover letters. This feature eliminates the number of steps users must complete to submit their information for different positions.
Using a form also helps you keep all the necessary information of applicants in one place for easy access. This can streamline the vetting process and, ultimately, help you find the most qualified applicants.
6. “Name It!” campaign – involve users in product decisions
Raise your hand if you’ve ever eagerly suggested a name for someone’s new puppy, or your local zoo’s newborn giraffe. Users love feeling useful, so give them a fun job. Create a form that allows visitors to suggest a name for your latest product or mascot. An entire viral campaign can sometimes emerge simply from a “name this” campaign.
Be forewarned that if you let your audience name something, the results might get a little bit silly. Source: BBC
A few simple tips for creating effective website forms
Once you decide to create a particular type of website form, the next step is to build it. As we mentioned earlier, there are various tools you can use to do so.
However, regardless of which plugin you use to create your forms, there are some essential tips to keep in mind to ensure effectiveness. For example:
Keep things simple. Only include the necessary information to keep the forms as brief and concise as possible. Otherwise, you risk overwhelming users and reducing the likelihood of completing the form.
Minimize the amount of typing involved. In most cases, your customers won’t want to spend considerable time filling out lengthy responses to form questions. Therefore, it’s a smart idea to include multiple choice answers when possible (and where applicable).
Provide clear instructions. To make your forms as effective as possible, it’s vital to ensure that users understand what you’re asking and how to complete the fields correctly. You might consider adding example answers to demonstrate the type of responses you’re looking for.
Best practices for creating website forms vary based on the type you’re building and what your end goal is. However, it’s crucial to prioritize the UX to make the data collection process quick and effortless for your customers.
What will you do with forms next?
Most website owners understand the importance of including contact forms on their websites. However, many overlook the various ways that forms can help drive conversions and generate leads.
As discussed in this post, you can use plenty of strategies to get creative with your forms. For example, you can use them to register users for events, conduct user surveys, let visitors sign up for your mailing list, and offer a seamless way to apply for jobs.
The end of the year is here, and with it comes a season of excitement and celebration! Whether you’re bundling up in cozy sweaters and snow boots or soaking up the sun in swimsuits, this time of year has something special for everyone. No matter where you are in the world, the final quarter brings festive holidays and celebrations to look forward to.
If you’re looking to capture the magic of the season on your website, try a pop of festive, holiday-inspired color or a cozy new theme. It’s the perfect way to welcome the season for you and your site visitors—whether they’re browsing for a holiday recipe, shopping for gifts, or exploring a guide to the best cross-country ski destinations.
Today we will show you how you can bring those festive feelings to your site with a few of our favorite color palettes and themes, along with where to find free illustrations and images to bring a refreshing seasonal touch to your site.
Festive color palettes
Here are four festive color palettes––ranging from bright and bold to chill and subtle––that will give your site some holiday spirit:
Joyful winter
This winter-inspired color palette features warm, inviting hues of soft coral and deep red, balanced by a neutral blush and grounded by cool teal and navy. Incorporating these colors into your WordPress site creates a cozy and joyful vibe.
This winter color palette offers a harmonious blend of soft neutrals and cool blues, creating a warm and calm earthiness on your website. Perfect for a more sophisticated Hanukkah palette or a serene winter feel.
This palette captures the essence of a cozy, rustic holiday with its warm earthy tones and timeless charm—perfect for creating a welcoming, homey Christmas atmosphere. It’s so inviting, that you can almost smell the gingerbread baking!
This palette is the jewel box of winter—perfect for those who prefer bold, vibrant colors in their branding and design. Its rich, saturated tones add a pop of color that stand out beautifully against classic autumn and winter hues. Best of all, it’s incredibly versatile, making it easy to expand and adapt throughout the year.
Use any of these palettes as a starting point for your site’s color refresh. To begin, take a look at your existing site and see if one of these palettes align well with your existing site branding. You can do this by swapping in just a color or two—you likely won’t use every color in the palette.
After choosing a palette, consider updating product or lifestyle images to echo these colors. If you need help sourcing stock photos, we’ll dive into that below.
If you’re new to customizing your site’s look, don’t worry—the WordPress.com Editor makes it easy. You can set a custom palette, add custom colors, and apply updates across your site, covering all the consistent elements like text, headings, links, backgrounds, buttons, and more.
When you’re ready to start implementing your new color palette, this tutorial is the perfect guide to get you going: Custom Colors on WordPress.com.
Winter-inspired themes
If you’re looking for a bigger site refresh, changing not just your colors but your theme can instantly elevate the look and feel of your website in a more impactful way. Here are a few of our favorite themes that instantly bring the cozy-cottage charm to life:
Cottage
Cottage is a beautifully-crafted theme that brings the charm of the countryside to your online space. Featuring a warm palette of earthy tones, subtle textured backgrounds, and timeless serif fonts, Cottage is all about rustic simplicity and warm natural elements.
Nook
Nook is a classic two-column blog theme with a sidebar. Its versatile, timeless design creates a warm, familiar feel, providing the perfect space for sharing your DIY projects, tasty recipes, and creative inspirations.
Dorna
Dorna is a clean, product-focused theme, and its warm, inviting design and simple layout make it ideal for online shops featuring cozy, modern homewares and furniture.
Resources for seasonal photography and illustrations
Photography and illustrations are fantastic ways to bring your new color palette and/or theme to life. If you’re not capturing photos yourself or just want a fresh look, Pexels, Unsplash, and Pixabay all offer a wide selection of free, high-quality photos and illustrations. Even better, Pexels is fully integrated into your WordPress.com media library, allowing you to easily add copyright-free images directly to your site.
When searching for images to add to your site, here are a few seasonal keywords to get you started: warm ambiance, hygge, fall leaves, snug nook, warm lighting, autumnal vibes, natural tones, fireside, rustic charm, homey feel, earthy tones, woolen textures, and cozy fall.
You can also incorporate seasonal pops of color by adding custom graphics to your site. Canva is an excellent tool for creating custom visuals, with easy-to-use templates for everything from banners to sidebar graphics. It’s a simple, freemium way to add that extra festive touch to your WordPress site.
As we start looking at the new year ahead, it’s the perfect time to refresh your website with a look and feel that captures the spirit of the season—whether it’s fall and winter in the northern hemisphere or spring and summer in the southern hemisphere.
Everyone who uses the Internet looks at website layout examples every day. Yet, unless you are a designer or in the process of building your own site, few of us ever stop to think about what actually makes a good web-page structure.
You may instinctively feel it when you encounter one that is less than satisfactory. But do you know how to design a website layout that both pleases your visitors and allows you to achieve what you want with your site?
If the answer to that question is no, don’t fret. We’ll show you examples of different types of website layouts you can choose from and help you understand which are most appropriate in different situations. Then, we’ll explain how to choose a layout for your own website, as well as share some tips and tools you can use to create layout mockups.
In order to give you ideas about what a website layout can look like, let’s go over some common types, the kinds of websites they are most suitable for, and examples. Be aware that for some of these, the distinction is a bit fluid. You can often apply more than one layout principle to a single site.
1. Z-pattern
This Z-pattern layout is based on the way many people naturally look at website content. They start at the top left, scan to the top right, then go down to the left and to the right again.
You can take advantage of that, for example, by placing the logo in the upper left corner and the navigation menu across from it. Your most important information, such as your heading and visuals, appears diagonally down left from that, while the call to action is to the right of it again.
This website layout is very skim friendly and most appropriate for sites that have relatively little content that you want to give much attention to, like CTAs, forms, and buttons.
You can also line up several Z-patterns with alternating elements to lead visitors down in zigzag form and keep them engaged.
It is observable on both desktop and mobile and especially for more text-heavy sites. That makes it well suited for websites with lots of options or written content that needs to be scanned quickly, e.g. news sites or search result pages. You can take advantage of it by using the left side as an anchor.
However, it is important to note that NNG has come out in recent years saying that, while the F-pattern is a natural reading sequence, it is not good for users and websites. They state you should encourage readers to consume the rest of your content through text formatting like bullet points or visuals like icons and images.
3. Magazine
Magazine layouts are inspired by printed newspapers and magazines and there are many examples of this kind of website out there. They usually consist of multiple columns made up of individual containers that create a complex visual hierarchy.
In this website layout, different elements often have different weights assigned to them to show their relative importance. You can do this, for example, with bigger headlines or the use of images. This creates a multi-level hierarchy.
The goal is to allow visitors to scan a great amount of information quickly. As a consequence, it’s a great choice for content-heavy websites, especially those covering a multitude of topics. Dashboards, such as for web applications, are also good candidates. The Gazette theme is another great example for how to use a magazine layout.
4. Grid
Also called box-based website layouts, grid layouts distribute elements across the page according to a clear underlying order.
The result is a well-structured and geometrically-arranged design. It’s ideal for sites that have a lot of content of equal importance, e.g. portfolios. Linked pages often appear in the form of an image plus title and a short abstract.
If your content does not all have the same priority, there are lots of options to determine relative importance of different elements as well.
5. Modular
Next in our list of website layout examples, we have a special kind of grid structure, which is also known as block layout. In it, each unit of content has their own space, is evenly spaced, and thus easy to locate. You might be very familiar with it from Pinterest and other sites that use a card layout.
This website layout is also great for mobile design, as it rearranges well for smaller screens. If you want to use it, it is most suitable for business websites, content collections like product pages, or the display of custom post types.
6. Single-Column
Our next website layout example arranges all content in one vertical column and orders it sequentially.
Single-column layouts are popular and easy to use, especially on mobile, where users prefer to scroll over clicking from page to page. To that end, it benefits from a back-to-top button and sticky menu.
If your content is very text-heavy, remember to break it up with images to ensure readability. As you can imagine, this website layout is frequently used for blogs and anything that has a feed-like content pipeline. Landing pages are also a good candidate.
7. Content-Focused
As the name already suggests, this layout is most appropriate for websites whose primary appeal is (written) content. It’s similar to the single-column variety, often with one main column and one or more side columns for additional information.
While the focus is on the primary content, you can surround it by other elements that you want visitors to notice after landing on the page for the main attraction. This could be a newsletter signup form in the sidebar, advertisement for your product or service, or a sales banner.
Naturally, this page structure lends itself best to blogs or other websites that mainly deal in writing. At the same time, singular pages on websites with a different layout can also benefit from a content-focused approach.
8. Full-Screen
This is a website layout that covers the entire page. There are no sidebars, the screen comes across as a singular unit.
Sometimes this design is coupled with a modular build that scrolls screen by screen, so that each section is like a separate page. It often has an image or even video in the background.
Full-screen layouts are best suited for one-page designs, storytelling, and product pages. They work best if you couple them with captivating colors and/or visuals. If you like this look, the Afterlight theme might be a good option for you.
9. Hero
A special type of full-screen website layout with a large image at the top (also called “hero image”) that contains the main elements like your site title, CTA, etc.
Hero layouts are a good way to quickly capture attention and clarify the topic of the page, especially for products. It’s a big, bold visual statement with additional information in the form of text elements.
The layout works best for product pages and ecommerce websites in general. However, some blogs also use it.
10. Split-Screen
In this website layout, the screen is divided in the middle.
Split-screen layouts provide a balanced symmetry allowing you to represent two different ideas and give them the same consideration. Alternatively, you can also show off the same idea from different angles or use it to divide ecommerce customers at the start of their journey.
Split screen is a great option for websites that use two different types of content (e.g. images and text) or provide two distinct customer journeys. It’s also suitable simply for websites that want a modern look. However, it’s not so great for text-heavy designs because it doesn’t scale well, especially on mobile.
11. Asymmetrical
A design similar to split screen or grid but with uneven distribution, offering an added dynamic.
You can use scale, color, width, and more to provide different focal points and highlights on the page. However, asymmetry does not mean chaos. There’s an underlying order that provides elegance and congruity.
What are good candidates for asymmetrical website layouts?
Websites that want to go for something modern, innovative and guide the user’s attention in dynamic ways. Business websites, online portfolios, or landing pages are prime beneficiaries.
How to Choose a Website Layout
With a better idea about what types of website layouts exist, how do you pick the right one for your website? Here are a few practical tips to do so.
Understanding website layout vs. website structure
First, make sure that a website layout is what you’re looking to implement. In a sentence, this means the way that the elements on your web pages (content, navigation, header, footer, and everything else visible) are arranged to present the information included within them.
In contrast to website structure, layout focuses on the individual page experience and how users consume the content on your pages. It is less concerned about leading them around your site as a whole (though, of course, that’s part of it as well).
While different web pages on your site can (and should) have different layouts, the basic structure usually stays the same. For example, the information needed on a shop page is very different from that of a product page or something like an About section. At the same time, the basic layout elements, especially header and footer, usually stay constant across most pages.
This makes for a consistent user experience, while allowing for flexibility to deliver different types of content to users.
What Is the Goal of Your Website Layout?
Good layout has the power to keep users on your page longer and engage them. Bad layout can do the opposite. In times where most visitors leave your site within ten seconds, you need all the edge you can get. Here are some things that good website layout accomplishes:
Makes a good first impression – Users decide within less than half a second whether they like your site or not, so you better make sure your layout is on point.
Naturally leads the eye to important content – The focus of every website is content, whether that is products or information. Your page structure can either direct users towards it or away from it.
Provides strong user experience (UX) – A good layout helps visitors find what they are looking for, both on page as well as sitewide. It also sets elements in relation to each other, determines their sequence, and gives weight to the right elements.
Gives guidance – Layout provides guide rails for your users. It places the most important content at the top and leads them down the page toward your goal.
The best website layout is one that you barely notice because you can easily find every element you are looking for. It is also one aimed at your target group, their preferences, behaviors, and needs.
Consider the Type of Website You Are Building
As you have seen above, different website layouts are more or less suitable for different types of websites. Therefore, in order to choose the right one for you, you first need to be crystal clear about what kind of site you are building.
Business sites, shops, blogs – they all have very different focal points and demand different layouts. Clarity in this area is the first step towards making the right choice.
Do Your Research
Your website does not exist in a vacuum. Look at websites that are the same type as yours (e.g. blog, ecommerce, B2B, B2C, etc.) but sell different types of products/services or serve different industries/niches than your own.
When you do, identify common website layouts, best practices, what looks good, and see what you can do better with your layout.
Consider What You Like
Yes, a website is primarily there to serve other people. However, at the same time, it also needs to be something you like. If you are turned off by your own website, it’s unlikely that you will put in the energy and enthusiasm needed to run it and make it successful.
For that reason, while considering which website layout to choose, also do some introspection. Think about what you personally like and would like to see on your site.
Base Your Design on Common Layouts
The website layouts we discussed above are commonly known because they work. They have proven to be usable over time, are familiar to users, and ready to go. Therefore, it’s a good idea to go with one of the established layouts and then add your individual flavor to it.
Creating a website layout mockup
WordPress themes are flexible enough to support different types of page layouts out of the box. But what if you are designing your own theme or are working with a website developer? In this case, you might want to create a wireframe. This helps to map out your page layout and is also good to clarify your ideas and get them onto paper.
Wireframing your layout
A wireframe is like a map of your page. It’s not the finished design but something that shows its structure.
Here’s how to create a simple wireframe:
Think about the user journey – Be aware what your goals are with your layout, where you want to steer visitors and what you want them to do.
Get sketching (and start with mobile) – Wireframes are not meant to be superfancy or detailed. Therefore, you can get started right away (see the tools below). A good idea is to start with the mobile design, then move on to larger screen sizes.
Create the basic framework – Take a bird’s-eye view, tackle the basic design problems first. Think about where to place the navigation and other basic UI elements.
Identify content areas – Mark where your content goes. For that, it’s important to know the content you will use ahead of time (both word count and images) so that you can accurately include it in the map.
Iterate – Even if you are satisfied with your first idea, do a few more passes to give yourself options. It often takes a while for the best ideas to bubble to the surface.
Test – Once you have some website layout ideas collected, it’s time to put them in front of potential users and collect feedback. The tools listed below are suitable for that as well. Getting some real-life feedback is great to improve and get closer to the final version.
Rinse and repeat – Do this over and over until you are satisfied with the results and ready to move to the design phase.
Pro Tip: Did you know that sites hosted with WordPress.com includes wireframe block patterns that you can use? These are patterns that are closer to a blank slate for your page without much design, but they include a basic structural layout. Just choose a wireframe pattern you like from the patterns library and customize it to suit your needs.
Additional Tips
In order to create the best possible website layout, here are some tips and concepts to keep in mind:
Create a visual hierarchy – Decide which elements are the most important and build your website layout so that it focuses on them. Make sure that they are placed where they are easily noticeable and identifiable.
Use a grid – Almost all web design is based on some sort of grid. It provides order and a basic structure and scaffolding that you can order your page elements along.
Employ the rule of odds – Use odd numbers of elements rather than even. That way, the focus is always on one element instead of in between two of them.
Ensure scanability – We have already talked about reading patterns. When designing your website layout, be sure to accommodate the way visitors consume content to make it easy to catch the gist of your site.
Focus on the fold – The fold is where the screen cuts off when someone first gets to your site. Above it, in the part that visitors see first, you should have your most important content and call to action.
Use enough white space – Negative space, the part without content, is as important as the content itself. It provides space to breathe and allows the emphasis to be where you want users to focus.
Tools for Wireframing
You can use different kinds of tools to build wireframes:
Pen and paper – Classic but powerful, easy to use, and great to quickly whip up some website layout ideas without having to learn a new tool.
Whimsical – A collaboration tool that works for wireframes and also allows you to get feedback. It’s also easy to use and has a free plan.
Invision – Similar to Whimsical. Also works for collaborative designing. Comes with wireframe templates and has a free plan for up to three online whiteboards.
Figma – A popular tool for design and prototyping that has free wireframe kits to hit the ground running. Use the free plan to get started without paying.
WordPress.com’s wireframe patterns – If you want to start with an pre-designed wireframe template, and adjust from there, WordPress.com has some patterns to make this simple.
Find the Right Website Layout for Your WordPress Site
The layout is one of the most decisive factors for the usability of your website. For that reason, it deserves ample consideration so that you can serve your visitors in the best way possible.
Established page structures are a great way to get started. They have proven themselves over time and are able to fulfill established user expectations. While you can (and should) add your own flavor, you don’t have to reinvent the wheel. It’s also often feasible and sensible to use more than one layout in a website, especially on different pages.
When making decisions, consider your type of website, goals, industry, and personal likes. Then, use wireframing to capture your ideas for your website layout. And remember, it’s all about your users. The best layouts are those that they hardly notice.
Build fast, ship faster with Studio, a fast, free way to develop locally with WordPress. Get started now.
Welcome to the latest in WordPress innovation with the release of WordPress 6.7! This update brings a wave of new features, design flexibility, and performance enhancements to elevate your WordPress experience, whether you’re building your first site or fine-tuning a complex project.
From the introduction of the Twenty Twenty-Five theme to powerful new editing tools and developer capabilities, WordPress 6.7 empowers you to create a site that’s dynamic, engaging, and uniquely yours.
As always, WordPress.com sites are updated automatically, so you may already see these new features live. Read on to discover what’s new and how these updates make it easier than ever to build, design, and manage a standout site on WordPress.com.
WordPress 6.7 brings a host of new features, design tools, and bug fixes to enhance your website creation experience. WordPress.com updates sites automatically, so there’s nothing you need to do before you can enjoy these benefits.
As a WordPress.com user, you may have already enjoyed early access to some of these improvements, reflecting our commitment to keeping you equipped with the most up-to-date features. If you experience any issues, our Happiness Engineers are here to help at wordpress.com/help.
Let’s look at some new enhancements that can help take your site to the next level.
Twenty Twenty-Five theme release
As part of the annual tradition, WordPress 6.7 introduces a new default, block theme: Twenty Twenty-Five.
Twenty Twenty-Five is designed for bloggers of all scales—from hobbyist writers to major news sites—capturing a balance between simplicity and versatility. It allows you to intuitively create a site that feels truly personal while offering the flexibility for complex designs. With a diverse array of patterns and templates for everything from landing pages to photo blogs, the theme is tailored to enable seamless storytelling for any purpose. Natural, universal imagery and thoughtfully chosen typography bring warmth and a timeless aesthetic that resonates on a global scale.
Built to support multiple languages and visual styles, Twenty Twenty-Five includes a curated selection of color palettes and font pairings, ensuring both accessibility and elegance in design. Whether you lean toward a minimalist personal blog, a striking photo gallery, or a content-rich magazine layout, the theme’s templates and design tools empower you to build a site that is uniquely yours
Expanded block customization options
WordPress 6.7 also introduces even more styling flexibility, adding additional options for borders, backgrounds, shadows, and spacing across numerous blocks. These updates allow you to create custom designs without extra code. Notably, the Group block now supports shadow effects and the Content block allows for a background image, while blocks like Paragraph, Heading, and Buttons offer additional options for borders, color, and padding.
Streamlined creation with Zoom Out
The new Zoom Out feature offers a fresh way to view and design your content at a high level. By toggling to this zoomed-out perspective, you can easily style entire sections or adjust the arrangement of blocks across a page, all without getting caught up in the details of individual blocks.
With Zoom Out, you can make broader edits using patterns, giving you control over top-level containers and block groups. Click or drag-and-drop to add patterns and use the arrows to the left to rearrange them. When you’re ready to dive back in, simply double-click the content area or click the Zoom Out icon to return to the standard editor view. This feature is a game-changer for efficient layout creation, whether you’re building pages or fine-tuning templates.
Simplified Query Loop block
The Query Loop block, known for its power and complexity, has been refined to make it more user-friendly. A new toggle allows you to choose between “Default” and “Custom” modes, simplifying the creation of content-rich sections on your site. In Default mode, the block automatically inherits settings from your template, so posts display instantly without extra configuration. This means you can drop in the Query Loop block and see your content right away, saving setup time. For more specific use cases, switch to Custom mode for precise control over what content is displayed.
Additional refinements include a cleaner layout of the Settings Sidebar on the right, making it simple to adjust display options in one place.
Key features and updates to take note of:
Quick preview when adding the block from the inserter
Display controls moved from the toolbar to the sidebar
New post format filter for customized content display (on select themes)
Improved font management tools
The latest updates bring powerful new options to font management for block themes, making it easier to customize typography across your site. In the Global Styles section, you can now create, edit, and delete custom font size presets. These presets let you define reusable font sizes site-wide, with options to customize names, base sizes, and fluid scaling, which automatically adjusts font size based on screen dimensions.
Additionally, fonts are now grouped by source (theme or Google Fonts), giving you a clear view of where each font originates. A convenient “Select All” option lets you quickly activate or deactivate fonts as needed, with active fonts visibly highlighted for easy management.
Customizable Data Views
Data Views, a powerful tool for managing pages, patterns, and templates in the Site Editor, now features several enhancements to simplify navigation:
Grid Layout Preview Size: Choose the view that works best for you.
Customizable Columns: Reorder columns based on your preference.
Bulk Actions on Grid Layout: Select multiple items and take action quickly.
These refinements make it easier than ever to organize your site, whether you’re handling a few pages or hundreds.
Developer features
WordPress 6.7 introduces several enhancements for developers, making it easier to create unique site experiences.
Template Registration API
This release allows developers to register custom block templates directly within plugins, simplifying the process of creating and managing front-end template outputs. The Template Registration API enables developers to define default content for custom post types, taxonomies, and virtual pages—all built on the block system, so both themes and users can customize templates to their needs.
Data Views API
Developers can now use a new API to register and unregister Data Views actions, offering more flexibility in managing project-specific actions. Learn how to use Data Views in your own plugins and for adding images to the Media Library. This update is part of ongoing work in Gutenberg’s Phase 3 and the Admin Redesign project, providing expanded tools for custom workflows.
Block Bindings improvements
Building on Block Bindings introduced in previous releases, this update adds a user interface for admins and editors to connect block attributes with custom field data directly in a block.
And more
There are too many great updates to cover them all here, but here are a few smaller yet valuable enhancements worth noting:
Block inserter: The block inserter now stays open while you interact with the editor canvas, making it easier to navigate your content as you add blocks.
Editor topbar: The action icons in the top right corner have been reordered for improved accessibility.
Pre-publish check buttons: The second Publish (or Save) button has been repositioned within the pre-publish panel, so you won’t need to move your mouse after clicking the initial Publish (or Save).
WordPress 6.7 brings hundreds of improvements, developer features, and bug fixes. The above highlights are only a taste of what’s available. If you’d like to dive deeper, the official WordPress 6.7 Field Guide has all the technical details.
Click below if you’re a developer and want to leverage the benefits of hosting your sites with WordPress.com:
When you’re browsing the web, how quickly do you navigate elsewhere if a website isn’t instantly loading? We all know from experience that every second counts. If your website takes too long to load, visitors won’t hesitate to move on—sometimes straight to your competitors.
Faster load times not only improve user satisfaction but also boost your search engine rankings and ultimately drive more conversions.
That’s why you’re going to love using our new Site Speed Tool. It can quickly identify areas impacting your site’s Core Web Vitals (CWV), like load times, interactivity, and visual stability and provides actionable insights and recommendations, making it easier to optimize your site’s performance and deliver a smoother, faster user experience.
Nearly 70% of consumers admit that page speed impacts their willingness to buy from an online retailer.
Almost half of consumers say they’ll try to refresh a page at least once when it takes 3 seconds to load. But 22% say they’ll close the tab, and 14% say they’ll visit a competitor’s site.
47% of consumers expect a web page to load in 2 seconds or less.
Website performance plays a critical role in the success of any online business. Slow websites will cost you not only visitors but also potential revenue. Investing in performance optimization could be the difference between closing a sale and losing out to a competitor.
A faster website gives you a competitive edge by capturing traffic from slower sites. Visitors are more likely to stay, explore, and convert into customers when your site loads quickly. Speed isn’t just a nice-to-have—it’s a key driver of business growth.
Optimize your WordPress site for lightning-fast performance
Is your WordPress site as fast as it could be? Test the speed of your WordPress site with free our Site Speed Tool and get detailed performance metrics and tailored recommendations with just a few clicks. Simply enter any public WordPress URL, and we’ll run real-time tests on your site to assess its performance.
Our tool evaluates key areas, such as:
Loading speed: How fast your site loads for users.
Core Web Vitals: Metrics that focus on user experience, including loading, interactivity, and visual stability.
Historical performance: Tracking your site’s performance over time to spot trends and areas for improvement.
Once analyzed, you’ll receive an easy-to-understand performance score and WordPress-specific, AI-enhanced recommendations to boost your website’s speed and overall performance.
If you already have a site on WordPress.com with a Business or Commerce plan, you can also easily access the speed test directly in your dashboard. Test your performance across all of your sites to better understand correlations between site changes and performance.
Get weekly performance change alerts
Want to stay ahead of performance issues? Sign up for weekly performance change alerts, which provide a comprehensive overview of your website’s metrics over the last handful of weeks. These reports will highlight trends, performance fluctuations, and areas where further optimization is needed—keeping you informed and in control of your website’s health.
Test your site today
Your website’s performance can make or break your success online. With our easy-to-use performance measurement tool, you can take the guesswork out of optimizing your site.
Test your URL now for free and get personalized recommendations to ensure your site performs at its best, or head to the Performance tab in your site’s Hosting Overview menu to get automatic performance data about your WordPress.com sites.
Don’t leave your website’s success to chance—start optimizing today.
You’ll likely need the help of several WordPress plugins to build a successful food blog, but none are as important as the mighty recipe plugin. To put it in perspective, if I were thinking of a recipe blog as a pie, the recipe plugin would be the biggest piece of that pie and the ice cream à la mode. It’s that big of a deal.
A recipe plugin is basically a tiny little translator that meticulously parses and organizes the details of a recipe into robot-ready pieces of data that search engines need to display your content accurately and beautifully in search results. But that’s not all it does.
Recipe plugins serve three main purposes:
They supply search engines with the structured data needed to display your recipes accurately in search results with rich snippets. If this sounds like gobbledygook, don’t worry—we’ll explain it more below.
They provide an easy-to-use recipe template for you, making it simple to add a recipe to your WordPress post without hassle.
They give readers a visually consistent, well-organized recipe format, often including useful features like ingredient checkboxes, unit converters, and serving size adjustments.
Search Engine Optimization
Recipe plugins work behind the scenes (as the tiny translators) to add structured data to every recipe you publish. This structured data (specifically JSON-LD) makes it easy for search engines to understand and showcase your recipes in search results with extra details like images, videos, ingredients, cook times, ratings, and more.
When these enhanced details appear in search, they’re known as rich snippets, and they’re what makes your recipe stand out. This can increase your click-through rate (CTR) and boost your search rankings because of the extra information shown for your content within the search itself.
Luckily, you don’t need to worry too much about structured data. Just know that a good recipe plugin adds this data to display rich results, like Google’s rich snippets or Pinterest’s Rich Pins.
Here’s a fun fact: Pinterest, essentially a visual search engine, is a major traffic driver for food bloggers. With constant algorithm changes in search, diversifying your traffic sources is always a smart strategy.
Here are a few examples of how rich snippets are displayed in Google and Pinterest search results:
Templates for adding a recipe to a post
Let’s not forget that recipes are really just instructions. Using a clear, organized template helps you include all of the important details that your recipe plugin needs to create the structured data.
Here’s an example of a recipe card template from the WP Recipe Maker plugin. You’ll find a similar template with each of the plugins we recommend.
Improved reader experience
Recipe cards come jam-packed with reader-friendly features designed to make cooking easier—like the popular “jump to recipe” button at the top of recipe posts.
It’s easy to feel overwhelmed by all the options. Try to focus on a handful of features that truly add value for your readers. For instance, if your site is focused on baking, a unit converter is a must-have.
Some of the most useful reader-facing features include:
Accurate unit conversions – Test these out, as not all converters are created equally!
Recipe scaling options – Adjust servings by 1/2x, 2x, or 3x.
User ratings display – Helps readers feel confident in the recipe they’re about to make.
‘Jump to recipe’ button – A shortcut to “jump” the reader from the top of the post to the recipe.
Hands-free cook mode – Keeps the screen awake for readers while cooking.
Customizable templates – Allows you to easily style the recipe card to match your brand without the help of a developer.
Starting a food blog often comes with a bit of a learning curve, but being a great recipe writer doesn’t mean you also need to be a tech expert. When deciding on a recipe plugin, choose one that aligns with your current comfort level and can support your needs as you grow.
When evaluating plugins these are a few of the most important things we recommend looking for:
Actively maintained plugins
“Actively maintained” means the plugin receives regular updates, ideally every few months. Recipe publishing evolves quickly, and it’s essential that the team behind this vital part of your site stays on top of the latest changes in search, ad placements, and performance optimization.
Community feedback
The next thing you want to consider is reviews. If it’s free in the WordPress.com plugin repository and the WordPress.org plugin repository, then you can find reviews there. If it’s a premium plugin that’s not in the repository, you can look on the website for testimonials or reviews.
It’s also helpful to ask for recommendations from other food bloggers; Facebook groups and Reddit forums for food bloggers are excellent resources.
Evaluate support
Free plugins on WordPress offer a support forum—take a peek to see if questions are promptly answered. Premium plugins may handle support through a dedicated support channel or email. Try reaching out with pre-sales questions, and if you get a helpful response, that’s a great sign. If support seems lacking, you might want to keep looking.
The technical parts
JSON-LD is the preferred schema markup for search engines like Google and Pinterest, so verify that your recipe plugin includes it.
For search engines to interpret your recipe accurately, your plugin needs to support all required and recommended structured data fields. Google provides a list of these fields, so double-check that your plugin covers them all.
Once installed, test the plugin by completing the fields in the template and running the recipe post through Google’s Rich Results Test to catch any errors or warnings.
Popular recipe plugins
Investing in a paid recipe plugin may seem intimidating at first, but it’s one of the best (bite-sized) investments you can make as a food blogger because it offers you so many benefits that are important to get right from the start. Many plugins offer a lighter free version or a trial period, so I strongly encourage you to test out a few options before making a decision.
WP Recipe Maker
WP Recipe Maker (WPRM) is a powerful recipe plugin, with over 50,000 active installations. They offer a free version, along with premium upgrades that are definitely worth considering. This plugin is the most feature-rich of all of the options.
The main drawback is that WPRM can be somewhat complex to set up with so many features to enable, disable, and customize. It will require some effort, and if you have an eye for design, you may need to customize the templates to achieve a polished look.
Tasty Recipes
Tasty Recipes is part of the WP Tasty plugin suite of plugins, all built for bloggers. While they don’t offer a free version, they do have a 14-day free trial. It’s the easiest of the bunch to set up, and the cards are beautiful right out of the box. It has everything you need and nothing you don’t!
Create
Create is a popular free option developed by Mediavine, a full-service ad management company. With a selection of well-designed card templates and a responsive support team, it’s a solid choice for food bloggers. Create also offers built-in functionality for list and how-to cards if you publish more than recipes.
The only downside of Create is that it doesn’t receive updates as frequently as some other plugins.
Run ads and install plugins, including your favorite recipe plugin, on our Business plan, and let us manage the rest. Get unlimited traffic, unstoppable security, and the power of WordPress, all for one low price.
Imagine you’re sitting in your favorite coffee shop. Your latte is hot, your laptop is open, and you’re ready to write your next brilliant blog post. Where others see a blank page, you see a limitless sea of possibility, waiting to be filled with your persuasive prose and captivating copy.
You start tapping away at the keys, sipping your coffee, thrilled with your progress.
Then you try reading what you’ve written and realize it’s hard to follow. In fact, you’re not exactly sure what you’re even trying to say. If you’re confused, your readers will be confused too. The awesome article you hoped to write is turning into a mess.
Where did you go wrong? You started writing without creating an outline first.
It’s an easy mistake to make. Fortunately, it’s also a mistake you never need to make again. We’re going to show you how to create effective blog post outlines that will help you write better articles more quickly. Plus, we’ll give you a copy-and-paste template to make the task even easier.
Blog post outlines are simple documents that describe the angle and structure of your article. They make it easier to write clearly and efficiently while staying focused on your topic. At a minimum, a good outline should include the following items:
Your topic: What are you writing about?
Your angle: What’s your perspective on that topic?
Your structure: What specific points will you make to support your angle?
You can also include working titles, though some writers prefer to write headlines after their post is finished. This helps make sure your selected headline actually fits the finished article.
Different writers have different approaches to creating outlines. Steal this process to get started, then feel free to adapt it to fit your own needs.
Let’s say you want to write about your most recent vacation. You had an awesome time and you’re sure your readers want to hear about it. But rather than summarizing the entire trip, you want to share a story about something specific. You could start narrowing down your topic by asking:
Where did you go?
Why did you go there?
When did you visit?
How did you travel there?
What did you do at your destination?
These are simple questions but there is a purpose to this exercise. I’ll share some example answers from an actual vacation my wife and I went on:
Where: Acadia National Park in Bar Harbor, Maine.
Why: To see the fall colors, to see a state we’ve never been to before, and to see where the sun first rises in the United States.
When: In the fall (to see those leaves along the mountainside turning colors).
How: Plane and two rental cars (the first car got hit by a semi-truck).
What we did: All kinds of stuff! Hiking, climbing, catching lobsters in a net, and more.
From this simple list, you can see there are a ton of topics I could write about. What happens when you get into a vehicular accident with a rental car on vacation (and how did we survive)? What’s it like taking a tour on a lobster boat? What does it look like when the leaves hit peak fall colors in New England?
Suddenly, our blog post about a vacation just got a lot more interesting, and it might actually turn into multiple different blog posts on specific topics that people might enjoy. By asking yourself the five W’s (what, when, where, why, and the honorary 5th W, how), you can break down any broad topic into more specific points too.
Anyone can copy content they’ve found through Google but not everyone can bring a unique perspective to their topic. That’s where developing an angle for your blog post comes in.
An angle is the intersection of your topic and your perspective. It’s part of what blog post introductions are intended to establish, helping the reader to understand not only what they’re about to read, but why they should care about it in the first place.
For example, to continue with the vacation example from the previous section, let’s say our blog post is about Acadia National Park. Some good angles might include:
Why is Acadia National Park the best place to see the fall colors in New England?
What do you wish you knew before tackling the toughest trails in the park?
Where is the best destination to find a lobster roll near the park?
These angles not only address the topic but also the perspective. Instead of dry facts and information, they give the reader an incentive to care, and they’ll be more likely to click, read, and stick around the blog. That’s the power of having an angle.
Step 3: Determine the format for your post
Different topics will lend themselves more easily to different formats. Here are some types of posts you could consider and when each one might make the most sense for your article:
Type of blog post
Best suited for these types of topics
Example headline
How-to
Instructional guide on completing a task or learning a skill.
How to Get Started With Mountain Climbing
What-is
An extended definition of a term or topic.
What is the Most Difficult Mountain to Climb?
Why-is
Answering a question that people commonly ask (or perhaps don’t ask often enough).
Why is [PRODUCT] the Best Option for [TASK] When Mountain Climbing?
When
Informing readers about what to do in a given set of circumstances.
When Should You Avoid Mountain Climbing If You’re Unsure About the Weather?
Essay
Writing about a personal experience.
What I Learned From Climbing a Mountain
Review
Covering a product you’ve used or want to recommend.
Why I Recommend [PRODUCT] for Mountain Climbing
List
Rounding up your favorite things or options within a category or topic.
10 Things You Should Know Before Mountain Climbing
Comparison
Stacking two products or options against one another.
[MOUNTAIN A] vs. [MOUNTAIN B]: Which One Should Beginners Climb First?
Interview
Sharing a Q&A with an individual or a feature article based on an interview.
A Conversation With a Famous Mountain Climber
Feature Article
Deep dive into an interesting story based on interviews and research.
The Interesting Story About the World’s Best Mountain Climber
There are more types of blog posts that could consider writing, but these are some ideas for common formats that you might choose. What matters most is that you understand which one you are writing before you begin, rather than getting too deep into your post, and realizing that you need to change direction after you have already spent time working on a draft.
If you do decide to pivot or start over, that’s okay too. This process is only meant to avoid that from happening, but there’s no shame in changing your mind.
Step 4: Figure out the main points of your post
One blog post isn’t enough to cover everything about our vacation, so we’ve narrowed down one specific topic. We’ve also narrowed down an angle that combines our topic with our perspective. Next, we need to identify the main points that our blog post needs to make, in order to follow through on our angle.
In order to construct our outline, we’ll identify three to five points we want to make (you can include as many as you need, but if you have fewer than three main sections in your blog post, you might not need to write an outline).
Going back to our vacation example, let’s say I’m writing about what I wish I knew before hiking in Acadia National Park. Here are some things I might want to cover:
Know your skill level and choose trails accordingly.
Make sure you have the right footwear for the terrain.
If you’re afraid of scaling rock faces, how can you overcome that fear?
If you only have enough time for a few trails, which ones should you prioritize?
What times are the trails usually the most crowded?
That looks like a solid list. Next, we’ll need to figure out what we’ll say for each of these items.
Step 5: Nail down the specific subpoints you’ll make in each section
Once you have the main points of your blog post mapped out, think about what you’ll say for each one. This can be as simple as two or three bullet points per section.
Let’s take the first item from the list of trail tips in the previous section:
Know your skill level and choose trails accordingly
Some trails will stretch your abilities but some are for experts only
You can get a trail map that will help you find ones you’re comfortable with
Difficult trails sometimes have alternate routes you can take if you get tired
Straightforward stuff, right? Continue with each subsection until you have two or three subpoints for all of them.
Step 6: Think about your conclusion
Generally speaking, a conclusion should wrap up the main points of your blog post, and bring your topic to a resolution. But there may be other details here to consider. Take a moment to think through the following:
Is there a specific action I’d like the reader to take after reading the post, such as signing up for emails, making a donation, purchasing a product, or registering for an event?
Is there a specific point you really want to drive home before the reader moves on?
Are there other similar articles on your blog that you could direct the reader toward (and continue to hold onto their attention)?
It’s okay if the answer to one or all of these questions is “no,” but it’s worth taking the time to be intentional about how you’ll end your post.
Step 7: Review the structure of your outline
Follow steps one through four, and before you know it, you’ll have a completed outline. Take a moment to read it over and make sure your angle fits your topic and everything flows in a logical order. If it doesn’t, try moving some sections around, and see if it clicks. The time you spend on this now can save you much more time later.
An example blog post outline you can follow
Now, let’s take a look at an example outline you can follow. Here’s what the finished product might look like when it’s all said and done:
Headline: Five Things I Wish I Knew Before Hiking in Acadia National Park
Format: List
Introduction (angle): Acadia National Park is a great place to hike, but it’s even better when you know what to be prepared for. Here’s my personal experience.
Tip 1: Know your skill level and choose trails accordingly
Some trails will stretch your abilities but some are for experts only
You can get a trail map that will help you find ones you’re comfortable with
Difficult trails sometimes have alternate routes you can take if you get tired
Tip 2: Bring the Right Footwear
Good hiking boots are a must on most trails
However, decent sandals may be sufficient for some trails
Bring multiple pairs of boots and shoes for different situations
Tip 3: Overcome Your Fear of Treacherous Trails
Some trails will take you up rocky portions of mountainside on very narrow walkways
They are safe as long as you’re careful (just don’t look down)
The rewards are worthwhile when you see the views from the top
Tip 4: Prioritize Trails to Make the Most of Your Time
If you know there are certain types of scenery you want to see the most (mountains, forest, ocean, etc.) choose trails that provide those types of terrain and views
Tip 5: Hike at Off-Peak Hours (If Possible)
The park is very busy
Consider hiking in the early morning or evening to beat the crowds
Timing your trip outside of peak vacation season can also help alleviate crowding
Conclusion
End with a link to the park’s website to find more information
This is a very quick and simple outline but it’s sufficient for demonstration purposes.
Use this copy and paste template
Now that we’ve walked through the entire process of crafting an outline, here is an easy-to-use template that you can copy and paste into a document. You can edit and update this template however you’d like (some suggestions might be to add sample headlines or a brief two or three-sentence section describing your angle):
Introduction (what’s the angle of this post?)
Type of Post:
Main point 1
Subpoint 1
Subpoint 2
Subpoint 3
Main point 2
Subpoint 1
Subpoint 2
Subpoint 3
Main point 3
Subpoint 1
Subpoint 2
Subpoint 3
Conclusion
Optional CTA
When should you write an outline?
If you landed on this article, then odds are you already knew you wanted to write a blog post outline. But you might still have some questions about why we actually take the time to write them in the first place.
Personally, I know some writers who are meticulous about outlining, and some who skip them entirely. Sometimes you just want to let your consciousness flow onto the page and sometimes that can produce great writing that can’t be planned. I’ve even bounced between being in both camps, sometimes choosing to write outlines, and sometimes choosing to skip them.
So, when does it make sense to put one together, and when can they safely be skipped? Here are some thoughts based on personal experience:
You’re writing a long-form post (approximately 1,000 words or more).
You’re writing about a complex topic that requires a lot of research to accurately cover.
You’re assigning a post to another writer for your blog and need to make sure they understand what you want the post to touch on.
Does it ever make sense to skip an outline?
The point is to clarify your thinking so you can clarify your writing and produce better content more quickly. However, the point is not to follow rules for no reason, and there are times when it may not be necessary to write an outline.
For example, if you’re writing a personal essay for your blog, you might prefer to let your thoughts flow in a more stream of consciousness sort of way. Or if you’re crafting a short news blurb, you could probably write your entire post in the time it’d take to outline it. Use your own judgment, because when it comes to learning what works for you, experience will be your best teacher.
Writing outlines doesn’t have to take too much time in order to be an effective exercise. Once you get into the habit of writing them before starting on blog posts, and start to see the benefits of doing so, you won’t want to break the habit. Now, go forth and write better blog posts, faster!
Ready to start your own blog? Find out why more bloggers and creators choose WordPress.com. Start your journey here.
In the world of web development, creating custom layouts often feels like a balancing act between functionality and design. But with Gutenberg, WordPress’s powerful block editor, developers now have the tools to craft complex, unique layouts—all without the need for third-party page builders. Whether you’re building a site from scratch or looking to enhance an existing one, Gutenberg offers a streamlined, flexible approach to layout design.
In this post, we dive into five specific Gutenberg blocks that stand out for their versatility and power.
Group Block: Allows you to group multiple elements and apply consistent styling across them.
Columns Block: Enables developers to create multi-column layouts that are fully responsive across all devices.
Cover Block: Combines visuals with layered content, like text and buttons, to create immersive, standout sections.
Spacer Block: Provides an easy way to manage consistent spacing throughout a layout without adjusting individual block settings.
Query Loop Block: Dynamically displays lists of posts or other content, offering flexible filtering and layout options.
These blocks are essential tools for developers who want to create custom layouts that are both visually stunning and fully functional. Keep reading to explore how each block works, see examples of them in action, and learn about potential use cases that can elevate your next project.
Unlock Custom Layouts with the Group Block
When it comes to crafting custom layouts in WordPress, the Group block is one of the most versatile tools in your arsenal. This block allows you to combine multiple elements—such as text, images, and buttons—into a single, cohesive section. By grouping elements together and utilizing the Group block variations, you gain greater control over their positioning, styling, and responsiveness.
Why the Group Block is Powerful
The strength of the Group block lies in its ability to simplify your design process. Instead of having to adjust settings on each element individually, the Group block allows you to apply consistent styling to an entire section. This not only saves time but also ensures that your layouts are cohesive and visually appealing across different devices. It’s also the primary block used for creating fixed elements, such as a sticky header or sidebar.
How to Work with the Group Block
In the screen recording below, you’ll see how the Group block enhances the process of building a hero section by combining elements like images, text, and buttons into one cohesive section. Notice how easily you can adjust the spacing, colors, and alignment, streamlining your design workflow.
Putting the Group Block into Action
The Group block excels at creating reusable modular sections, such as a call-to-action or feature area, that can be deployed consistently across multiple pages. This block is also essential for organizing complex content arrangements into a single, unified section that can be easily updated site-wide. Whether you’re crafting a sticky header or organizing a product showcase, the Group block gives you precise control over how these elements are positioned and styled.
Design with Flexibility Using the Columns Block
The Columns block offers flexibility in organizing content side-by-side, allowing developers to create multi-column layouts that can accommodate grids, comparison sections, or any layout where parallel information is key.
Why Developers Love the Columns Block
The true power of the Columns block lies in its versatility for designing structured layouts. Its flexibility allows you to customize the number of columns, their width, and spacing, from simple two-column layouts to more complex grids. The Columns block is also fully responsive, ensuring layouts automatically adjust across different screen sizes, providing developers with seamless control over visually balanced designs.
See the Columns Block in Action
This recording showcases the Columns block used to create a three-column layout featuring services or products. Notice how columns with multiple components can be duplicated and edited.
When to Use the Columns Block for Maximum Impact
The Columns block is ideal when content needs to be displayed side by side, such as in service comparisons, product grids, or team member profiles. Combining it with the Group block allows for more complex, unified sections with consistent styling while still leveraging the flexibility of columns.
Create Stunning Visual Impact with the Cover Block
After organizing your content with the Group and Columns blocks, the Cover block steps in to add a bold, immersive visual experience. Whether it’s a full-width section with a background image or a full-screen video, the Cover block helps create standout moments on your page, perfect for grabbing your audience’s attention as they scroll.
Why the Cover Block Stands Out
What sets the Cover block apart is its ability to combine beautiful visuals with layered content like text and buttons. This block allows for a sleek, modern look with customizable overlays, and its parallax effect creates a sense of depth as users scroll. It offers developers a visually striking way to engage visitors and direct attention to key content.
How to Use the Cover Block as a Section Break
The following video demonstrates the Cover block being used to create a dynamic section break with a full-width image, overlay text, and a contrasting color filter. Pay attention to how this visually striking break guides users from one section to the next.
Where the Cover Block Shines
Whether for a hero section, a banner to break up sections, or a feature area to emphasize important content, the Cover block works best where you want to make an impression. It’s ideal for landing pages, events, or promotional areas where a mix of powerful visuals and actionable text is needed to guide visitors toward their next step.
Create Balance and Breathing Room with the Spacer Block
For developers, clean, balanced layouts are crucial to a great user experience. The Spacer block might seem simple at first glance, but its ability to fine-tune the spacing between elements gives you precise control over your design. Rather than manually adjusting margins or padding across multiple blocks, the Spacer block offers a streamlined approach for maintaining consistency throughout your layout.
Why Developers Choose the Spacer Block
One of the key benefits of the Spacer block is its ability to apply consistent spacing without needing to modify each block’s individual settings. For developers managing complex layouts, this can be a huge time-saver. You can insert Spacer blocks between sections to ensure consistent spacing, avoiding the need to repeatedly jump between block settings. This results in a cleaner workflow and a more polished design.
Simplifying Layout Spacing
This clip highlights how the Spacer block ensures balanced spacing between sections. You’ll see how adding Spacer blocks keeps the layout clean and cohesive without needing to adjust individual padding and margins for each element. Plus, see how changing the height of multiple Spacer blocks is one step when you create a Spacer synced pattern.
Where the Spacer Block Adds Efficiency
The Spacer block shines when you need to maintain uniform spacing throughout a project. You can preset its default dimensions or sync it within design patterns, and any future adjustments can be done in one place, saving you time when managing entire page or site-wide updates. For added flexibility, you can apply custom CSS classes to synced Spacer block patterns, making it simple to adjust spacing for different screen sizes. This not only improves the speed of implementation but also ensures consistency across your layouts, whether for landing pages, posts, or custom templates.
Dynamically Display Content with the Query Loop Block
The Query Loop block allows you to easily pull in lists of posts, pages, or custom post types, dynamically displaying content based on specific parameters such as categories, tags, or author. It’s an essential tool for developers who want to showcase content in customizable layouts without needing to manually curate each section.
Why Developers Rely on the Query Loop Block
The Query Loop block provides developers with powerful filtering and display options that are fully customizable. With complete control over how posts are pulled and arranged, developers can customize the Query Loop block to display filtered content based on categories, tags, or other criteria, allowing for tailored blog grids, portfolios, or archive pages that fit seamlessly into their overall site design.
Creating and Enhancing a Custom Query Loop Layout
This example shows how the Query Loop block is configured to display a custom set of blog posts, filtered by category. Notice the versatility and how integrating blocks together enhances the layout, resulting in a dynamic, visually balanced blog section that updates automatically.
Where the Query Loop Block Shines
On sites with frequently updated content, the Query Loop block provides a dynamic solution for showcasing new material. When integrated with other blocks it helps developers create visually engaging layouts that update automatically while keeping a consistent design structure.
Elevate Your Layouts with These 5 Powerful Blocks
These five versatile Gutenberg blocks—Group, Columns, Cover, Spacer, and Query Loop—can transform your layouts, helping you build dynamic, fully customized designs. Whether you’re creating responsive multi-column sections with the Columns block, adding visually striking breaks with the Cover block, or displaying dynamic content with the Query Loop block, these tools empower you to build and refine layouts with precision and creativity.
Each block offers unique strengths, and when used together, they give developers a powerful toolkit to craft sophisticated designs directly within the WordPress editor. By combining these blocks, you can streamline your workflow, maintain consistency, and create layouts that are both visually appealing and highly functional.
Try It Yourself!
Now it’s your turn. Experiment with these blocks in your next project and explore the different ways they can work together to create custom layouts tailored to your needs. In the comments below, share your unique Gutenberg-powered layouts and show us how you’ve applied these blocks to your projects. We’d love to see what you come up with!
Get ready to meet your new development best friend: the Studio Assistant.
The Studio Assistant is a smart chatbot integrated within Studio, our free and open source local development app, and it’s now available for all Studio users to assist you in building WordPress sites effortlessly.
The Assistant leverages WordPress.com infrastructure and our WordPress knowledge base to provide helpful responses using Retrieval Augmented Generation, so you’ll get tailored-to-WordPress responses every time.
Building WordPress sites locally has never been easier. With the Studio Assistant, you can quickly configure new sites, manage existing sites, and run complex WP-CLI commands—all through a simple and intuitive chat interface.
Check out what the Assistant can do directly within the Studio app:
Why you’ll love the Studio Assistant
There are many reasons to love the Studio Assistant, but here are just a few:
You can speak to the Assistant in any language, and it will respond in the same language, so that you can learn in the language that’s best for you.
The Assistant gives you the ability to open site files with just one click, so you won’t need to go digging in your site files manually.
The Assistant uses context about your specific site (like what themes and plugins are installed) to give you tailored responses and suggestions.
But seeing is believing, right? Here are some exciting use cases for the Assistant:
Ask and discover
Say you’re looking for an SEO plugin but are unsure of your options. Ask the Assistant, and you’ll get specific recommendations.
Code and content blocks written for you
When you ask the Assistant to write posts or code, it will provide you with Gutenberg blocks or code that you can simply copy and paste.
Tailored to your site
Moreover, the Studio Assistant is trained on WordPress-specific documentation and has access to a bunch of context about your site; therefore, it’s able to respond with site-specific information and recommendations.
WP-CLI commands with just one click
The Assistant is extra slick because you can run commands inline, removing the steps of installing WP-CLI and running commands in your terminal––simply click Run, and your recommended commands will be run for you:
Elevate your expertise
You’ll also get a handy output about what the suggested commands do, helping you learn as you use the tool. This aligns with our desire to continue giving developers more ways to level-up their development skills and knowledge.
And if that isn’t enough to convince you to incorporate the Studio Assistant into your development workflow, here’s what Hoang Hxn said after he got early access to the feature:
After more than two months of using the Studio Assistant, it has become a great tutor that has helped me learn WordPress 100 times faster. I can ask questions in my native language, and the Studio Assistant can return Vietnamese results, in both complex terms and simple, easy-to-understand language for beginners like me.
In addition, I can execute CLI commands directly and quickly without knowing the technicalities, and I can create sample posts and pages quickly. I can also ask questions for beginners (like “what is the purpose of WordPress plugins?”) without being afraid that they’re “too beginner.”
The Studio Assistant answers these basic questions quickly, accurately, and directly in the Studio app; it prevents me from having to go to forums and wait for my questions to be answered.
Ready to get started with the Studio Assistant?
We thought you might be.
Start leveraging Studio Assistant’s powerful capabilities in just a few steps:
Login with your WordPress.com account (free or paid).
Create a new Studio site.
Click on the Assistant tab.
Start chatting.
Let us know what you think!
We’re thrilled to finally share the Studio Assistant with you. We’d love to hear about some of the tasks you hope to automate with the Studio Assistant in the comments below.
As a reminder, Studio is a free, open source tool, so we welcome any and all feedback in GitHub. Explore other Issues and create your own here.
If most food bloggers had their way, a recipe blog post would likely be simpler—a few images, a short introduction with helpful tips, and the recipe itself. Sadly that’s not the reality of the internet today with flashing ads taking over your screen while you’re up to your elbows in focaccia dough. But it hasn’t always been that way.
In the beginning, think early aughts, food blogging was entirely disconnected from ad revenue and Google’s algorithmic whims. Most food bloggers then were in fact food writers, using an online audience to develop their voice and share a much-loved recipe.
There were so few recipe publishers, we hung onto their every word and looked forward to each new post—100% ad-free. A few would get cookbook deals or become contributors to our favorite food magazines. We giddily followed them off the screen and into print. It was the golden age of food writing.
Modern recipe publishing
Then came the flood. Aspiring food bloggers popped up in droves, eager to replicate the success of what those early pioneers had made look so effortless. Along the way, the terrain had shifted dramatically.
You need to be more than just a great recipe developer and writer now—you need to be a professional photographer, videographer, food stylist, marketer, and SEO expert. If you could do it all, and do it well, you could make a very comfortable living from your home kitchen.
All of this expertise from one person requires a lot of time and financial investment. Beyond the basic costs of running a website—like hosting, recipe plugins, and software—there’s the need for high-end camera equipment, online courses, and endless food styling props. For new bloggers, these expenses add up fast.
Today, crafting a single recipe optimized for both Google (more on that below) and social media can easily take over 20 hours. And that’s before you’ve even nailed down a version of the recipe that’s consistently reliable and simple to follow.
As the saying goes, time is money. Enter ad placements—the lifeline that generates the revenue food bloggers rely on to keep the lights on.
How food bloggers earn money
This is where RPMs come in, aka the soft, gooey center of why food blogs can seem so tediously long.
For food bloggers, ad revenue is based on RPMs (Revenue Per Mille), which is the amount earned per 1,000 sessions. This amount can fluctuate based on a number of factors, including time of year, device, traffic source, time on page, and ad density. Ad density is one of the few factors a blogger can control and plays a big role in boosting RPM—more ads mean higher earnings and longer posts create more opportunities for ad placements. More content, more ads, more revenue!
But it’s not as simple as it sounds. There are millions of food blogs, and only a small percentage are highly profitable. Early-stage food bloggers are often fueled by sweat equity, working hard in hopes of eventually breaking into the top tier of high-earning bloggers.
To qualify for some of the larger ad networks, food bloggers need at least 100,000 monthly pageviews. With that level of traffic, a food blogger might earn between $2,000 and $3,000 per month, or around $24,000 to $36,000 annually. Longer posts can drive up those RPMs.
The ad networks were primarily responsible for this initial push to longer posts, even if you were just waxing poetic about your weekly trip to Costco while losing sight of that blueberry muffin recipe your readers are after.
Then Google said enough. We’ll reward the sites that demonstrate expertise, through a combination of high-quality, relevant content and author credibility—aka the helpful content update.
Nowadays, personal stories have largely given way to detailed instructions and practical tips, such as where to buy the author’s go-to Thai curry paste online (which, of course, will be an affiliate link—because yes, food blogging is a real job, and bloggers need to earn a living too).
This added information above the recipe serves two main purposes:
First and foremost, to ensure even the most inexperienced home cook feels confident following the recipe.
To provide Google with plenty of tasty SEO tidbits to boost the recipe’s ranking in search results.
Better rankings lead to more traffic—and more revenue.
Another important consideration for authors is the extent to which their articles are eligible for copyright protection. Basic lists of ingredients are generally not considered copyrightable under US law—whereas more substantial expressions or accompanying media will be. The more creative you are in your explanations, the better for your reader, and the more likely you are to enjoy protection over the results.
Advice for food bloggers
If you’re a food blogger trying to maintain the delicate balance between performing well in search and keeping your readers happy, do your best to ensure that the content above the recipe card offers value to your readers.
Here are some suggestions for relevant content to include:
Ingredient substitutions
Dietary considerations (can this recipe be made vegan or gluten free?)
Where to find uncommon ingredients
Preparation tips, along with process shots
Storage, freezer, and meal prep tips
Alternative methods, like Instant Pot or slow cooker variations
Recipe FAQs
With literally millions of food sites to choose from, think of personality as the sprinkles that set you apart, but relevant content is what establishes your expertise and keeps readers coming back for more.
Even John Mueller, who coordinates Google Search Relations efforts, recommends making content for your readers first. What makes you, your recipe, and your corner of the internet unique, helpful, and relevant?
How to support online publishers
Food is a highly personal topic, filled with memories and experiences food bloggers are generous enough to share. Whether they’re helping us recreate a beloved restaurant dish at home or offering a comforting family recipe, they’re here to guide us every step of the way.
Now that you’ve gotten a glimpse behind the scenes, here are a few ways you can support the recipe publishing community:
Leave a review after trying the recipe—it helps others and gives valuable feedback to the creator.
Share any tips or questions that might help fellow home cooks.
Remember your dinner party manners when commenting—be kind and respectful, even if the recipe didn’t turn out as expected.
Spread the word by sharing a recipe you love with friends and family.
Make the recipe and post about it on social media—bonus points if you tag the author!
Let those video ads play while you gather ingredients. You can close them afterward, knowing you contributed to the creator’s RPM.
Be patient with ads, especially during Q4 (the last three months of the year). This is when bloggers earn the most—RPMs spike, traffic increases, and ad placements get more aggressive.
If you find ads and anecdotes distracting, simply use the “Jump to Recipe” button at the top of most recipe posts. It’ll take you straight to the recipe. While you may still encounter a few ads within the recipe card, it’s a small trade-off for a well-written, free-to-you recipe.
For a completely ad-free experience, consider buying a cookbook, a paid recipe subscription service, or better yet—give your grandma a call. She probably has a recipe and a story you’ll love, and let’s face it, you’re probably overdue for a chat.
Run ads and install plugins on our Business plan, and let us manage the rest. Get unlimited traffic, unstoppable security, and the power of WordPress, all for one low price.
One of the biggest struggles in the life of a freelance web designer or developer is figuring out how to get web design clients – especially at the beginning of your career. It can be frustrating when you’ve spent a lot of time honing your skill set, educating yourself, and staying on top of the latest trends, and yet your client roster stays empty.
Failing to find clients can be very disconcerting. Not only do you not know where your next paycheck will come from, it can also introduce self-doubt. You might start questioning whether striking out on your own was the right choice after all and if you have what it takes.
Luckily, there are plenty of things you can do to build a clientele for your services, and in this post, we’ll share them in detail. Below, you’ll learn 12 ways to get web design clients that will want to work with you (along with tips on how to implement each idea). From understanding business basics, to reaching out to prospects, to closing deals, you’ll find everything you need to start landing clients here.
There is an old marketing adage that says, “if you try to appeal to everyone, you end up appealing to no one”. In this case, it means that simply providing “web design” is too broad an offer. Most of the time, it’s more effective and lucrative to cater to a specific clientele who you create websites for.
Why?
For one, doing so allows you to target your marketing much more specifically. You can address the needs of a certain target group and speak to their pain points directly instead of very generally.
Imagine you are a mental health provider. Which web design offer would you rather go for?
“High-Quality Web Design Services: We Build Your Website Fast!”
“Mental Health Website Design – Let Us Help You Help Your Patients”
It’s most likely the second one, right? That’s because it is a lot more targeted.
Focusing your offer increases your credibility and the perception of the value you can provide. It allows you to position yourself as an expert and charge accordingly.
In addition, niching down means you compete with fewer people. Instead of all “web designers,” now you only contend with “web designers for industry X.” That group, by definition, is much smaller.
How to decide on a niche
However, what target group should you go for? The best niche is one that is made up of both something that you enjoy and in which there is a clientele willing and able to pay.
To figure it out more specifically, it’s a good idea to look at both your past work and what you do in your free time. First, consult your portfolio. Think about what projects you enjoyed doing the most.
In addition, consider which hobbies or personal passions you indulge in and the industries you interact with in those endeavors. For example, you might have built a website for a dental lab in the past, and you also like to knit, surf, and do CrossFit.
Now it’s time to see if any of these industries offer enough earning potential to become your niche. In this case, knitting is probably not a good fit. However, dentistry, surfing, and CrossFit are all niches with members who likely have a large enough marketing budget to be profitable.
Once you have decided on your niche, what’s left is to research it extensively. Get to the point where you really understand your clientele and their needs. Become the expert they need you to be to help them achieve their website goals.
2) Establish your pricing for web design projects
The next step is deciding on your pricing. It’s much easier to negotiate for a new project when you have thought about what you want to offer and how much you will charge for it beforehand. Otherwise, when put on the spot, you might not know what to say. Plus, you need to make sure you get paid what your services are worth.
The web design process has become more complex over time. A lot goes into creating a user-friendly, mobile-responsive, accessible, search-engine-optimized, and fast-loading website – which is what it takes to compete in today’s online environment. It also involves several stages, from setting up the site architecture over wireframing to testing.
In addition, a website is one of the main considerations for most businesses these days and one of the main ways of presenting themselves. Therefore, you are not simply providing a website; you are building a business asset for them.
Plus, it’s not just the design and programming work; you also offer strategic advice for marketing their business online (at least, if you have done your homework earlier in step one). This might include creating the branding, writing copy, and helping with a content strategy.
You can determine your pricing for a project by following this process:
List all the steps required for to complete the project (ex: research, wireframing, design, copywriting, etc.).
In the end, your pricing depends a lot on how you position yourself. If you go the “I am a freelance web designer” route, you can ask for anywhere from $2,000 to $5,000 for a simple website and $10,000 to $20,000 for a complex site with a variety of templates, features, and intricate functionality.
On the other hand, if you niche down enough and acquire the necessary expertise for your industry, you get to position yourself as an agency that builds bespoke web presences for an exclusive client pool. In that case, your pricing can be higher, starting at $10,000 for simpler sites and ending at $75,000+ for more complex projects.
Be sure, however, that you can back up what your price tag promises and are able to achieve the requisite results for your clients.
3) Build a strong web design business website and portfolio
Once you have settled on both your niche and price points, it’s time to build your own web presence. As a web designer, that shouldn’t be too big a challenge. However, make sure it looks the part since potential clients will likely judge your skills on your own website design.
Also, use your earlier research to gear it clearly toward your target group. That means you should consider that group’s needs for your site’s aesthetics and, most importantly, copy. Your written content will be the most persuasive tool to show them that you offer what they need. So, be sure to address their needs and pain points in your website copy.
Another crucial tool here is your portfolio. It not only allows you to stress your expertise, but it also acts as a filter for the kind of work you want to do more of. For that reason, a) show off your strongest work, b) choose examples that are relevant to your chosen niche, and c) and focus on the kind of projects you want to do.
However, what if you haven’t done any projects in your niche yet? In that case, do the best you can and try to look for portfolio items that represent the principles you are trying to sell. In short, focus all your appearance and marketing on your ideal client and work.
4) Be active on social media
Social media has become a ubiquitous tool to advertise your products and services. Everyone and your mom is on it by now (seriously, my mom is on more platforms than I am). It’s also an ideal environment to talk and listen to your target audience as well as work on your personal brand. Therefore, it should definitely be part of how you try to get web design clients.
A short caveat beforehand: Remember that you are not trying to close a deal with every message you put out there. Social media is about visibility, getting-the-word-out, top-of-funnel kind of stuff. So adjust your strategy and expectations accordingly.
5) Be active in web design communities
However, where to start? Well, an obvious choice is to go where people talk about web design. That means Facebook groups, Slack communities, subreddits, and forums.
These are good places to take part in discussions, share your expertise, and ask for feedback.
Why should you do that in front of other web designers? Aren’t these not the kind of people who want to hire you?
Well, maybe not directly. However, being active in the web design sphere allows you to build connections and present your work. And who knows? Someone might hire you for a project they are working on.
In addition, where would you go as a potential client who is looking for a web designer? Probably a place where web designers are known to hang out, right? Therefore, taking part in those communities is also a way to get noticed for potential work.
At the very least, you can network, learn from others, and get some critique for your work.
Join communities and platforms frequented by your ideal clients
Of course, if you want to connect with people who might want to hire you, the best way is to go directly where they are. For that reason, a second step is to look for similar resources as above but for your niche and target group.
That might not always seem super easy. After all, is there an online forum for dentists? A Twitter group for accountants? A subreddit where organic grocers hang out?
The funny thing is, the answer often is – yes.
That’s one of the best parts of the Internet. It connects people with similar interests from across the world, meaning there are groups for almost any profession online. You can find them on LinkedIn and Facebook, you can search for “[your target group] + forum” on Google, subscribe to relevant hashtags, and all the other ways you would use to find members of your own profession.
Offer value, be authentic, and have a unique point of view
The challenge in trying to get web design clients via social media is that you need to find a good balance between selling your services and simply being a pleasant and helpful person to talk to. Too much of the first, and you’ll annoy people with being too salesy, too much of the latter, and you’ll have a hard time closing deals.
The best way here is to simply be friendly, knowledgeable, and genuinely interested in helping others. Seriously, that’s what it usually comes down to.
Think about how you can create value for your target group in the easiest way. How can you help them with their problems and make their life easier? Then, do that.
Be generous with advice and input, share your opinions, be polite, and genuinely try to contribute to other people’s success. You’d be surprised at how many clients would be willing to continue a conversation about working together with a person like that.
6) Publish helpful content about web design on your blog
You have probably heard that content has been elevated to royalty. While this notion is a bit overdone, the fact is that content is a staple of inbound marketing. Consequently, if you want web design clients to come to you instead of chasing them down, you would do well to start producing content as well. That also gives you material for your social outlets.
Publish on your own blog
In most cases, blogging will be a part of content marketing. A blog is easy to add to your website, and it’s one of the cheapest marketing tools out there as it mainly costs time.
However, the most decisive part here is what to write about. Reflexively, you might want to publish articles that show what a good web designer you are. In a way, that’s what you’ll do.
However, this is not about demonstrating your skills to your peers. Instead, you need to think about problems that your target group has and provide solutions for them. This shows off your expertise, allows you to target keywords that clients will type into Google, and builds trust in your skills.
This is why settling on a niche and doing extensive research on it is so important. Instead of very general content that likely has a lot more competition, you can create articles that are hyper-focused on your defined target group. Those are usually much easier to rank for and speak directly to the people you want to attract.
Aside from that, there are other types of content you can produce:
podcasts
case studies
a newsletter
guest posts
ebooks
Finally, start collecting email addresses on your blog from the very beginning. Having a good list of subscribers is one of the most effective ways to sell your services. For WordPress.com users, there are several tools and methods you can use to add email subscribers to your blog.
Syndicate your posts on Medium and LinkedIn
Once you are in the habit of creating content (on your WordPress website), it’s a great tactic to repurpose and republish it in other places. Two great candidates for that are Medium and LinkedIn.
Why is that?
Because those two platforms have readership automatically built in. They have an existing user base who spend a lot of time consuming content specifically on there. For that reason, if you also post your content on these platforms (under your name, with a link back to your own website), you can reach additional readers and members of your clientele. That helps further spread your expertise and brand.
By the way, you can take this even further by repurposing your blog content into social media updates, YouTube videos, infographics, or downloadable content. You have already done the bulk of the research, now you simply need to bring it into a different format.
7) Search job boards for clients and contract work
Another classic way to get web design clients is to use job boards. They offer the advantage that you find a lot of warm leads there, meaning people actively looking for help with their web design. The disadvantage is that they can have a lot of competition. You also want to stay away from those sites that purely compete on price (think Fiverr or Guru).
Instead, here are a few resources where you can get started:
Here, too, it pays to do a bit of legwork beforehand. Research potential clients and tailor your offer towards them. Demonstrate the value you can create for them and make it easy for them to say yes.
8) Go to conferences and industry events
In-person meetings are another way to find client work. They are especially suited if you are more of an extrovert who thrives on interacting with others. Talking to clients directly also makes it easier to find out their pain points and discuss their needs in detail without a lot of back-and-forth emailing. If you want to take this to the next level, consider speaking at events, it’s a great way to get more visibility.
Consider business events
Most places have business associations, such as local Chambers of Commerce, that regularly run networking events. They can be general or more specific in nature. What they have in common is that they bring people together in a business setting.
The advantage here is the same as for job boards: attendees come specifically to make business connections, so you don’t have to prime the pump too much so to speak. Everyone is on the same page, making it much easier to speak about commercial issues including offering your services.
The disadvantage is that at general business meetings, it’s harder to meet someone who actually belongs to your target group. You don’t know who exactly is going to be there, so it can be a bit of a gamble.
As usual, it’s always a good idea to be prepared. Have your business cards with you, practice your elevator pitch, and dress professionally. That makes it much easier to make a good impression.
Besides in-person meetings, there are also virtual networking events. For example, you can find them on Eventbrite.
Attend the same networking events as your ideal customers
In order to eliminate the element of randomness, attending occasions that are specifically for members of your target group is a better idea. Doing so makes it much more likely to run into someone who needs what you are offering.
This can be a bit challenging as you are specifically there to hawk your services. However, remember what we talked about before. Don’t be too salesy. Listen to what the other person is talking about, try to uncover issues they are having with their website, and offer insights for what could be helpful. If they like what they hear, it could possibly turn into a job.
You can even think outside the box a bit. Bring your laptop and a sign offering free website reviews. Let people come to you, go over their sites together, offer your insight, and point out how you would improve their current website. It should be easy to make connections that way.
9) Consider WordCamps and WordPress conferences
It’s no secret that WordPress is the most popular CMS in the world and that it powers a large part of the web. For that reason, WordPress in-person events are a hotbed for people interested in web design and companies working with WordPress.
That also makes them a good place to make connections with like-minded people (again, for potential collaboration) as well as companies looking for expertise. This is especially true if you have made building websites with WordPress part of your niche.
In addition, WordCamps are simply a great place to meet people. You automatically have something in common with everyone there, so it’s easy to get a conversation going.
10) Email businesses you’d like to work with (that have websites that look like they need a redesign)
Another way to get web design clients is to directly contact companies in your niche who obviously have needs in that area. Use business directories to find them and check out their sites.
As usual, tailor your offers to each particular case. Spend some time analyzing the websites, point out concrete things that could use improvement, then add a solution.
You can even do so in the form of a prototype or wireframe or a quick video in which you talk about their site live on screen. That’s much better than sending the same form email to everyone and, again, makes it much easier for them to say yes.
So, do your homework beforehand. In addition, be sure to follow up when you don’t hear back. Most people are very busy, so it helps to be a bit tenacious. Even if they end up saying no, at least then you know for sure.
11) Ask past clients and your network to refer you to their connections
Once you have the ball rolling a little bit, one of the best ways to extend your client pool is actually to ask existing clients for referrals. Word of mouth is a very powerful way to get new web design clients for two reasons:
First of all, you have instant social proof. If someone hears about you from a person they know and probably trust, that’s worth more than any third-party testimonial you can put on your website.
Secondly, it’s automatically a warm prospect. We are not talking about someone you found on the Internet who has no idea who you are and receives an email from you out of the blue. Instead, it’s someone you have a personal connection with through a middle-person. Possibly even someone who asked their network for recommendations. That instantly creates a better relationship.
So, make it part of your web design process to email clients after finishing a project and ask them for referrals. In fact, be sure to stay on friendly terms with them and check in now and again. That makes it more likely they will recommend you by themselves.
You can also reach out to other freelancers or people you know in the industry and ask them for referrals, even your friends and family. You can form beneficial partnerships with them and recommend clients to each other for your respective services.
12) Partner with web design agencies
A final way you can get more web design clients is to work with agencies. Many of them hire freelancers in order to increase their work pool when they have too many projects. It’s always worth getting on their list for when that happens.
When you pitch yourself to an agency, treat it with the same regard as when interacting with one-to-one clients. Make sure to send along your portfolio and tailor your application toward each agency you contact.
Plus, of course, do your best work and be as professional working for them as when doing your own projects. That way, you make it more likely that they will send more work your way.
That only leaves the question, where do you find web design agencies to pitch yourself to?
Use business directories to find agencies
Similar to what we talked about above, there are specific directories that you can look into to find web design agencies. Two online resources for that are Clutch and Dexigner.
Both list a large number of web design companies. It’s easy to find potential studios to collaborate with and their contact information is right there as well.
In addition, look into local business directories. Working with local design companies has the added benefit that it’s also possible to introduce yourself personally and take face-to-face meetings. That’s always good for relationship building.
Or conduct a simple Google search
Of course, there is always Google. You can use the search engine to look for web design agencies for potential collaboration and easily apply your own filters like location, industry, or any other categories.
Are you considering developing websites on WordPress.com?
A big factor in winning and keeping web design clients is the tools you work with. One primary consideration here is hosting, both for your personal website and portfolio as well as your client sites.
At this point, we want to humbly suggest considering WordPress.com for your web design projects. Here are just a few features that make us a great option for your new web design or development project:
You are free to use (custom) plugins and themes on any Business plan and above. You also get access to SFTP-SSH, WP-CLI, and Git tools.
The REST API, with its plethora of endpoints, allows you to fetch a wide range of information and build applications on top of WordPress. What’s more, you can test live JSON data and explore it with the Developer Console.
Use wpcom.js, the official JavaScript library for the WordPress.com REST API. It’s compatible with Node.js and all modern web browsers and allows you to easily build back ends for your web and mobile apps.
Photon is an image acceleration and modification service available on WordPress.com and via Jetpack. It automatically compresses and caches images as well as serves them from a distributed CDN.
For more information and additional features, check out our developer resources. If you run or work for an agency, you may also be interested in Automattic for Agencies.
Now, go land more web design clients
While it would be nice if being a freelance web designer or developer only consisted of being creative all the time, unfortunately, learning business skills, such as how to get web design clients, is a necessary part of the job. At the same time, however, it’s also not the insurmountable obstacle it can sometimes seem to be.
By being crystal clear about the industry you are targeting, figuring out your pricing, and building a strong web presence, you can create a solid basis for your business from which to start your acquisition efforts.
After that, there are many options to get on the radar of your clientele. From inbound measures like social media marketing and blogging to outbound marketing such as frequenting job boards, going to events, cold outreach via email, asking for client referrals, and partnering with design agencies, there is a lot you can do to get hired.
Pick what plays to your personal strengths and inclinations to get started. At the same time, don’t be afraid to experiment with what seems outside your comfort zone. Then, double down on what works and keep building your business. Also, don’t forget to have a strong hosting partner by your side who can support you in your efforts.
This article was originally published on wordpress.com/go on March 31, 2023. It was lightly updated by Ben Sailer and republished on Oct. 22, 2024.
While there are no shortcuts to success, there are shortcuts to a more efficient workflow. We may not think about them much, but these keyboard shortcuts have helped millions of people make their daily—even hourly—workflows faster and more efficient.
Some of our favorite shortcuts at WordPress.com help us bypass menus, create post drafts with a single click, quickly access bulk management options, and effortlessly find useful blocks in the editor. Let’s take a look and see how you can use these same shortcuts right now.
1. Command Palette with ctrl+K (or cmd+K)
First up is the Command Palette—think of it like a Swiss Army knife for your site.
What It Does: Instead of clicking around menus and hunting for the right setting or page, you can press ctrl+K on Windows or cmd+K on Mac to instantly open a WordPress-specific search bar. From there, you can access pages, posts, settings, and even plugins. It’s your shortcut to just about anything you need in WordPress. The Command Palette is accessible when you are logged into your site and have a Block theme activated.
How to Use It: Press ctrl+K on Windows or cmd+K on Mac to open the command palette. Start typing what you’re looking for, like “new post” or “theme settings,” and hit enter when the option pops up. Voilà! You’re instantly taken where you need to go.
Productivity Boost: This shortcut is a lifesaver when you’re deep in your workflow and don’t want to break your concentration by clicking through menus. It’s especially useful for developers or site owners juggling multiple tasks.
2. Quick Post drafts from the toolbar
If you’ve ever been struck by a brilliant idea while browsing your site, you know the frustration of having to navigate to the dashboard to jot it down. Enter the Quick Post Draft shortcut! This lets you start a new post directly from the admin toolbar without breaking your flow.
What It Does: Start drafting a post from anywhere on your WordPress site (while logged in) by clicking the “+ New” icon in the admin toolbar and selecting “New Post.” No more navigating to the dashboard, and no more interruptions.
How to Use It: While logged in, click the “+” icon in the toolbar, select “New Post,” and start typing. That’s it! You’re already in draft mode, ready to get your thoughts down. Simply save the post as a draft for later, or let those creative juices fly right then and there.
Productivity Boost: This is perfect for those moments when inspiration strikes, whether you’re looking at your homepage or checking your latest blog post. Instead of wasting time going to the dashboard and clicking through menus, you’re writing instantly.
3. Bulk Edit posts, pages, or products
If you’re managing a large WordPress site with a lot of content, you’re probably familiar with the hassle of updating multiple posts or products, one by one. The Bulk Edit feature can save you loads of time by letting you edit several posts, pages, or WooCommerce products all at once.
What It Does: You can modify categories, tags, status, author, and more across multiple items in just a few clicks. Whether you’re managing a blog, an eCommerce store, or a portfolio, bulk editing makes site management much faster.
How to Use It: Go to the Posts, Pages, or Products section of your WordPress dashboard.
Select the items you want to update using the checkboxes on the left-hand side, choose “Bulk actions,” then select “Edit.” Clickk Apply.
From there, you can change multiple settings at once, including categories, tags, and visibility.
Productivity Boost: This shortcut is a game-changer for anyone managing content-heavy or product-rich sites. You can handle mass updates without touching each individual post or product, making it a must-have for developers, content managers, and site owners.
4. Use / to search for blocks in Gutenberg
If you’re using the Gutenberg block editor, you might have found yourself scrolling endlessly through the block library to find the exact block you need. Well, guess what? You don’t have to! The slash-command (/) lets you search for any block instantly, speeding up your workflow.
What It Does: Typing / followed by the block name (like /image or /heading) pulls up the block you need instantly and without endless scrolling.
How to Use It: While in the Gutenberg editor, type / followed by the name of the block you want to add (e.g., /image or /quote). Select the block from the dropdown, and boom, you’re good to go!
Productivity Boost: This shortcut is a massive time-saver for anyone working in the block editor. Whether you’re building complex layouts or writing a blog post, it eliminates the need to manually search for blocks.
Ready to save time with keyboard shortcuts?
There you have it—four simple yet powerful shortcuts that can dramatically improve your WordPress experience. Whether you’re looking to speed up content creation, navigate more efficiently, or manage large batches of posts, these tips will help you work smarter, not harder.
And remember, WordPress is packed with these kinds of hidden gems, so don’t hesitate to explore and find even more ways to streamline your workflow.
Time is precious—let WordPress help you make the most of it. Looking for a powerful managed WordPress host? Check out WordPress.com’s plans that offer unmatched speed, unstoppable security, and unlimited site visitors.
We are pleased to announce that Ian Stewart (blog, LinkedIn, GitHub, X) has been chosen to lead end-to-end customer experience for WordPress.com as its Artistic Director and product lead.
In a nod to LVMH’s organizational structure, Ian will lead in the style of a maison head, ensuring that every part of WordPress.com remains the best managed WordPress experience available. He has been a part of the WordPress.com team for over 14 years, and we’re excited to see what changes he will implement on WordPress.com in this new role.
“I got involved with WordPress after growing tired of using Blogger for my personal blog,” Ian says. “This quickly led to the demise of my regular blogging habits as I spent most of my time messing around with my theme…My fooling around with WordPress themes quickly became a delightful obsession as I tried to publicly figure out what I thought about them.”
We’re grateful for your obsession with WordPress, Ian, and we certainly know the feeling.
If you find yourself diving deeper into the topic of WordPress, content management systems, and websites, a term you will quickly stumble upon is “PHP.” You will likely hear how crucial PHP is for the Internet and that it is what’s powering WordPress websites.
However, what exactly is PHP, and why is it so important?
The short answer is that it’s a general-purpose, server-side scripting language. That said, unless you are already knowledgeable in programming and web development, that probably doesn’t make things much clearer.
In order to help you better understand this topic, we’ll cover PHP in detail below. You’ll learn what PHP is, why it matters, and how it relates to WordPress and pretty much everything you do online. We promise you’ll be surprised to hear how much you likely rely on PHP every day.
The original developer of PHP was a Danish-Canadian programmer named Rasmus Lerdorf. He first created the language in the mid 1990s to build tools for his own website; that’s why PHP originally stood for “Personal Home Page.” Today, it stands for the recursive acronym “Hypertext Preprocessor” and development and support has been taken over by the PHP Group.
PHP features
PHP has some notable features, many of which are applicable to the way WordPress works:
Open Source: The first thing that is important to note is that, like WordPress, PHP is open source. That means it does not belong to any one business entity. It also means that it’s free to download and use for any purpose.
Finally, both WordPress and PHP are community-funded––while WordPress has the WordPress Foundation, The PHP Foundation’s mission is to “ensure the long-term prosperity of the PHP language.” Automattic is a proud Platinum Sponsor of The PHP Foundation.
Server Side: PHP is a server-side language, which means it executes on the server and not in the user’s browser.
For example, PHP’s most frequent application is for creating HTML documents for websites. Even though there are PHP files on the server, the browser does not receive the PHP code; instead, it receives the finished HTML documents for display. This is different from client-side languages like JavaScript where the processing happens directly in the user’s browser after downloading the JavaScript files.
To make things clearer, server-side languages are a bit like going to a restaurant. You send an order to the kitchen, they prepare the meal, and it arrives at your table ready to eat. Client-side languages, on the other hand, are like meal-delivery services. While they provide you with all the necessary ingredients, you still have to put them together in your own kitchen.
General Purpose: PHP is also a general-purpose programming language. You can use it for command-line scripting, creating desktop applications, and more. However, its primary application is in web development.
Ubiquitous: According to W3Techs, the language is present on 75.7% of all websites. That includes some famous ones, as you will see below.
In addition, it forms the backbone of many content management systems like Drupal, Joomla!, and—the most popular of them all—WordPress.
PHP is one of the biggest open source success stories, as much of the modern Internet depends on it to work.
Benefits of PHP
You might be asking yourself why the usage of PHP is so widespread. There are many good reasons for that, but here are just a few:
Beginner-Friendly: PHP is relatively easy for beginners to learn due to its intuitive syntax. There are also plenty of tools and frameworks available to make coding easier.
Wide Community: The language has a vast and active community of developers worldwide. This means there are loads of online resources, forums, and other places where users can seek help and find ready-made solutions to common problems.
Cross-Platform Compatibility: PHP is compatible with popular operating systems, including Windows, MacOS, Linux, and Unix. It also works on various web servers such as Apache, NGINX, and Microsoft IIS.
Database Connectivity: In addition, it works with a number of different database formats, such as MySQL, MongoDB, PostgreSQL, SQLite, Oracle, and more. PHP can execute SQL queries, retrieve, update and delete data, and handle database connections and transactions.
Cost-Effective: As we have already learned, the programming language is free to use, distribute, and modify. That eliminates the need for expensive licensing fees and reduces development costs, making it an economical choice for web development projects.
Scalability: PHP is capable of handling high traffic loads and can easily scale. You can use it together with caching techniques and other optimization strategies to enhance performance. Plus, it’s generally faster than some other programming languages, such as Python.
How PHP works: Creating dynamic web content
One of the main reasons why PHP is so popular for web development is that it seamlessly integrates with various technologies and services commonly used in this area. Examples include HTTP, POP3, IMAP, and more.
One of its main advantages is that it is highly compatible with HTML, the main language used to create and display websites. In fact, it’s possible to use PHP code in HTML files and vice versa.
<div class="about__section is-feature has-subtle-background-color">
<div class="column">
<h2><?php _e( 'Shape the future of the web with WordPress' ); ?></h2>
<p><?php _e( 'Finding the area that aligns with your skills and interests is the first step toward meaningful contribution. With more than 20 Make WordPress teams working on different parts of the open source WordPress project, there’s a place for everyone, no matter what your skill set is.' ); ?></p>
<p><a href="<?php echo esc_url( __( 'https://make.wordpress.org/contribute/' ) ); ?>"><?php _e( 'Find your team →' ); ?></a></p>
</div>
</div>
Above you can see how both languages appear in the same file. The PHP markup is delineated by opening and closing brackets (<?php and ?>) so that the server knows where it ends and begins. However, the PHP code itself is inside an HTML <p> element. The _e function is a WordPress function used for localization, which allows for easy translations across the WordPress software.
The main benefit of this is that using PHP allows web developers to display dynamic content in otherwise static web pages. For example, PHP is able to pull content directly from databases, making it great for templating. You can create a fixed layout for all web pages but then display different content depending on the page a user is on.
This is vastly different from pure HTML, where the content needs to be hard-coded in the page file in order for the browser to show it. PHP, on the other hand, can add it on the fly as needed. That’s one of the main benefits of this programming language—the ability to dynamically combine and display content from different sources and of different kinds according to what the user requests.
PHP and WordPress: The CMS’ heart and soul
As a WordPress user, PHP is especially important. The programming language forms the basis of much of what WordPress can do. It’s what allows you to create, edit, and delete pages, posts, media, and other content. That’s why you see that a lot of files that end in .php when you look in the directory of any WordPress installation.
It’s also why, when installing WordPress on a server, the system requirements insist that PHP be present. In recent years JavaScript has been playing a bigger and bigger role in the WordPress ecosystem, mainly because of the adoption of the Gutenberg editor. That said, PHP is still the main workhorse in the background.
Powering themes and plugins
What are some of WordPress’ main tasks powered by PHP? Before the advent of block themes, WordPress themes were all written mostly in PHP, especially page template files. In fact, if you look at the template hierarchy, you can see that WordPress has PHP files for pretty much all pages and theme components.
Why? So we have the ability to create a single layout for one type of content and then dynamically display what’s saved in the database for a particular piece of content.
That way, if you have 300 pages of the same kind on your site, you don’t need a file for each as you would on a pure HTML website. Instead, you just need one single page template file; PHP can then populate each individual page with its specific content.
PHP also makes it easy to compartmentalize different parts of your theme. For example, it’s very common to not have the markup for a footer in each file. Instead you can create a separate footer.php file and call it into your templates where needed. That way, if you want to modify the footer layout, you only have to make changes in a singular place—the footer.php file.
The same is true for plugins, aka collections of PHP files that contain the necessary markup for adding extra functionality to your WordPress site. When you activate a plugin, it gets added to the rest of your website code and can provide the functionality you are looking for.
Without PHP, there would be no WordPress
All of the above is only made possible by the flexibility that PHP offers. Besides the benefits we have discussed before, this is the main reason why WordPress relies on PHP to the extent that it does; PHP offers a ton of flexible functionality specifically for web development. PHP’s capabilities in content management, working with databases, and its modularity all make it a perfect candidate for powering the most popular website builder there is.
This also means that if you know PHP, it opens up a lot more possibilities to modify your WordPress website. You can write custom plugins, make changes to (non-block) themes and page templates, introduce functionality to functions.php, and so much more. So, if you want to improve your WordPress skill set, learning PHP is not a bad place to start.
PHP in everyday life: You rely on it more often than you think
Besides WordPress, you might actually be unaware how much of your general everyday online interactions are enabled by PHP. There are a number of very well-known websites that use PHP to run and many common processes that the programming language performs online:
Facebook: The largest social network in existence was initially built using PHP. While they have moved away from the programming language over time, it still plays a significant role in their infrastructure.
Wikipedia: The world’s biggest online encyclopedia also relies heavily on PHP for its back end operations, content management, and user interactions.
Tumblr: This microblogging and social networking platform employs PHP to power its vast network of user-generated content and social interactions. We’re actually in the process of migrating Tumblr’s backend to run on WordPress; if you’re interested in being a part of this exciting project, leave your information here.
Slack: This widely-used team collaboration and communication platform utilizes PHP for its back-end operations, real-time messaging, and API integrations.
And this is just the tip of the iceberg. There are countless other examples of well-known web staples that exist in part because of PHP.
Other abilities of PHP
Up until this point, we’ve mostly talked about PHP in the context of creating and outputting HTML markup; however, the programming language is involved in a lot more that you probably take advantage of on a daily basis:
Form Processing: PHP can process and validate data submitted by users via forms. It’s also capable of performing actions such as storing data in a database, sending email notifications, or generating dynamic responses based on user input. Plus, it comes with encryption to keep the submitted data safe.
User Authentication: It can also handle user authentication by verifying login credentials. PHP allows you to implement user registration and login/logout functionality, and it can control access to different areas of your website or application. For example: user roles.
Session Management: PHP can also manage user sessions, store session data, and track user activity. Among other things, this allows you to save user preferences. PHP can also set cookies and receive cookie data.
File Manipulation: The programming language provides a wide range of functions for file manipulation, such as reading and writing files, uploading files from forms, creating directories, and modifying file permissions. This comes in handy for managing files on the server through other applications (like WordPress).
Email Handling: PHP comes with functions to send emails from a server. This allows you to build features like contact forms, email notifications, and automated email responses.
Third-Party Communication: With PHP you can interact with external APIs and web services. It makes it possible to integrate with other applications, retrieve data from remote servers, and perform actions like posting to social media platforms.
What is PHP? It is the web’s backbone
If you’re an everyday WordPress user or non-developer, you probably don’t spend a lot of time thinking about how much of your online experience is possible thanks to the humble PHP. However, the more you dive into this topic, the more you’ll realize how much you rely on it.
Who knew an open source solution was at the heart of what makes the World Wide Web tick? From the largest content management system in the world to well-known web entities, so much of what we take for granted exists because of it.
There are good reasons why it’s so widespread; from its powerful capabilities over its wide support system to ongoing development and support, there is a lot that speaks for PHP as the go-to solution for web projects.